
Transforming Your Style with the Perfect Shirt Knot
We’ve all been there – staring at our wardrobe wondering how to elevate a simple outfit from ordinary to effortlessly chic. The answer might be simpler than you think: mastering the art of tying a shirt knot. This versatile styling technique can instantly transform oversized shirts, button-downs, and even basic tees into trendy, fitted pieces that flatter your silhouette.
Whether you’re heading to brunch with friends, creating a casual office look, or styling the perfect weekend outfit, knowing how to tie a shirt knot opens up endless possibilities in your closet. We’re about to share the step-by-step techniques that’ll have you creating Instagram-worthy looks in seconds.
From the classic front knot to side ties and more advanced variations, we’ll guide you through each method so you can confidently style any shirt with professional-looking results every time.
Choose the Right Shirt for Knotting
We need to select the appropriate fabric and fit to achieve the perfect shirt knot every time. Not all shirts work equally well for knotting techniques.
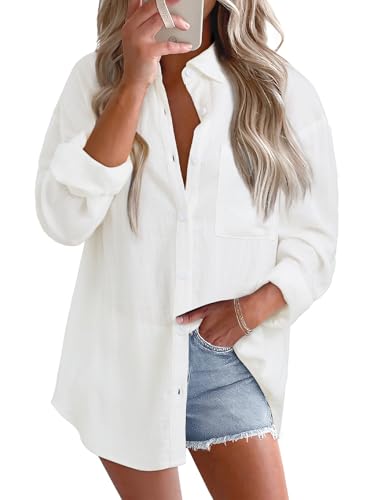
Premium Cotton Linen Button Down Womens Tops - Crafted from a soft cotton-linen blend with a natural crinkle texture, these trendy V Neck womens tops deliver lightweight, breathable comfort and durability—perfect spring summer tops for women to stay cool and chic in warm weather.

A soft beachwear Bikini Cover up for women,which makes you feeling well when you wear in summer. We offer 5 sizes to fit different body types and let individuality show off. Size Small fits US 2-4, Size Medium fits US 6-8, Size Large fits US 10-12,Size XL fits US 14-16, Size XXL fits US 18.

Lightweight Material:This womens button down shirt is soft,skin-Friendly,breathable,and lightweight.Comfortable to wear all day.80% Rayon +20% Nylon
Cotton and Linen Shirts Work Best
Cotton shirts offer the ideal flexibility for creating secure knots that hold their shape throughout the day. These natural fibers provide the perfect balance of structure and pliability, making them easy to manipulate while maintaining a polished appearance. Linen shirts excel at knot tying because their lightweight texture allows for smooth gathering and twisting motions. We recommend 100% cotton button-downs, cotton tees, and linen blouses as your go-to options for mastering shirt knotting techniques.
Chambray and cotton poplin fabrics create particularly stunning knots due to their medium-weight construction and natural drape. These materials hold their shape without becoming bulky at the knot point, ensuring a flattering silhouette.
Avoid Thick or Stiff Fabrics
Heavy denim shirts create bulky knots that look awkward and feel uncomfortable against your body. These thick materials resist the folding and twisting motions required for clean knot formation. Starched dress shirts prove difficult to manipulate because their stiff texture fights against the natural gathering process.
Synthetic blends with polyester often slip and fail to maintain knot integrity throughout wear. We suggest steering clear of thick flannel, heavy wool shirts, and overly structured garments that lack the necessary flexibility for successful knotting.
Consider Shirt Length and Fit
Oversized shirts provide the most versatility for different knotting styles because they offer extra fabric to work with at the hem. We find that shirts extending past your hip bones give you enough material to create secure knots without exposing too much midriff. Regular fit shirts work well for basic front knots and side knots when you want a more subtle gathered effect.
Cropped shirts limit your knotting options but can still work for simple twist techniques if you prefer a higher hemline. Fitted shirts require careful positioning to ensure the knot doesn’t pull the fabric too tight across your torso.
Master the Basic Front Knot Technique

We’ll start with the most versatile and popular shirt knotting method that works perfectly for both casual and semi-formal occasions. This fundamental technique forms the foundation for more advanced knotting styles you’ll learn later.

Materials:Made of 100% natural cotton, this women's long sleeve shirt is loose-fit, breathable, soft and skin-friendly, making it a great choice for the summer and fall seasons!

Soft & Comfortable Fabric:Made from 100% lightweight and breathable cotton, this button down shirt for women feels soft against your skin and keeps you cool on hot days. The summer shirts for women is comfortable fabric, offering all-day comfort. An easy choice for womens casual top you can wear again and again.
Position Your Shirt Correctly
Start by putting on your shirt and leaving it unbuttoned for easier manipulation. Pull the bottom hem of your shirt to ensure it sits evenly around your waist. We recommend standing in front of a mirror to check that both sides of the shirt are symmetrical before proceeding.
Gather the excess fabric at your desired knot placement, typically 2-3 inches above your natural waistline. This positioning creates the most flattering silhouette and prevents the knot from sitting too high on your torso. Your shirt should have enough length to allow for comfortable gathering without pulling tight across your chest or shoulders.
Pinch the fabric on both sides of your body where you want the knot to sit. We suggest collecting about 3-4 inches of fabric on each side to create a substantial knot that won’t come undone throughout the day. Make sure you’re grasping the fabric firmly but not pulling it so tight that it distorts the shirt’s shape.
Create the Initial Twist
Cross the right side of fabric over the left side to form an X shape at your waist. This crossing motion should happen directly in front of your body, creating a clean intersection point for your knot. We find that keeping the fabric taut during this step prevents wrinkles from forming in the final result.
Wrap the right side of fabric underneath and around the left side, creating a loop. Pull the fabric through this loop while maintaining tension to ensure the knot stays secure. Your movements should be deliberate and controlled to avoid creating bulk or uneven gathering.
Adjust the tightness of your twist by pulling gently on both ends of the gathered fabric. We recommend testing the comfort level by moving your arms and torso to ensure the knot doesn’t restrict your movement. The twist should feel snug but not constricting against your body.
Secure the Knot
Pull the fabric ends through the loop you created, forming a traditional knot structure. This step mirrors the motion of tying shoelaces, making it familiar and easy to master. We suggest pulling both ends simultaneously to maintain even tension throughout the knotting process.
Tighten the knot by gently tugging on the loose ends while holding the knot’s center. This dual pulling motion ensures the knot stays centered and doesn’t shift to one side of your body. Your final knot should feel secure but still allow for comfortable breathing and movement.
Arrange the excess fabric around the knot to create a polished, intentional appearance. We recommend tucking any loose ends behind the knot or spreading them slightly for a more casual look. The key is making sure no fabric bunches up awkwardly or creates unflattering bulk around your midsection.
Try the Side Knot Style

Side knots create an asymmetrical focal point that flatters your silhouette while adding visual interest to any outfit. This technique works exceptionally well with flowy fabrics and creates a more relaxed vibe than centered front knots.

Button down closure, two chest pockets and cropped length, lightweight & comfortable fabric that is not see-through

REGULAR FIT: Enjoy a comfortable fit with our mens button down short sleeve shirt, providing ease through the shoulders, chest, and waist
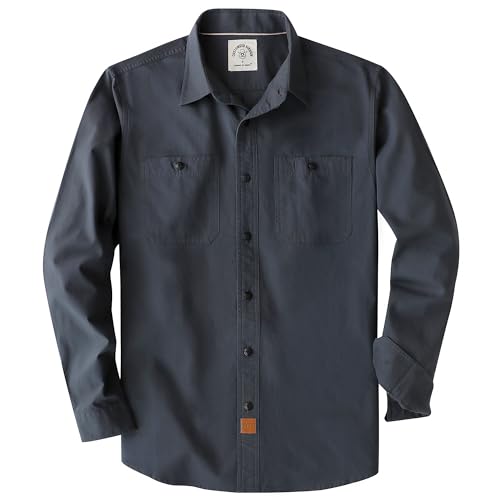
【Size Exactly】Dubinik chambray shirt for men are in US sizing. If you are not sure what size to buy, please check the size chart according to your usual clothes size. If you like loose shirts, one size up is probably beter. If you have any questions, please feel free to click on the store [Dubinik] to contact us.
Gather Fabric at Your Hip
Position your shirt so the hem falls naturally at your desired length before knotting. Pinch approximately 3 to 4 inches of fabric at your hip bone, choosing either your left or right side based on your preference. Pull the gathered fabric slightly away from your body to create working room without stretching the shirt’s natural drape.
Ensure the fabric bundle sits directly over your hip bone rather than toward your waist or lower torso. This placement creates the most flattering silhouette and prevents the knot from shifting during wear. Twist the gathered fabric once to begin forming the foundation of your side knot.
Form a Compact Side Knot
Create a loop with the twisted fabric by bringing the end piece toward your body and threading it through the gap near your hip. Tighten the knot gradually while maintaining control over the fabric’s position to avoid creating bulk or uneven gathering.
Shape the knot by gently pulling on different sections until you achieve a neat, rounded appearance. The finished knot should measure roughly 1 to 2 inches in diameter for optimal visual balance. Secure the knot by giving it a final gentle tug to ensure it won’t loosen throughout the day.
Adjust for Comfort and Style
Check that the knot doesn’t pull too tightly against your hip or create uncomfortable pressure when sitting or moving. Loosen the knot slightly if you experience any restriction in your range of motion. Smooth any wrinkles or bunched fabric around the knotted area to maintain a polished appearance.
Balance the overall look by adjusting the shirt’s positioning on the opposite side if needed. The unknotted side should drape naturally without appearing too loose or tight compared to the knotted side. Fine tune the knot’s height by sliding it up or down along your hip until you achieve the most flattering proportion for your body type.
Perfect the Half Tuck Knot Method

We’ll explore a sophisticated technique that combines the classic tucked look with modern styling flair. This method offers more versatility than traditional knotting while maintaining a polished appearance.
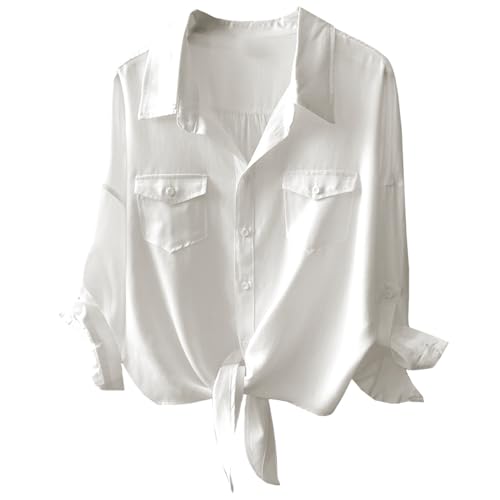
Feature: 3/4 Roll Up Cuffed Sleeve, V Neck, Front Pockets, Tie Knot, Button Down, Cropped, Solid Color, Collared Shirt.

Material: 95 %Polyester and 5 %Spandex,Lightweight and breathable fabric, soft and comfortable to wear

ELEGANT DESIGN: Women's short sleeve blouse in a versatile beige color featuring a classic round neckline with a stylish keyhole cutout at the back secured with a button closure
Tuck Only the Front Section
Gather the front center fabric of your shirt at waist level, creating approximately 2-3 inches of excess material. Position your hands about 6 inches apart to ensure even distribution of the fabric you’re working with.
Tuck this gathered section into your bottoms while leaving the sides and back completely untucked. We recommend starting with the center front panel and working outward to achieve the most natural drape.
Pull the tucked fabric slightly upward to create gentle blousing above your waistband. This technique works exceptionally well with high-waisted jeans, skirts, and customized trousers.
Adjust the untucked portions to frame your silhouette naturally. The contrast between tucked and untucked sections creates visual interest while flattering your natural waistline.
Create a Subtle Knot Detail
Twist the gathered front fabric once before tucking to add texture and dimension to the look. This small detail prevents the shirt from appearing too flat against your body.
Form a loose knot with approximately 1-2 inches of the twisted fabric, keeping it small enough to fit comfortably beneath your waistband. We find that smaller knots create cleaner lines and avoid bulk.
Tuck the knotted section into your bottoms with the knot positioned slightly off center for the most flattering effect. The knot should sit about 1 inch below your natural waistline.
Smooth the surrounding fabric to eliminate wrinkles and ensure the transition from tucked to untucked appears intentional. This finishing touch elevates the overall sophistication of your look.
Balance the Proportions
Adjust the shirt length on both sides to create symmetrical draping that complements your body shape. The untucked sections should fall approximately 2-4 inches below your waistband depending on your torso length.
Pull the back hem down slightly to create a curved silhouette that’s longer in back and shorter in front. This proportional adjustment flatters most body types and adds movement to your outfit.
Fine tune the side seams by gently pulling them down to ensure the shirt doesn’t ride up during movement. We suggest checking your profile in a mirror to confirm the proportions look balanced from all angles.
Create consistent spacing between the tucked front section and untucked sides, maintaining approximately 3-4 inches of untucked fabric on each side. This measurement ensures the look appears intentional rather than accidental.
Experiment with the Cropped Knot Look

Cropped shirt knots create a fresh, youthful appearance that showcases your waistline beautifully. This trendy styling technique transforms regular length shirts into fashion forward pieces perfect for spring and summer outfits.

Sleeveless shirts for women, summer knot tops, solid color tunics, casual basic tops for women

Material: 60%Rayon & 35%Polyester & 5%Spandex. Ultra soft, stretchy and lightweight fabric make this Casual T Shirt perfect for Everyday Wear.

The Twist Knot T Shirt Dress is Very Soft ,Stretchy and Breathable, Making you Feel very Comfortable and Relaxed.
Roll Up the Shirt Bottom
Rolling creates the foundation for a perfect cropped knot by providing extra fabric to work with. Start by folding the bottom hem of your shirt upward about 2 to 3 inches, creating a clean cuff around your torso.
Smooth the rolled section evenly across the front and sides of your shirt to ensure uniform thickness. This technique works exceptionally well with cotton blends and lightweight fabrics that hold their shape when folded.
Adjust the roll width based on your desired final length and the amount of fabric you need for knotting. Wider rolls provide more material for elaborate knots, while narrower rolls create subtle cropped effects.
Tie Above Your Natural Waist
Position your knot approximately 2 inches above your natural waistline to achieve the most flattering cropped proportion. This placement elongates your legs while creating a balanced silhouette that complements high waisted bottoms perfectly.
Gather the rolled fabric at your desired position and twist it gently to form the base of your knot. The twisted section should sit comfortably without pulling too tightly against your skin.
Create a simple overhand knot by pulling one end of the twisted fabric through the loop you’ve formed. Pull both ends simultaneously to tighten the knot securely while maintaining the cropped positioning.
Achieve That Trendy Cropped Effect
Adjust the knot’s tightness to control how much midriff you want to show while ensuring comfort throughout the day. Looser knots create a relaxed, bohemian vibe, while tighter knots produce clean, structured lines.
Smooth any wrinkles around the knotted area and ensure the shirt fabric lays flat against your body. The cropped effect should look intentional and polished rather than bunched or messy.
Style your cropped knot with high waisted jeans, skirts, or shorts to create seamless outfit proportions. This combination emphasizes your waistline while maintaining coverage and creating a trendy, put together appearance that works for casual outings and social events.
Style Your Knotted Shirt for Different Occasions

Transform your knotted shirt techniques into versatile looks that suit every moment of your day. We’ll explore how different knotting styles work perfectly for exact settings and events.

Note: Oversized white button down shirt women, please refer to size chart in product description page, not amazon size chart. There will be a little wrinkle during shipping, but don't worry, A quick wash and dry iron low or hang dry will deal with the wrinkles effectively

Deep V Neck Shirt front tie shirt crop tops,cropped button down shirts loose blouse short sleeve button up shirts for women oversized button shirt short sleeve tops.lightweight button shirt crop blouse summer crop shirt collared blouse fitted button up crop top short sleeve collared shirt v neck shirt summer cotton black tshirt

FEATURE: S=US 4-6, M=US 8-10, L=US 12-14, XL=US 16-18, XXL=US 20-22 / Summer Clothes For Women / Loose Casual Tops / Waffle Knit Tops / Short Sleeve Blouse Tops / Tie Knot Short Sleeve Shirts / Comfy Summer V Neck Top / Button Down Tunic Top / Dressy Button Up Shirt / Country Concert Outfits / Mama Shirts / V Neck Short Sleeve Blouse / Cinched Waist Tops / Crochet Blouse Tops / Henley Neck Blouse Top / Western Wear / Loungewear / Clothes That Hide Belly Fat / Boho Clothes / Breastfeeding Shirts
Casual Day Out Options
Pair a basic front knot with high waisted jeans for effortless weekend comfort. We recommend keeping the knot loose and positioned slightly below your natural waist when running errands or meeting friends for coffee. Side knots work beautifully with flowing maxi skirts, creating movement and visual interest during outdoor activities like farmers markets or park strolls.
Choose cotton tees or chambray shirts for casual knotting since these fabrics maintain their shape throughout the day. The cropped knot technique pairs perfectly with mom jeans and sneakers, giving you that trendy streetwear vibe we love for shopping trips. Oversized flannels create stunning side knots when worn over tank tops, making them ideal for casual brunches or weekend getaways.
Layer your knotted shirts under denim jackets or cardigans to add dimension to your casual looks. We suggest experimenting with different knot heights to find what flatters your proportions best during relaxed activities.
Work Appropriate Variations
Select button down shirts in neutral colors for professional knotting that maintains workplace standards. The half tuck knot works exceptionally well in office settings, creating polish without appearing too casual or revealing. Position your knot at hip level when wearing blazers to ensure it stays hidden and maintains a clean silhouette.
Avoid tight knots in professional environments since they can appear too casual or create unwanted attention. We recommend using the side knot technique with blouses tucked into pencil skirts, keeping the knot small and discrete. Choose structured fabrics like cotton blends or silk that hold their shape during long work days.
Pair knotted shirts with customized trousers and pointed toe flats for a balanced professional appearance. The front knot technique works well under cardigans or open blazers, adding subtle texture without compromising your professional image.
Evening and Date Night Looks
Create dramatic silhouettes with cropped knots paired with high waisted trousers for dinner dates. We love how side knots add sophistication to silk or satin shirts when combined with statement jewelry and heels. Position your knot higher on the torso to create an elegant waistline that flatters your figure in dimmer lighting.
Choose shirts with interesting textures or subtle patterns for evening knotting since these details become more noticeable in restaurant or bar settings. The front knot technique creates romantic appeal when paired with flowing midi skirts and strappy sandals. We suggest keeping your knot tighter for evening wear to maintain the shape throughout dinner or dancing.
Layer delicate necklaces over knotted shirts to draw attention to your neckline and create visual balance. Evening knotting works beautifully with wide leg pants and block heels, creating an effortlessly chic look that transitions from cocktails to late night conversations.
Avoid Common Shirt Knotting Mistakes

Even experienced stylists make errors that can ruin an otherwise perfect knotted shirt look. We’ll help you identify and avoid these pitfalls to ensure your shirt knots always look polished and intentional.

BREATHABLE FABRIC: Made from 75% cotton and 25% lyocell, this button-down shirt has the authentic look and breathable feel of linen. The unique high-cellulose fabric gives the shirt a light, natural feel, like a mist over a lake, keeping you cool and dry on hot summer days
Premium Cotton Linen Button Down Womens Tops - Crafted from a soft cotton-linen blend with a natural crinkle texture, these trendy V Neck womens tops deliver lightweight, breathable comfort and durability—perfect spring summer tops for women to stay cool and chic in warm weather.
Don’t Make the Knot Too Tight
Overly tight knots create uncomfortable pulling and distort your shirt’s natural drape. We recommend leaving enough slack to slide one finger between the knot and your body comfortably. Tight knots also restrict movement and can cause the fabric to wrinkle in unflattering ways around your midsection.
Check your knot’s tension by gently tugging the shirt’s hem after securing it. The fabric should have slight give without the knot loosening completely. This flexibility prevents the shirt from riding up during daily activities and maintains a comfortable fit throughout the day.
Adjust the tightness based on your planned activities and the shirt’s fabric weight. Lighter materials like cotton blends require gentler knotting than heavier fabrics. Remember that knots naturally tighten slightly as you move, so start with a looser tie than you think you need.
Avoid Uneven Fabric Distribution
Lopsided knots occur when one side of the shirt has more fabric gathered than the other. We always measure equal amounts of fabric on both sides before creating the twist. Hold the shirt at your desired knot position and ensure both gathered sections feel similar in bulk.
Smooth out wrinkles and fold lines before forming your knot to prevent uneven thickness. Fabric bunching creates an unprofessional appearance and makes the knot appear sloppy. Take extra time to distribute the material evenly, especially with thicker fabrics like flannel or denim shirts.
Step back and check your knot from multiple angles in a mirror. Front facing views can hide asymmetrical fabric distribution that’s obvious from the side. Make adjustments by loosening the knot and redistributing the fabric until both sides appear balanced.
Skip These Unflattering Placement Errors
Positioning knots too high creates an awkward, boxy silhouette that shortens your torso. We recommend placing knots at or slightly below your natural waist to maintain proper body proportions. High knots also tend to ride up during movement, requiring constant readjustment.
Low knot placement eliminates the waist defining benefits and creates a frumpy appearance. Knots positioned below the hip bone make your midsection appear longer and can add visual weight to your lower body. The sweet spot falls between your natural waist and hip bone for most body types.
Consider your bottom’s waistline when choosing knot placement for a cohesive look. High waisted pants and skirts pair best with knots positioned at the natural waist. Mid rise bottoms work better with slightly lower knot placement to avoid competing horizontal lines across your midsection.
Maintain Your Knotted Shirt Look

Maintaining your perfectly styled knotted shirt throughout the day requires strategic techniques and proper care routines. We’ll share essential tips to keep your shirt knots secure and looking fresh from morning to night.

REGULAR FIT: Comfortable, easy fit through the shoulders, chest, and waist.

Wrinkle Free: Developed for less wrinkles and easy care

Premium Cotton Linen Button Down Womens Tops - Crafted from a soft cotton-linen blend with a natural crinkle texture, these trendy V Neck womens tops deliver lightweight, breathable comfort and durability—perfect spring summer tops for women to stay cool and chic in warm weather.
Keep the Knot Secure Throughout the Day
Double check your knot tension before leaving home to ensure it stays in place during regular movement. We recommend testing your knot by sitting, standing, and raising your arms to verify it maintains its position without loosening or shifting.
Choose shirts with natural grip like cotton or linen blends that hold knots better than slippery synthetic fabrics. These materials create friction that prevents the knot from sliding or coming undone during daily activities.
Position your knot strategically at your natural waist where your torso curves slightly inward. This anatomical anchor point helps keep the knot stable as you move throughout your day.
Tuck the loose fabric ends underneath the knot to create a cleaner appearance and prevent them from working loose. This simple technique adds security while maintaining the polished look you’ve created.
Quick Touch-Up Techniques
Retighten your knot by gently pulling the fabric ends in opposite directions if you notice loosening during the day. We suggest doing this in a bathroom or private space to maintain the professional appearance.
Smooth out wrinkles by running your hands along the shirt fabric from the knot outward toward the seams. This quick movement helps redistribute the fabric and eliminates minor creases that develop from sitting or moving.
Adjust the shirt positioning by lifting the fabric slightly and resettling it around your waist if the knot has shifted. Small adjustments every few hours keep your look balanced and intentional.
Check your silhouette in reflective surfaces throughout the day to ensure your proportions remain flattering. Quick visual checks help you catch any issues before they become noticeable to others.
Washing and Care Tips
Untie your shirt completely before washing to prevent permanent creases from forming in the knotted areas. We always recommend returning shirts to their original flat state before putting them in the laundry basket.
Use gentle wash cycles with cool water to preserve fabric flexibility and prevent shrinkage that could affect future knotting success. Harsh washing can make fabrics stiff and difficult to manipulate into clean knots.
Air dry your shirts flat whenever possible to maintain the fabric’s natural drape and texture. Heat from dryers can cause synthetic blends to become less pliable for knotting techniques.
Store shirts properly by hanging them smoothly or folding them without creating sharp creases near areas where you typically place knots. Proper storage preserves the fabric’s ability to form clean, attractive knots for future styling sessions.
Conclusion
We’ve explored the groundbreaking power of shirt knotting techniques that can instantly elevate your everyday wardrobe. These versatile styling methods work across different occasions and body types when you choose the right fabrics and execute proper placement.
Remember that practice makes perfect with these techniques. Start with the basic front knot and gradually experiment with more advanced styles as you build confidence. The key lies in understanding your body proportions and selecting shirts that complement your knotting goals.
With these skills in your styling toolkit you’ll never look at an oversized shirt the same way again. Each technique we’ve covered offers endless possibilities for creating fresh polished looks that transition seamlessly from casual to professional settings.

Casual sexy tops for women. This classic women blouse features v neckline, 3/4 ruffle sleeves and button down design. Blouses for women business casual, business casual tops for women, casual summer shirts for women.

Material: Front knot blouses for women made of 70% cotton, 27% polyamide, 3% elastane, skin-friendly, lightweight fabric, offers all-day comfortable wearing

FEATURE: S=US 4-6, M=US 8-10, L=US 12-14, XL=US 16-18, XXL=US 20-22 / Summer Clothes For Women / Loose Casual Tops / Waffle Knit Tops / Short Sleeve Blouse Tops / Tie Knot Short Sleeve Shirts / Comfy Summer V Neck Top / Button Down Tunic Top / Dressy Button Up Shirt / Country Concert Outfits / Mama Shirts / V Neck Short Sleeve Blouse / Cinched Waist Tops / Crochet Blouse Tops / Henley Neck Blouse Top / Western Wear / Loungewear / Clothes That Hide Belly Fat / Boho Clothes / Breastfeeding Shirts
Frequently Asked Questions
Style: Women tops, women t shirts, short sleeve shirt, blouses for women fashion, womens shirts front twist knot, tunic shirts for women

Material:95% Polyester 5% Spandex,The fabric is soft comfortable,stretchy and skin-friendly.Suitable for all kinds of bodies

Material:The basic oversized side split tops is made of 65%Polyester+35%Cotton,ensuring a soft, stretchy, breathable, and comfortable for your skin.This women's tunic tops packed with vacuum bag.It may looked wrinkle after open the package.Please wash and iron it to solve the wrinkles.
What types of shirts work best for knotting?
Cotton and linen shirts are ideal for knotting due to their flexibility and structure. Oversized shirts offer the most versatility, while basic tees work well for casual looks. Avoid thick materials like heavy denim or starched dress shirts, as they hinder clean knot formation and don’t drape well.
How do I tie a basic front knot?
Position your shirt correctly, then gather fabric at the front hem. Create an initial twist by bringing the fabric ends together, then loop one end through to form the knot. Maintain tension while securing to achieve a polished appearance and prevent the knot from loosening throughout the day.
What’s the difference between a side knot and front knot?
A side knot creates an asymmetrical focal point positioned at the hip, flattering your silhouette and adding visual interest. A front knot is centered and provides a classic, balanced look. Side knots work well with flowing bottoms, while front knots pair nicely with high-waisted pieces.
How do I create a cropped knot look?
Roll up the shirt bottom to create extra fabric for knotting. Position the knot above your natural waist for a flattering silhouette. Adjust the knot’s tightness to control how cropped the effect appears. Style with high-waisted bottoms for a trendy, put-together appearance perfect for casual outings.
Can I wear knotted shirts to work?
Yes, for professional settings, choose button-down shirts in neutral colors and use the half tuck knot technique. This creates a polished appearance that combines classic tucked styling with modern flair. Avoid overly cropped looks and opt for subtle knots that maintain a professional silhouette.
What are common shirt knotting mistakes to avoid?
Don’t make knots too tight, as this causes discomfort and distorts the shirt’s drape. Ensure even fabric distribution to avoid lopsided knots. Position knots at or slightly below your natural waist to maintain proper body proportions. Avoid thick fabrics that create bulky, unflattering knots.
How do I maintain my knotted shirt look throughout the day?
Check knot tension regularly and choose shirts with natural grip to prevent loosening. Tuck loose fabric ends for a cleaner appearance. For quick touch-ups, gently retighten the knot and smooth any wrinkles. Select quality fabrics that hold their shape and resist stretching throughout wear.
What bottoms pair best with knotted shirts?
High-waisted jeans work perfectly with front knots for casual looks. Flowing maxi skirts complement side knots beautifully. High-waisted trousers pair well with cropped knots for evening wear. The key is balancing proportions – high-waisted bottoms generally work best to create a flattering silhouette with any knot style.