
We’ve all got those old t-shirts hanging in our closets – the ones that are too worn to wear out but too comfortable to throw away. Instead of letting them collect dust, why not transform them into something fresh and trendy? Cut up t-shirts have become a massive fashion statement, allowing you to create everything from edgy crop tops to flowing tank tops with just a few strategic snips.
The best part? You don’t need any sewing skills or expensive tools to get started. With nothing more than a pair of sharp scissors and some creativity, we can show you how to breathe new life into your old tees. Whether you’re aiming for a vintage band tee makeover or want to create multiple summer tops from one oversized shirt, the possibilities are endless.
Ready to discover the DIY magic that’s taking social media by storm? Let’s jump into the industry of t-shirt transformations that’ll have you looking at your wardrobe in a whole new way.
Cut Up T Shirt Into a Crop Top
Creating a crop top from your favorite oversized t-shirt takes just minutes and delivers instantly trendy results. We’ll guide you through three popular cutting techniques that transform any tee into a stylish cropped piece.

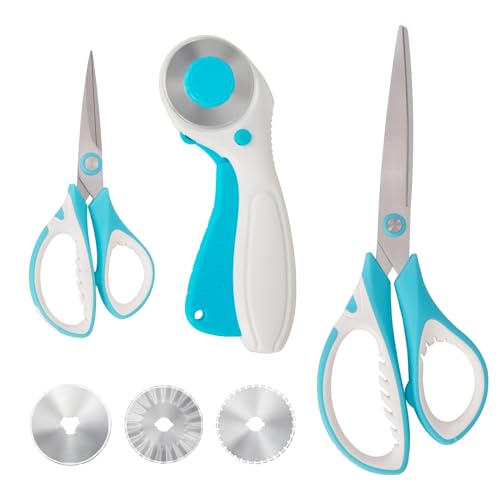
8 ½ inch fabric shears with rubberized handles

Tailor Scissors made form high-density Stainless Steel Rust Resistant

If You Use My Fabric Scissors I Will Cut You is perfect for women and men who love making things with fabric. A sarcastic joke for quilters, seamstress, crocheters, knitters, tailors, or fashion designers.
Basic Straight Cut Method
Mark your desired length by trying on the shirt and pinching where you want the new hemline to fall. Most crop tops sit 2-3 inches above the natural waistline for a flattering fit.
Cut straight across using fabric scissors in one smooth motion from side seam to side seam. Sharp scissors prevent fraying and ensure clean edges that won’t unravel after washing.
Stretch the raw edge gently to create a naturally curved hem that rolls slightly inward. This technique eliminates the need for hemming while giving your crop top a professional finished appearance.
Try on immediately to check the length and make adjustments if needed. You can always trim more fabric but can’t add it back once it’s cut.
Curved Hem Technique
Create a template using a dinner plate or large bowl to trace a gentle curve along your cutting line. This method produces a more feminine silhouette than straight cuts.
Position the curve so it’s slightly longer at the sides and shorter in the center front and back. This creates a flattering shape that follows your natural body contours.
Cut along the curved line in sections rather than trying to follow the entire curve in one motion. Multiple small cuts give you better control and smoother results.
Test the drape by holding up the shirt to see how the curved hem falls. The gentle arc should create movement and visual interest while maintaining the crop top’s proportions.
Asymmetrical Crop Style
Mark two different lengths with one side sitting at your natural waist and the other ending 2-4 inches higher. This creates an edgy diagonal hemline that’s perfect for layering.
Start with the longer side and cut straight across to your marked point. Then angle your scissors upward to create the diagonal line toward the shorter side.
Blend the angle gradually to avoid harsh lines or awkward jumps in the hemline. The transition should flow smoothly from long to short across the width of the shirt.
Style strategically by tucking the longer side into high-waisted bottoms or letting both sides hang loose for a relaxed asymmetrical look. This versatile cut works with jeans, skirts, or shorts.
Cut Up T Shirt Into a Tank Top
 1")
Creating a tank top from an existing t-shirt requires strategic cutting to achieve the perfect sleeveless silhouette. We’ll show you three professional techniques that transform any basic tee into a stylish summer essential.

10-Piece Clothing Accessory Set: The crop band set includes 6 scarf rings, 2 stretchy waist bands, and 2 crop tucks. This accessory kit is designed for women and girls to...
Sleeveless Design Approach
Mark the sleeve cutting line by laying your t-shirt flat and measuring 1-2 inches from the shoulder seam toward the armpit. Draw a gentle curve from this point down to the side seam using fabric chalk or a washable marker. Cut along this marked line through both fabric layers simultaneously to ensure symmetrical results. Smooth any rough edges by folding the cut edge under and trimming excess fabric for a clean finish.
Choose fitted t-shirts for the most flattering sleeveless conversion since loose shirts can create unflattering armhole gaps. Test your cutting line on an old shirt first to perfect your technique before working on your favorite tees.
Racerback Style Creation
Locate the center back neckline and mark a point approximately 3-4 inches down from the collar. Cut from each shoulder seam toward this central point, creating two diagonal lines that form a V-shape. Trim the back neckline to widen it slightly, ensuring the racerback opening sits comfortably without being too tight.
Stretch the cut edges gently to create a natural rolled hem that prevents fraying. Adjust the racerback opening by cutting deeper for a more dramatic athletic look or keeping it shallow for subtle style enhancement.
Wide Armhole Technique
Position your cutting line 4-6 inches from the shoulder seam to create an oversized armhole opening. Extend the cut downward to approximately 2-3 inches below the natural armpit level for maximum coverage while maintaining the tank top aesthetic. Round the bottom corners of each armhole to prevent sharp angles that can tear during wear.
Layer a sports bra or bandeau underneath wide armhole tanks for appropriate coverage and added style dimension. Consider using this technique on oversized t-shirts to achieve the trendy slouchy tank top silhouette that’s perfect for layering or wearing alone.
Cut Up T Shirt Into a Halter Top
 2")
Transforming t-shirts into halter tops creates stunning summer pieces that showcase your shoulders while keeping you cool. We’ll show you three versatile methods to achieve this trendy style using simple cutting techniques.

Game Changer For Shirt Making: Make placing your HTV and sublimation easier & more consistent. Simply line it to the collar of the shirt to center your design before pressing. No more eyeballing it, saving you hours of repositioning and second guessing

🥼【What You Get】Tietoc ORIGINAL Tshirt vinyl alignment tool set contains 5pcs all kinds size t shirt rulers, 1pcs soft measuring tape, 1pcs 40 multi-color pins for fixing & product instruction to let you know the size and placement of your design. These rules can meet the design needs of the whole family clothes. Free your imagination and enjoy DIY fun from now on!

🥼【9pcs T-Shirt Alignment Tool Set 】T shirt ruler guide include 4 different sizes rulers, 10"x5"/10"x4.5"/10"x3.5"/10"x2.5". and 1 pcs soft measuring tape, lehgth 59". Help you to make alignments and save time on center your designs.
Front Tie Halter Method
Start by laying your t-shirt flat on a clean surface and cutting off the sleeves completely from shoulder to underarm. Mark the neckline by measuring 4-5 inches down from the collar on both front and back sides. Cut a straight line across the front of the shirt at your marked point to create the halter top base.
Create the neck straps by cutting two 1-inch wide strips from the removed sleeves, each measuring approximately 20 inches long. Make small holes on either side of the front neckline using scissors or a hole punch. Thread each strap through these holes from the inside out.
Secure the halter style by tying the straps around your neck in a comfortable knot or bow. Adjust the length by retying the knots higher or lower on your neck. This method works best with fitted t-shirts and creates an adjustable, customizable fit.
Back Tie Halter Design
Begin with the basic halter cut following the same sleeve removal and neckline cutting process as the front tie method. Measure 6 inches down from the back collar and cut straight across to create the back opening. This wider back cut allows for better strap placement and comfort.
Fashion the tie straps by cutting the removed sleeves into four 1-inch strips, each 18 inches long. Create two sets of ties by knotting two strips together at one end. Make small incisions at the top corners of the back cut to thread the straps through.
Complete the halter transformation by threading one set of ties through each corner hole and securing them on the inside with a knot. The remaining long ends tie around your neck for the classic halter look. This design offers excellent back support and creates a sleek silhouette from behind.
Strapless Halter Variation
Cut the base differently for this modern twist by removing sleeves and cutting the neckline 6 inches down from the collar all around. Create a tube top foundation by cutting straight across both front and back at the same level. This creates the strapless base while maintaining the halter top aesthetic.
Add removable straps by cutting 2-inch wide elastic bands or fabric strips that measure 24 inches each. Attach these temporary straps with safety pins on the inside of the top at shoulder points. This allows you to wear the piece as either a strapless or halter style.
Customize the fit by gathering excess fabric at the center front and securing it with a decorative knot or small hair tie. This technique works exceptionally well with oversized shirts and creates interesting ruching details. The strapless option provides versatility for different occasions and layering opportunities.
Cut Up T Shirt Into a Fringe Design
 3")
Fringe details add movement and texture to any t-shirt transformation. We’ll show you three popular fringe cutting techniques that create eye-catching designs perfect for festivals and casual summer wear.

Group Costume Set design. 3 Person Matching Easy Group Halloween Costume

Multipurpose Craft Scissors Set – This unique kit includes purple-handled scissors with a curved tip for embroidery and sewing, as well as green-handled scissors ideal for fine details and general DIY use.

Versatile All-Purpose Set – Includes 4 different sizes of scissors, ideal for sewing, quilting, tailoring, dressmaking, knitting, DIY crafts, and fine detail work at home, school, or the office.
Bottom Fringe Technique
Mark your desired fringe length by measuring 2-4 inches from the bottom hem of your t-shirt. We recommend starting with shorter fringe on your first attempt to avoid cutting too much fabric.
Create vertical cuts every ¼ to ½ inch across the entire bottom section, stopping at your marked line. Consistent spacing between cuts ensures even fringe distribution and professional results.
Stretch each fringe strip gently by pulling downward to create natural curl and texture. This technique works especially well with cotton t-shirts that have natural stretch properties.
Test the fringe movement by shaking the shirt to see how the strips flow and adjust any uneven pieces. Longer fringe creates more dramatic movement while shorter strips offer subtle texture.
Side Fringe Method
Cut vertical slits along both side seams starting 2 inches below the armpit and extending down 4-6 inches. We suggest measuring both sides carefully to maintain symmetrical fringe placement.
Make parallel cuts spaced ¼ inch apart, creating narrow strips that will form the side fringe detail. Uniform spacing prevents the design from looking messy or unintentional.
Pull each strip gently to activate the fabric’s natural curl and create flowing side fringe that moves with your body. This technique works particularly well for creating bohemian style tops.
Trim any uneven lengths using sharp fabric scissors to ensure all fringe pieces are consistent. Clean edges make the difference between professional and amateur results.
All-Over Fringe Style
Plan your fringe placement by marking sections across the entire shirt front, back, and sleeves where you want fringe details. Strategic placement prevents the design from becoming overwhelming.
Start with the bottom section and work upward, creating horizontal rows of fringe spaced 2-3 inches apart. This systematic approach ensures balanced coverage across the entire garment.
Vary your fringe lengths between 1-3 inches to create visual interest and prevent the design from looking monotonous. Shorter fringe near the neckline and longer strips toward the bottom work particularly well.
Connect fringe sections by cutting small horizontal bridges between vertical strips, creating connected fringe panels that move as one unit. This technique adds structure while maintaining the flowing fringe effect.
Cut Up T Shirt Into a Braided Creation
 4")
Braided t shirt designs elevate your DIY projects with intricate textile artistry that transforms basic garments into statement pieces. We’ll explore three advanced braiding techniques that create stunning visual textures.
Product includes: one big scissors, one small scissors, one rotary cutter and 3pcs rotary cutter blades

Ultra Sharp Fabric Scissors: Wteehn sewing scissors for fabric cutting is made of high-quality galvanized manganese, exquisite hand-forged craftsmanship, high hardness, sharp, durable, rust-proof and not easy to deform, and can cleanly cut thick materials such as multi-layer fabrics and leather

Pinking shears for Fabric, Linings, Paper,leather,PU and Craft Uses. Ideal Craft Shears for Professional and Domestic Use. These pinking shears for fabric cutting can be used to add decorative edging to ribbon, paper, and other materials.
Side Braid Design
Creating side braids transforms your cut up t shirt into an asymmetrical masterpiece with elegant flowing details. We start by cutting three vertical strips along one side seam, making each strip approximately 1 inch wide and 6 inches long. Mark your cutting lines with chalk to ensure even spacing between each strand.
Stretching each strip gently creates natural rolling edges that enhance the braid’s organic appearance. We begin braiding from the top, crossing the right strand over the middle, then the left strand over the new middle piece. Continue this pattern until you reach the bottom of the strips, then tie a small knot to secure the braid.
Adjusting the tightness creates different visual effects, with looser braids offering a relaxed bohemian vibe. We recommend cutting additional side strips on the opposite seam to create balanced symmetry across your transformed t shirt.
Back Braid Technique
Back braids create stunning focal points that showcase intricate detailing when viewed from behind. We begin by cutting a vertical line down the center back, starting 3 inches below the neckline and ending 4 inches above the hem. Create two additional parallel cuts on each side, spacing them 2 inches apart for optimal braiding width.
Connecting the bottom cuts with a horizontal line creates five separate strands for our braiding pattern. We gather the center three strands and begin a traditional braid, incorporating the outer strands as accent pieces that weave through the main structure. This technique requires patience as we work from top to bottom, maintaining consistent tension throughout the process.
Securing the finished braid with a small hair tie or by knotting the strand ends ensures lasting durability. We suggest trying this technique on darker colored shirts first, as the contrast highlights the braided texture more dramatically.
Multi-Strand Braid Method
Multi strand braiding creates complex patterns that showcase advanced DIY skills and artistic vision. We start by cutting 6 to 8 vertical strips across the back panel, each measuring 1.5 inches wide and extending from shoulder blade level to the shirt’s bottom hem. Planning your strip placement prevents accidental cuts through essential structural areas.
Dividing the strips into two groups allows us to create dual braids that can either remain separate or intertwine at exact points. We begin braiding each group independently, using a four strand technique that creates wider, more substantial braided sections. The right outer strand crosses under the next strand, then over the following two strands in sequence.
Connecting the two braids at the midpoint creates an hourglass effect that adds visual interest and structural integrity. We finish by securing both braid ends and gently pulling apart the individual loops to create fuller, more voluminous braided sections that enhance the overall design impact.
Cut Up T Shirt Into a Knotted Style
 5")
Knotted t-shirt styles offer endless versatility while maintaining the relaxed comfort we love about casual wear. These techniques create visual interest through strategic fabric manipulation rather than complex cutting patterns.
Front Knot Technique
Create a classic front knot by gathering fabric at your natural waistline and securing it with a simple tie. Start by putting on your t-shirt and pinching the excess fabric about 2-3 inches from the center front hem. Twist the gathered material clockwise for 2-3 full rotations to create tension in the fabric. Pull the twisted section through itself to form a secure knot that sits comfortably at your waist.
Position the knot slightly off center for a more modern asymmetrical look. We recommend practicing the twist and pull motion a few times before committing to your final knot placement. The beauty of this technique lies in its adjustability – you can easily loosen or tighten the knot throughout the day to maintain your desired fit and comfort level.
Side Knot Method
Transform oversized shirts into fitted silhouettes by creating strategic side knots that cinch the waist. Gather 3-4 inches of fabric from either the left or right side seam at your natural waistline. Twist this gathered section counterclockwise for 2 full rotations to build sufficient tension in the material. Thread the twisted fabric through itself and pull tight to create a secure side knot that won’t come undone during normal wear.
Experiment with knot height placement to achieve different proportions and styling effects. Higher knots around the ribcage area create a cropped appearance perfect for high-waisted bottoms. Lower knots positioned at the hip bone offer a more relaxed fit that works well with skinny jeans or fitted shorts. We suggest trying both positions to see which flatters your body shape and matches your intended outfit combination.
Multiple Knot Design
Elevate your t-shirt game by incorporating 2-3 small knots strategically placed around the hemline. Mark three points along the bottom edge: one at center front and two at the side seams. Gather small sections of fabric (approximately 1-2 inches) at each marked location. Create mini knots by twisting each section once and pulling it through itself for a subtle gathered effect.
Vary the knot sizes and positions to create visual rhythm and movement across your shirt. We recommend making the center knot slightly larger than the side knots to draw attention to your waistline. This technique works exceptionally well with longer t-shirts that would otherwise hang loose and shapeless. The multiple knots add dimension while maintaining the shirt’s original length and coverage.
Cut Up T Shirt Into a Cold Shoulder Top
 6")
Cold shoulder tops offer the perfect balance between coverage and style, creating an eye-catching look that works for both casual and dressy occasions. We’ll explore three stunning variations that transform any basic t-shirt into a trendy cold shoulder masterpiece.

Premium Thick Acrylic Construction Made of high grade transparent acrylic material, this quilting ruler set features a sturdy, wear resistant build that resists cracking, warping and bending for long term daily use. The clear design offers full visibility of fabric underneath, while smooth polished edges protect hands and fabric from snags or damage, ideal for frequent sewing and quilting projects.

Do It for Dad: Whether you’re spending Father’s Day backyard grilling, golfing, or fishing with pop, show him he’s the Best Dad ever with a cool dad shirt. Check out our cool, funny dad shirts and let your dad in on the ultimate dad jokes!

T-SHIRT ALIGNMENT TOOL SET - T shirt ruler guide include 8 different sizes rulers , 1 soft measuring tape and 40 multi-color pins for fixing. Unique Round And V-Neck 2-IN-1 Rulers, unique Back and Front design ruler(4 x PVC front rulers and 4 x PVC back rulers) for adult, youth,children and V-neck.
Single Shoulder Cutout
Single shoulder cutouts create an asymmetrical design that adds instant sophistication to your t-shirt transformation. Mark a rectangle measuring 3-4 inches wide by 2 inches tall on one shoulder, positioning it about 2 inches down from the shoulder seam. Cut along your marked lines using sharp fabric scissors for clean edges.
Stretch the cutout edges gently after cutting to prevent fraying and create a soft rolled hem effect. Position the cutout on your dominant side’s opposite shoulder for the most flattering angle when you move and gesture. We recommend starting with darker colored shirts as they hide any imperfections while you perfect your technique.
Test the placement by holding the shirt up to your body before making the final cuts. Adjust the rectangle size based on your comfort level, making it smaller for a subtle peek of skin or larger for a more dramatic statement piece.
Double Shoulder Cutout
Double shoulder cutouts provide symmetrical elegance that frames your collarbones beautifully. Create matching rectangles on both shoulders, measuring 3 inches wide by 1.5 inches tall for balanced proportions. Position each cutout 1.5 inches down from the shoulder seam and 1 inch in from the sleeve edge.
Use a template made from cardboard to ensure both cutouts match perfectly in size and placement. Mark the first shoulder, then flip your template to mark the second shoulder for mirror image precision. Cut both openings simultaneously by folding the shirt in half lengthwise along the center front and back seams.
Maintain consistent spacing between the cutouts and neckline for professional results. We suggest measuring the distance from each cutout to the collar edge to verify symmetry before finalizing your cuts.
Sleeve Cutout Variation
Sleeve cutout variations extend beyond basic shoulder openings to include forearm and upper arm details. Create horizontal slits measuring 4 inches long by 0.5 inches wide at 2 inch intervals down each sleeve. Start the first slit 3 inches below the shoulder seam and continue toward the elbow area.
Experiment with geometric patterns by cutting diamond shaped openings or circular cutouts instead of traditional rectangles. Use a coin or small template to trace perfect circles, spacing them 3 inches apart for optimal visual impact. Cut carefully around curved lines using small sharp scissors for smooth edges.
Layer these sleeve cutouts with solid colored tank tops or bralettes underneath for added dimension and coverage options. We’ve found that contrasting colors between the base layer and cut t-shirt create the most striking visual effects for this advanced cold shoulder technique.
Cut Up T Shirt Into a Distressed Look
 7")
Creating a distressed look takes your cut up t shirt transformation to the next level with edgy, lived-in appeal. These weathering techniques add character and rebellion to your DIY wardrobe projects.

The blades of Fabric scissors and embroidery scissors are made of knife-grade stainless steel and surface with color titanium plating, showing better anti-corrosion feature and longer service life.

Cutting Tool Design design. A cool, fun design for the passionate hairdresser, barber, stylist, hair trimmer, hair groomer, hairdresser and hair stylist who loves his profession. The fun motif is guaranteed to make customers laugh.

Sewing shirts for women and girls make great Mother's day gifts for mother and grandmother who love quilting.
Strategic Hole Placement
Careful positioning creates authentic distress patterns that enhance your t-shirt’s overall design. We recommend starting with small pilot holes using scissors or a create knife, then gradually expanding them through gentle stretching. Popular placement areas include the shoulder blade region, lower hem corners, and side seam intersections where natural wear typically occurs.
Focus on asymmetrical arrangements to achieve a more organic distressed appearance. Target high-stress zones like elbow areas, neckline edges, and pocket corners if your shirt has them. We suggest creating clusters of 2-3 holes rather than single isolated openings for maximum visual impact.
Size variation adds depth and authenticity to your distressed t-shirt design. Mix small pinhole openings with medium-sized tears and larger distressed areas. We find that combining quarter-inch holes with thumb-sized openings creates the most convincing worn appearance.
Ripped Edge Technique
Horizontal tears across the fabric create classic distressed lines that define your t-shirt’s rebellious character. Begin by making small horizontal cuts with scissors, then grip both sides of the cut and pull in opposite directions. We recommend starting with 1-inch initial cuts to control the tearing process effectively.
Vertical ripping produces different texture patterns that complement horizontal distressing beautifully. Pull the fabric perpendicular to the shirt’s natural grain for controlled vertical tears. We suggest alternating between horizontal and vertical rips to create a crosshatch distressed pattern.
Edge fraying enhances the authenticity of your ripped t-shirt transformation significantly. Use a cheese grater, pumice stone, or sandpaper to rough up cut edges and create natural-looking wear. We find that gentle scraping motions work better than aggressive rubbing for realistic results.
Weathered Finish Method
Sandpaper treatment creates subtle fabric thinning that mimics years of natural wear. Focus on high-contact areas like chest, shoulders, and hem edges using 120-grit sandpaper in circular motions. We recommend working gradually to avoid creating unwanted holes during the weathering process.
Bleach distressing adds authentic color fading that enhances your cut up t-shirt’s vintage appeal. Mix one part bleach with two parts water in a spray bottle for controlled application. We suggest testing on hidden areas first and working in well-ventilated spaces for safety.
Stone washing techniques provide professional-grade distressing results at home. Fill a washing machine with your t-shirt, several clean tennis balls, and pumice stones. We recommend using cold water cycles to prevent excessive fabric damage while achieving optimal weathered texture.
Cut Up T Shirt Into a Fitted Design
 8")
Transforming loose t-shirts into perfectly fitted designs gives us professional-looking results without any sewing experience. We’ll explore three proven techniques that create custom-customized silhouettes through strategic cutting and fabric manipulation.

ULTRA SHARP FABRIC SHEARS: Made of high carbon steel which is stronger than stainless steel, the craft scissors have great qualities including good edge retention and ability to make clean cut through multiple layers of fabric.well worth investing to help you cut down on time and money and perfect your sewing creations.

ARTS AND CRAFTS STAPLE: Fiskars Easy Action Micro-Tip Scissors (No. 5) are perfect for cutting details out of fabric including silk, oil cloth, polyester, cotton, crepe, felt, and more

All-purpose Fabric Scissors: These 10-inch stainless steel scissors are expertly crafted for heavy-duty use, providing clean and precise cuts through fabric, leather, and various materials
Side Seam Adjustment
Pinching the excess fabric along both side seams helps us determine the perfect fit before making any cuts. We start by putting the t-shirt on inside out and having someone mark where we want the new seam line to fall. Remove the shirt and lay it flat on a cutting surface with the marked areas clearly visible.
Cut straight lines from the armpit down to the hem following our marked guidelines on both sides. This technique removes approximately 2-4 inches of fabric from each side depending on the original fit. Stretch the cut edges gently to prevent fraying and create a clean finished look.
The side seam adjustment works best on cotton blend t-shirts that have natural stretch properties. We recommend testing the fit by trying on the shirt after each adjustment to ensure we don’t cut too much fabric away.
Dart Addition Method
Creating darts along the back panel gives us the most professional fitted appearance without complex alterations. We begin by marking two triangular sections on either side of the spine, starting 3 inches below the shoulder blades and tapering down 6 inches toward the waist.
Cut small triangular wedges following our marked lines and remove the excess fabric completely. The remaining edges will naturally pull together when we wear the shirt, creating an hourglass silhouette that follows our body’s natural curves.
Position the darts symmetrically to maintain balance in the overall design. We find that cutting darts approximately 1 inch wide at the top and tapering to a point creates the most flattering shape for most body types.
Tapered Fit Technique
Combining multiple cutting angles creates the ultimate fitted t-shirt design that rivals professionally customized garments. We start by making side seam adjustments as our foundation, then add subtle waist shaping through strategic angled cuts.
Mark diagonal lines from the armpit toward the waist, creating a gradual taper that follows our natural body contours. Cut along these angled lines rather than straight vertical cuts to achieve a more sophisticated silhouette.
The tapered fit technique requires precision in our measurements and cutting angles. We suggest practicing on old t-shirts first to perfect the technique before working on our favorite pieces. This method typically removes 3-5 inches of fabric while maintaining the shirt’s structural integrity and comfort.
Cut Up T Shirt Into Workout Wear
 9")
Transform your basic t-shirts into performance ready activewear with strategic cuts that enhance breathability and movement. These athletic modifications create functional workout pieces perfect for yoga sessions, gym routines, and outdoor fitness activities.
High-Low Hem Design
Front Hem Positioning creates the signature high-low silhouette by marking a curved line 2 inches above your natural waistline. Cut along this marked curve using fabric scissors, ensuring the front portion sits comfortably at hip level. This technique provides core coverage during bending movements while maintaining a trendy athletic aesthetic.
Back Length Extension maintains the original hem length to create the dramatic high-low effect that’s perfect for active wear. Mark the back hemline 4 inches longer than your front cut, creating a gentle slope from side seam to side seam. The extended back coverage prevents exposure during forward motions like planks or yoga poses.
Side Transition Blending connects the front and back hemlines with smooth, curved cuts along each side seam. Start from your front hem mark and gradually curve downward toward the longer back hemline, creating a seamless transition. These connecting curves eliminate harsh angles and provide natural movement flow during workouts.
Breathable Panel Cuts
Strategic Ventilation Zones target high heat areas like the upper back and underarms for maximum cooling efficiency. Cut horizontal slits measuring 3-4 inches long across the shoulder blade region, spacing them 2 inches apart for optimal airflow. These breathing panels channel cool air directly to your body’s warmest zones during intense exercise.
Mesh Effect Creation transforms solid fabric areas into breathable sections through parallel vertical cuts spaced 1 inch apart. Focus on the lower back panel where heat accumulates during cardio activities, cutting strips that extend 6 inches from the bottom hem upward. The resulting mesh like pattern promotes air circulation while maintaining structural integrity.
Geometric Pattern Integration combines function with style through diamond or triangle shaped cutouts along the spine area. Create these decorative breathing holes by cutting small geometric shapes measuring 2×2 inches, positioning them in vertical alignment down the center back. Each cutout serves as both a design element and a ventilation point for temperature regulation.
Athletic Fit Modifications
Performance Waist Cinching adjusts loose fitting shirts into body hugging activewear through strategic side seam reduction. Pinch excess fabric along both side seams while wearing the shirt, marking where the natural waistline should sit for optimal movement. Cut away the marked excess fabric, creating a customized fit that moves with your body during exercise.
Arm Mobility Enhancement widens armholes to accommodate the full range of motion required for athletic activities. Cut deeper into the existing armhole opening, extending 2-3 inches lower toward the side seam for unrestricted arm movement. This modification prevents fabric tension during overhead reaches, lateral movements, and cross body stretches.
Length Optimization Technique shortens overly long shirts to prevent interference during ground exercises like burpees or mountain climbers. Measure and mark your desired length at 2 inches below your natural waistline, then cut straight across for a clean finish. The shortened length eliminates fabric bunching while maintaining adequate coverage for all workout positions.
Conclusion
We’ve shown you that transforming old t-shirts into trendy new pieces doesn’t require expensive tools or advanced skills. With just scissors and creativity you can completely revamp your wardrobe while giving forgotten garments a second life.
These cutting techniques offer endless possibilities for personal expression. Whether you’re drawn to the edgy appeal of distressed styles or prefer the sophisticated look of fitted designs there’s a method that matches your aesthetic.
The beauty of DIY t-shirt transformation lies in its accessibility and sustainability. You’re not just creating unique fashion pieces – you’re also reducing waste and developing practical skills that’ll serve you well beyond your next closet cleanout.
Start with one technique that speaks to you and let your creativity guide the process. Each cut is an opportunity to discover what works best for your style and body type.
Frequently Asked Questions
What tools do I need to transform a t-shirt into a crop top?
You only need a sharp pair of scissors and creativity. No sewing skills or expensive tools are required. For best results, use fabric scissors, and consider having a ruler or measuring tape for precise cuts. Some methods may benefit from a template or pattern, but these can be made from paper or cardboard you have at home.
How do I prevent my cut t-shirt from unraveling?
Most t-shirt fabrics, especially cotton blends, naturally resist fraying due to their knit construction. The cut edges will curl slightly, which is part of the desired aesthetic. If you’re concerned about durability, gently stretch the cut edges to encourage the fabric to curl and create a finished appearance.
What’s the easiest method for beginners to try first?
The Basic Straight Cut Method for creating crop tops is perfect for beginners. Simply measure and mark where you want to cut, then make one straight horizontal cut across the shirt. This technique requires minimal precision and creates an instantly trendy cropped silhouette with maximum impact.
Can I transform any type of t-shirt using these techniques?
Yes, most t-shirts work well for these transformations. Cotton and cotton-blend fabrics respond best to cutting and stretching. Oversized or loose-fitting shirts provide more material to work with, while fitted shirts work better for subtle modifications. Avoid heavily structured or thick materials that may be difficult to cut cleanly.
How do I ensure my cuts are even and professional-looking?
Use a ruler or measuring tape to mark your cutting lines before making any cuts. For curved cuts, create a paper template first. Cut slowly and steadily, following your marked lines. After cutting, gently stretch the edges to create the natural curl that gives DIY t-shirts their characteristic finished appearance.
What’s the difference between a halter top and a tank top transformation?
Tank tops involve removing the sleeves while keeping the original neckline structure, creating a sleeveless design. Halter tops require cutting a new neckline and creating straps that tie around the neck, offering more dramatic styling options and better showcasing of shoulders and back areas.
How do I create fringe that looks professional?
Mark consistent spacing (typically 1/4 to 1/2 inch apart) before cutting to ensure even fringe strips. Cut straight vertical lines, then gently pull each fringe piece to encourage natural stretching and curling. The key is maintaining uniform width and spacing throughout your fringe design.
Are braiding techniques difficult for beginners?
While braiding techniques require more patience and precision than basic cuts, they’re achievable for beginners willing to take their time. Start with simple side braids before attempting complex multi-strand designs. Practice the braiding motion on scrap fabric first to build confidence and muscle memory.
How do I make my transformed t-shirt look fitted without sewing?
Use strategic cutting techniques like side seam adjustments and dart creation. Remove excess fabric along the side seams, or create triangular cuts (darts) along the back panel to cinch the waist. These methods create a tailored appearance while maintaining the shirt’s structural integrity.
Can I combine multiple transformation techniques on one shirt?
Absolutely! Many techniques complement each other beautifully. For example, you can create a crop top with fringe detailing, or combine a tank top cut with side braiding. Start with one technique, assess the results, then gradually add additional elements to achieve your desired unique look.