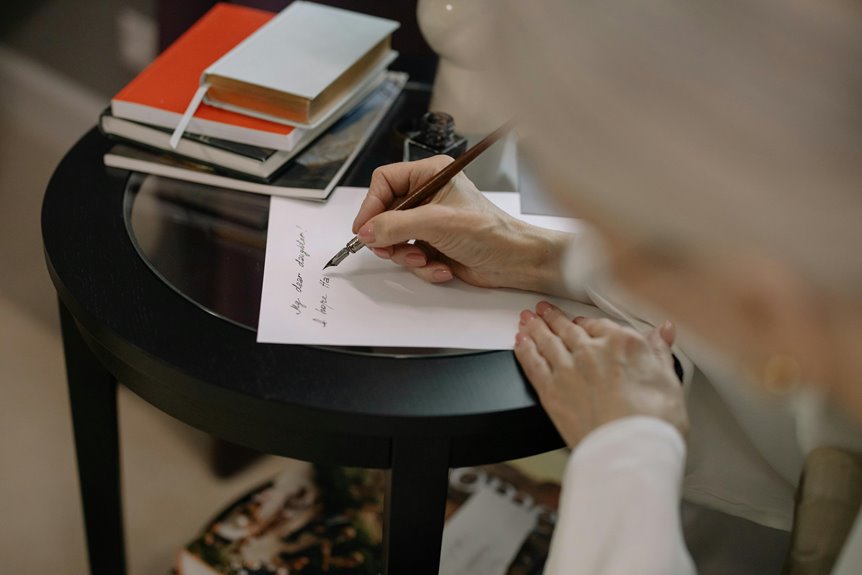
To sign a book as a gift, start by drafting your inscription on scrap paper—keep it short, just one to three sentences. Use a fast-drying ballpoint pen and write directly to the recipient using their name. Choose the title page or inside cover, whichever feels right. Add the date below your signature for a lasting personal touch. Rest your hand flat, write steady strokes, and let the ink dry completely before closing the book. For more polished techniques, there’s plenty more to discover.
Don’t Sign Rare or Valuable Books

Ever think about signing the inside cover of a fancy first edition before gifting it? Yeah, I’d pump the brakes on that one. Here’s the thing: when you sign rare books, you’re actually devaluing them. Your inscription might seem like a nice personal touch, but it messes with the book’s provenance and future resale value—not exactly the outcome you’re aiming for.
Instead, consider gift etiquette that keeps the book pristine. A signed card tucked inside works well. You get to personalize your gift without permanently altering something valuable. If signing’s really calling to you, try a removable inscription bookmark or certificate of authenticity. These methods let you express your feelings while respecting the book’s integrity. Your effort and attention count more than ink on a page.

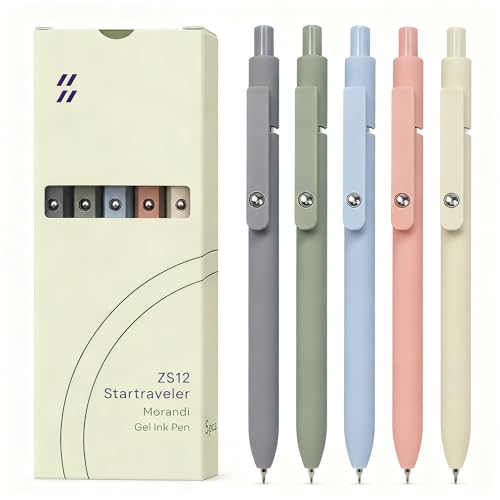
【Adorable Macaron Design】These cute retractable ballpoint pens are inspired by the soft pastel colors of macarons, adding a touch of cuteness to your stationery collection. Choose from two stylish sets: a Solid Color Set with 6 pens in different macaron shades or an Assorted Color Set for a mix of charming pastel hues.
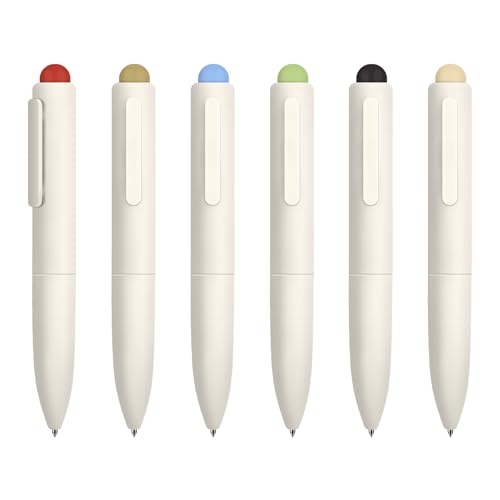
【Adorable Macaron Design】These cute retractable ballpoint pens are inspired by the soft pastel colors of macarons, adding a touch of cuteness to your stationery collection. Choose from two stylish sets: a Solid Color Set with 6 pens in different macaron shades or an Assorted Color Set for a mix of charming pastel hues.

Package Includes: 5 pastel colors dual-tip highlighters, and 3 retractable black ink ballpoint pens with a silent clicker, offering a versatile solution for both highlighting and writing.
Choose a Pen That Won’t Smudge

I’ve learned that grabbing just any pen won’t work when you’re signing a book, so I always reach for a fast-drying ballpoint or fine-tip ink pen that resists smudging and keeps your inscription looking sharp. Before I write anything important, I test the pen on scrap paper to make sure it won’t feather or bleed through—nothing’s worse than a beautiful inscription ruined by ink that decides to go on a tour through the page. I carry at least three pens in different colors, like black, blue, and another contrasting shade, so I’m ready to match whatever the book’s interior calls for and avoid those frustratingly faint marks.
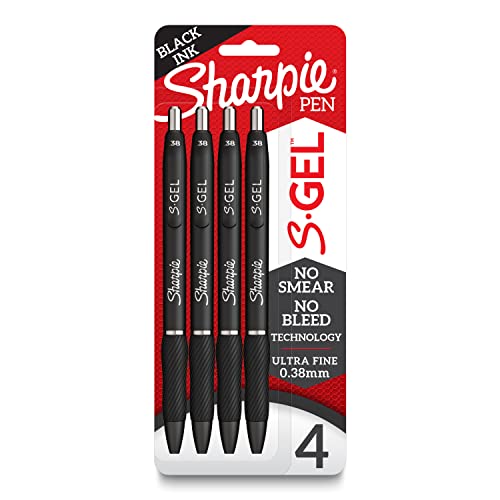
Smoother, bolder, cleaner, and quicker drying than the leading competitor (Compared to the leading competitor; across black, blue, and red ink based on 95% reliability)

Perfect for Premium Japanese-Style Journaling & Thin Paper Planners: Our Japanese Style 0.35mm extra fine tip gel pens are specially designed for delicate, thin notebook pages used in high-quality daily planners and journals. The smooth, no-smudge ink delivers clean, precise writing that pairs perfectly with minimalist, high-grade Japanese-style notebook paper, making this Japanese ink pen ideal for consistent, neat daily journaling.

With its 0.28mm ultra fine tip, it provides a precise yet smooth writing experience, and it provides an uninterrupted, consistent line, perfect for detailed work and note taking.
Quality Pen Selection
The right pen matters when you’re signing a book as a gift. I’ve learned that investing in quality ink and a comfortable grip improves the whole signing experience, keeping your inscription looking crisp and intentional.
What to consider for pen selection:
- Fast-drying ballpoint ink that resists smudging and feathering
- Comfortable grip that doesn’t cause hand fatigue during longer sessions
- Archival or pigment ink options for valuable editions to prevent fading
- Multiple pen colors (black, blue, contrasting shade) for visibility and backup
- Test pens on scrap paper first to confirm performance
A quality pen is a tool that serves your signature well. When you choose thoughtfully, your gift inscription becomes something the recipient values for years.
Ink Drying Speed
Quick-drying ink is your best friend when you’re signing a book, especially if you’re writing on glossy or thin pages where smudges love to happen. I’d recommend hunting down pigment-based or rollerball pens labeled “fast-drying”—they work well at preventing that dreaded bleed-through. Gel pens and felt-tip markers? Skip those; they’re basically smudge machines.
Here’s my trick: use a medium to fine nib with light, even pressure. This reduces ink pooling and gets your drying time down significantly. Before you commit to signing that gift, test your pen on similar paper first. It’s worth it.
Give yourself at least 10–30 seconds for the inscription to dry completely, especially on title pages. Keep a soft blotter or tissue nearby, and carry a spare quick-dry pen. Your gift-recipient’s book will thank you.
Decide Where to Inscribe: Title Page or Inside Cover

The title page is your best bet for visibility and a formal look, making your signature front and center where everyone flips first. The inside front cover works too—it’s less conspicuous, keeps your message safer from wear and tear, and gives newer editions a fresh start without your mark. Either way, pick a spot with enough blank space so your inscription doesn’t fight with existing text or artwork, and you’ll have a readable gift that lasts.

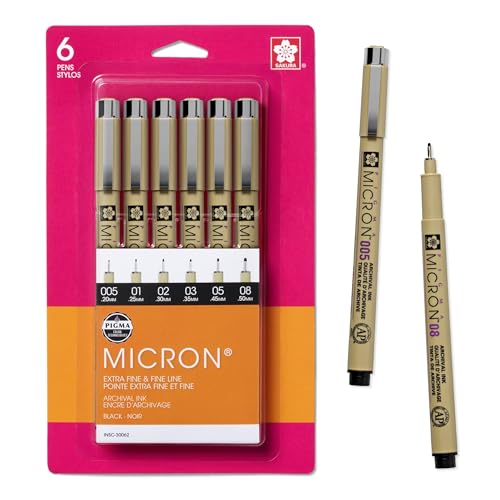
PRECISE POINTS & LINES: Create precise marks that stand the test of time with professional inking pens used by comic artists, illustrators, watercolor artists, archivists, and laboratory professionals. Set includes 8 pens with all different tips including: Pigma Micron, Pigma Graphic & Pigma Brush in archival black ink.

Precise archival pens create fade resistant, waterproof, bleed free marks for drawing, artwork, journaling, and more

9 Black Drawing Pens with Precision Tips - 9 assorted and unique nib sizes 0.2 mm (005), 0.25 mm (01), 0.3 mm (02), 0.35 mm (03), 0.4 mm (04), 0.45 mm (05), 0.5 mm (06), 0.6 mm (08) and 1 soft brush tip (Brush). It allows for varying line weights and precision when technical drawing or writing. Ideal for stippling, bold lettering, illustrating, journaling, doodling, sketching, and outlining
Title Page Prominence
Choosing where you’ll sign a book as a gift matters more than you might think, since you’ve got a couple of great options that’ll display your inscription clearly.
The title page offers prominence for your signature and message. It’s the traditional spot where readers expect to find a personal touch from you. Here’s what makes it work:
- Clear association: Your name stands out immediately, linking you directly to the gift
- Prime real estate: The title page gets noticed first when someone opens the book
- Established tradition: Signing here feels natural and formal
- Clean backdrop: Minimal graphics means your words really stand out
- Gift authenticity: It communicates that this is personalized for you
Just make sure you have enough blank space and avoid cluttering any publication information already there.
Inside Cover Alternatives
Why not consider the inside cover as your inscription spot? It’s a practical alternative to the title page because it keeps your message hidden until someone opens the book. You’ll want to keep things concise since space is limited, and you’ve got to think about readability with proper margins and alignment.
| Consideration | Benefit | Tip |
|---|---|---|
| Light paper | Better visibility | Maintains legibility |
| Margins | Prevents trimming loss | Leave ½ inch space |
| Quick-drying ink | No smudging | Test first |
The inside cover works well for hardbacks especially. Just remember that the inscription shouldn’t interfere with the blank page opposite the title page. Make sure your ink dries fast so it won’t smudge on adjacent pages. This spot keeps your gift message personal and protected from immediate view, making it a considered choice.
Design Your Author Signature
How do you want people to remember your signature when they flip through their gifted book years from now?
Your signature is your personal stamp on this gift. I’d design one that includes both your first and last name for recognizability. Here’s what I focus on:
- Practice until you can reproduce it quickly and consistently
- Reference calligraphy styles or fonts for inspiration
- Use quality blue or black ink that dries fast
- Choose your signing location strategically (title page or inside cover works well)
- Create two or three signature phrases tailored to each book’s theme
A comfortable pen matters because you’ll sign multiple books without hand fatigue. Your signature becomes part of the gift’s value. When recipients open that book later, they’ll recognize your mark instantly. That’s the power of designing something uniquely yours.


Used Book in Good Condition

Ball Point Pen Topped With A Shimmering, Glittery Feather,Made of natural feathers.
Ask the Recipient About Their Preferences

Before you put pen to paper, taking a few minutes to ask the gift-giver (or the recipient directly, if you can) about what they’d actually want in that inscription makes a real difference. Start by confirming their first name and checking the spelling—you’d be surprised how many ways people spell the same name. Ask whether the inscription should speak directly to them or acknowledge the buyer instead. This shapes your inscription tone completely. Find out if they have favorite characters or moments from the book you can weave in. Does the occasion call for something heartfelt, funny, or inspirational? Finally, check if adding a date or event detail matters to them. These preferences transform a generic message into something personal and fitting for the reader.

Super Soft Non-slip Grip: Features grip bring a super soft and comfortable touch feeling which make each ballpoint pen easy to hold

【Adorable Macaron Design】These cute retractable ballpoint pens are inspired by the soft pastel colors of macarons, adding a touch of cuteness to your stationery collection. Choose from two stylish sets: a Solid Color Set with 6 pens in different macaron shades or an Assorted Color Set for a mix of charming pastel hues.

TYPE : Qionew 3 Colors Gel Pens Set add shines, glares, snow, highlights and more to your compositions, Create Boldly on Any Colour of Paper - dries quickly and opaque so your designs, writing or sketches will look bold on dark surfaces
Write a Short Inscription Message

The trick to a great book inscription is keeping it short—think one to three sentences, not a novel inside your novel. You’ll want to connect personally with the recipient by mentioning something specific about them or a shared memory, whether that’s their favorite genre, an inside joke, or a late-night conversation you had together. Balance that personal touch with actual brevity, so your message stays legible in the front cover space and feels authentic rather than like you’re trying too hard.

Versatile Creativity: Medium 0.8mm tip creates bold, precise lines ideal for writing, drawing, and note-taking

Mr. Pen retractable pens come in a 6-pack featuring a sophisticated, muted color palette, adding an element of style to your writing instruments.

The Go-To set for Bible Study, Note Taking, Journaling, and Scrapbooking. Micron is the Fineliner Standard that Delivers with Precision
Keep Messages Concise
Why does every inscription need to be a novel?
Conciseness works. When you keep your message tight, it lands harder. What to focus on:
- Choose one clear purpose: memory, gratitude, or encouragement—not all three
- Stick to 1–3 sentences maximum: brevity makes your words more memorable
- Reference something specific: that shared joke, favorite character, or moment you both know
- Skip unnecessary details: dates clutter things unless they’re meaningful
- Use direct phrases: “For [Name], with warm wishes” beats flowery rambling
A short inscription feels personal and thoughtful. Lengthy ones feel like you’re trying too hard. Your reader will treasure those few honest lines far more than a paragraph of generic sentiment. That’s where real connection happens.
Connect To The Recipient
Your inscription lands best when it’s written directly to the person holding the book.
I personalize mine by using their first name right away—it makes them feel like I’m speaking directly to them, not just signing a generic message. Then I reference something we’ve shared: maybe a conversation we had, an inside joke, or a character they love from another book.
This is where the connection deepens. When Sarah opens her gift and sees, “For Sarah—this reminds me of our coffee chat about dreams,” she’ll remember that exact moment every time she reads it.
Your inscription doesn’t need to be long. Even a simple “This made me think of you” works well. The key is making it specifically theirs, not something you’d write for anyone else.
Balance Personalization With Brevity
less is more. You want your inscription to feel personal without taking up too much space. The balance comes from blending personalization with brevity—creating something that resonates without overwhelming the page.
Here’s how I keep it balanced:
- Include the recipient’s name and one specific reference (that book club they love, that promotion they earned)
- Stick to 1–3 sentences maximum for your inscription
- Skip lengthy backstories; trust that they’ll get it
- Read it aloud to catch clunky phrasing before writing in pen
- Use your signature phrase consistently so it becomes recognizable
Your goal isn’t writing a novel—it’s creating a moment. A great inscription feels like a friend talking, not a formal letter. That’s where the real connection lives.
Use a Closing Phrase Like “Best Wishes”
A closing phrase is basically the finishing touch of your book inscription—it’s the warm send-off that wraps everything up nicely without taking up half the page. I like to keep mine short and genuine, something that feels natural when I write it alongside my signature.
I’ve found that having two or three go-to closing phrases ready makes signing books way easier. “Best wishes,” “All the best,” or “Thanks for reading” work well because they’re friendly without being overdone. The key is picking phrases that actually sound like you.
Place your closing right after the recipient’s name in your inscription to keep that natural flow going. When you pair it with your signature, you’re creating a complete, legible message that’ll mean something years from now.

❤6 Black Art Drawing Pens: The professional micro pen kit contains assorted types of pen tips from 0.20mm to 0.50mm, plus a brush tip. No Bleed, No Smear and Waterproof. Perfect for drawing and writing. One set of pens for all your art creation needs. Whether you are an artist or a beginner, you can easily use it. Line Width & Cap Size: 0.2mm (005), 0.25mm (01), 0.35mm (03), 0.45mm (05), 0.50mm (08), Brush (BR)

Item Trademark: PETER PAUPER PRESS
Precise archival pens create fade resistant, waterproof, bleed free marks for drawing, artwork, journaling, and more
Reference a Shared Memory or Inside Joke

Once you’ve wrapped up with that warm closing phrase, it’s time to make your inscription personal by pulling in something you both know and love. A shared memory lifts your message from generic to something with real weight. Think back to a moment you experienced together—a funny mishap, an inside joke, or a conversation that stayed with you.
Here’s how to weave it in naturally:
- Reference a specific detail from that memory to jog their recall
- Connect the book’s themes directly to what happened between you
- Keep it brief—one clear moment beats a lengthy explanation
- Use phrases like “Remember when we…” to introduce it smoothly
- Verify your joke lands with them alone
This personalization shows you invested thought into the gift, making your inscription feel like it was written just for them.

Pilot Explorer Fountain Pen: Striking blue barrel with a medium, stainless steel nib. The Pilot Explorer features a contemporary barrel design perfectly weighted and balanced for a premium writing experience

Pilot's sleek Metropolitan Collection signature pens

PREMIUM DESIGN: Matt brown finish with regal brown PVD signature gold trims for an elegant professional appearanceElegant, streamlined silhouette.Accented with a refined cup and heart emblem on the cap Features the Sheaffer White Dot, the trademark symbol of writing excellence and Stylish cut-out clip
Get the Recipient’s Name and Spelling Right
You’d be surprised how many book signings go sideways because someone guesses at a name’s spelling, so always ask the buyer directly instead of assuming you’ve got it right. Once you know how they spell it, say it aloud slowly together—this simple approach catches errors before your pen hits the page, and it shows the recipient you care about getting their name correct. When you’re ready to write, verify the spelling one more time, because there’s nothing worse than discovering you’ve inscribed “Jon” when it’s really “Sean” staring back at you forever.

Smooth Ink Flow :1mm fine point Silver Gel Pens Set. Get creative with Qionew gel pens. Our high-quality ballpoint and rich, gel pen ink allow for detail drawing sketching coloring and illustration

Super Soft Non-slip Grip: Features grip bring a super soft and comfortable touch feeling which make each ballpoint pen easy to hold

Super Soft Non-slip Grip: Features grip bring a super soft and comfortable touch feeling which make each ballpoint pen easy to hold
Ask Before You Assume
How many times have we scribbled someone’s name into a book only to realize we’ve spelled it wrong? I’ve learned that asking beats guessing every single time. Before I write that inscription, I chat with the gift-giver about what matters most:
- Get their full name and hear them spell it aloud
- Confirm the preferred version—do they go by “Elizabeth” or “Liz”?
- Ask about titles or suffixes they want included professionally
- Verify pronunciation if the spelling seems tricky
- Write it down immediately so you remember for next time
This small step turns a generic gift into something personally tailored. Your recipient feels acknowledged when you’ve taken care to get their name exactly right. That’s when personalization works. It’s the difference between a nice gesture and a considerate one that demonstrates you listened.
Verify Spelling With Confidence
Now that you’ve got the name straight from the source, it’s time to make sure you can actually write it down correctly. I always draft the inscription on scrap paper first. This gives me a chance to practice the spelling and catch any wobbles before permanent ink hits the page.
| Method | Why It Works |
|---|---|
| Write a draft | Practice before committing |
| Spell it aloud | Hear the sounds clearly |
| Double-check details | Catch tricky letters |
For full name accuracy, I text or call the buyer to confirm the exact spelling. Multilingual names deserve special attention—I ask about diacritics and preferred spelling in their original language. That small effort demonstrates respect. Once I’ve got spelling confirmation locked in, I write the inscription with confidence, knowing I’ve nailed the recipient’s name perfectly.
Write Legibly So Your Words Last

Why does a beautiful inscription fade into illegibility? The answer’s simple: your pen choice and writing style matter hugely for long-term readability.
Your pen choice and writing style matter hugely for long-term readability—the answer to fading inscriptions is simpler than you think.
I’ve learned that great ink color makes a significant difference. Here’s what keeps your signature and inscription looking fresh for years:
- Use quick-drying ballpoint or fast-drying ink to prevent smearing
- Choose high-contrast colors like black, blue, or dark green
- Write in medium to large script with even letter spacing
- Avoid fancy cursive that becomes unreadable over time
- Skip busy backgrounds that compete with your ink color
Practice your inscription phrases beforehand so your legibility stays consistent. Medium-sized, clear handwriting outperforms elaborate flourishes every time. Your words deserve longevity that matches the book itself, creating a keepsake the recipient will value and actually read for decades.

Mr. Pen colored fineliners come in a vibrant 8-pack, each pen featuring a precise 0.5mm tip for detailed, fine line work.

Gel Pens: You will receive 6pc quick-drying ink pens with a modern minimalist design to suit your needs Daily use and replacement needs
Fashion & Practical Design: FIOVER 5pcs Gel Pens with sleek, stylish barrels give the pen a modern, professional look. This pen is a good tool for back-to-school supplies and a very nice pen for work, and everyday life
Practice Your Inscription on Scrap Paper First
Before you touch pen to that pristine book page, grab some scrap paper and do a test run. I’ve learned this the hard way after smudging gifts I’d worked hard on.
Start by drafting your inscription on sticky notes or regular paper. This gives you a chance to practice signing without pressure, and you’ll figure out what actually sounds good when written down. Test your pen’s ink flow on that same scrap material—ballpoint pens can be finicky, and you’ll want to know it works smoothly before committing.
Try different placements too. Should the inscription go on the title page or inside cover? Mock it up first. This way, your actual inscription comes out confident and polished, not shaky or covered in corrections.
Add a Date to Mark the Occasion

Adding a date to your inscription creates a record that lasts. When you include the date on a gift book, you’re establishing a marker that documents the moment of giving.
Consider these approaches when dating your inscriptions:
- Write the full date (month, day, year) for precision and clarity
- Place it strategically below your signature or on the same line to avoid crowding
- Add the occasion alongside the date for context
- Include the location if it’s significant to the gift-giving moment
- Use just the year if you prefer a cleaner, simpler look
Dating your inscription increases its value as a family heirloom. Future readers will know exactly when you gave this gift and why it mattered. That’s what makes gift-giving worth documenting.
Keep Your Hand Steady to Avoid Smudges

Once you’ve marked the date on your inscription, you’ll want to make sure your handwriting actually looks good—and that means keeping your pen steady so you don’t end up with smudges all over the page.
Here’s my go-to strategy: rest your writing hand flat on the table before you start. This simple move reduces hand tremor and keeps your pressure consistent, which makes a difference. I also practice short, steady strokes on scrap paper first—it’s like a warm-up before the real deal.
Grab a quality pen with a comfortable grip. Quick-drying ink minimizes smudging disasters. Finally, let that ink dry completely before closing the book. Your gift deserves great penmanship, and these techniques will get you there.
Let the Ink Dry Before Closing the Book

Patience is your hidden advantage here—rushing to close that book is basically asking for a smudged mess. I’ve learned that waiting for your signature to dry completely matters, especially with darker inks or glossy paper. You’ll want to give it time before you snap that cover shut.
Here’s what I do to speed things along without ruining the gift:
- Wait at least 30 seconds for ballpoint ink to set fully
- Use a blotting sheet to absorb excess ink gently
- Tap the page edge softly instead of pressing down hard
- Place protective sheets between pages when signing multiple spots
- Test your pen on scrap paper first to check drying time
This approach keeps your signature looking crisp and professional, and your recipient will appreciate the care you’ve taken.
Handle the Book With Care During the Process

Your hands play a critical role during this signing process, so treat the book with appropriate care. I keep one hand steadying the cover while the other rests on the page—this prevents unwanted dents or smudges that will damage the final product.
I always use a clean, flat surface as my signing area. This setup helps me avoid smears and keeps everything stable. Before I even touch the book, I wash my hands thoroughly and dry them completely. Damp fingers will cause ink to run and spread.
I also clear away pens, bookmarks, and clutter from my workspace. The fewer distractions nearby, the less likely something will accidentally damage those pristine pages. Opening the book gently matters too—I never force the spine beyond its natural range.