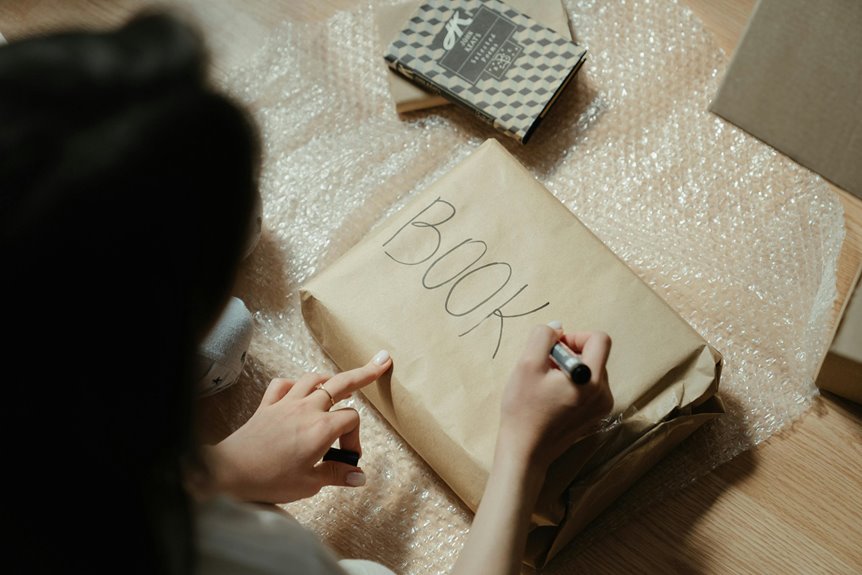
I’ve wrapped plenty of books that looked like they’d tumbled through a dryer, so here’s what works: gather quality paper, scissors, and tape that won’t leave marks. Measure and cut so paper covers three-quarters around your book. Position it horizontally, fold the left side first, then create triangular pockets on the right edge by folding top corners inward. Secure both sides with tape, wrap the bottom edges with crisp folds, punch holes along the pocket, and thread string through for a bow. Tuck a bookmark inside, and you’ve got a wrapped book that looks intentional. Want to master each technique?
Gather Supplies for Book Wrapping
Before you wrap that book, you’ll want to gather your materials—having everything ready makes the whole process smoother. Here’s what you need: a book (obviously), wrapping paper, scissors or a dedicated gift wrap cutter, and tape. The wrapping paper choice is fun because it sets the whole vibe. Grab kraft paper for that rustic, sophisticated look, or go with tissue and patterned options if you’re feeling festive. Scissors matter too—dull ones turn wrapping into a frustration. You’ll also want tape that sticks reliably without leaving marks. Optional decorations like ribbons and bows let you personalize things. Gathering everything first means you’re not hunting supplies mid-wrap, which keeps you focused and efficient.
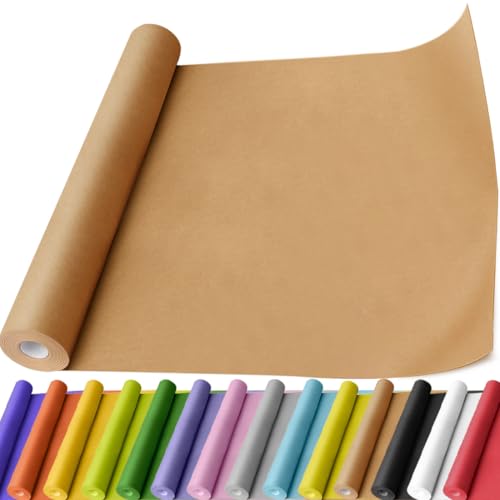
【HIGH-QUALITY NON-COATED CLASSIC KRAFT PAPER】Our kraft paper roll is made of natural, pure, virgin pulps, ensuring the highest quality. It is pliable, soft, and made from 100% recyclable material, which originates in Canada or Japan. The unwaxed and uncoated design allows for breathability, preventing moisture condensation. Moreover, it is made from natural and -safe materials.

【CLASSIC KRAFT PAPER】This solid kraft paper roll is a must-have paper roll item for packing, crating, shipping, moving, mailing, postal, parcel, sublimation printing, packaging fillers, table runner and floor coverings.

【PREMIUM NON-COATED CLASSIC BROWN PAPER】Dimensions: 17.5" x 1,200" (100 feet) with a thickness of 120μm. Our kraft paper roll is produced using natural, pure, virgin pulp, ensuring superior quality. It is both flexible and soft, made entirely from 100% recyclable materials originating from Canada. The unwaxed, uncoated design allows for excellent breathability, preventing moisture accumulation. Moreover, it is crafted from natural, child-safe materials.
Measure and Cut the Wrapping Paper
I’ll start by rolling out my wrapping paper and positioning the book horizontally so the paper covers about three-quarters of it, which gives me that extra inch at the bottom for wrapping the top. Next, I need to measure carefully and use my Little ELF Gift Wrap Cutter to make clean, straight cuts—no jagged edges allowed if I want this to look professional. Once I’ve trimmed any excess paper that’s four to five inches too long, I’ll verify there’s enough coverage above and below the book, then I’m ready to start folding those tricky sides.

Gift Wrapping Made Fun and Easy! - As Seen on Shark Tank, Little ELF Gift Wrap Cutter has revolutionized the gift wrap industry by making it easier for people to cut wrapping paper. Little ELF is a patented device that is the most efficient, safe, and easy tool for cutting wrapping paper.

Dual-Head Blade Design: Each wrapping paper cutter features dual-headed blades—two blades in one! Package Includes 2 cutters with a total of 4 blades, perfect for all your Christmas gift wrap and holiday packaging needs.

Left and Right Dual Blade Design: This 2-piece, 4-blade wrapping paper cutter features an upgraded dual blade design for both hands, making it easy for left- or right-handed users to cut gift wrapping paper effortlessly, speeding up the gift-wrapping process.
Determining Proper Paper Size
How much wrapping paper do you actually need? It’s simpler than you’d think. I place my book horizontally on the wrapping paper and make certain it covers about three quarters of the book’s length. I leave roughly one inch of extra paper at the bottom for proper folding, which prevents that awkward gap everyone dislikes.
To get this right, I roll out enough wrapping paper first, then use a ruler to cut a straight line parallel to the roll. This keeps my edges clean and professional-looking. I trim four to five inches beyond the needed length with a Little ELF Gift Wrap Cutter, removing excess waste. Getting the sizing just right means no crinkles, no shortcuts, and no frustrated wrestling matches during the actual wrapping.
Positioning The Book Correctly
Now that you’ve prepared your paper and book, position everything correctly before wrapping. Proper alignment makes the process smoother and less frustrating.
Here’s how to do it:
- Lay your wrapping paper flat on a clean surface with the grid side up
- Place your book horizontally, leaving about three quarters of the paper’s width uncovered
- Position the book toward the left edge, giving yourself plenty of paper on the right side for your pocket
- Position roughly one inch of wrapping paper to extend beyond the bottom edge
Use a light pencil line to keep everything straight and aligned. This setup provides a solid foundation for wrapping. You’re making good progress.
Making Clean, Straight Cuts
The most essential part of wrapping a book like a pro is getting your cuts straight, and that’s where the Little ELF Gift Wrap Cutter becomes your best friend. I line up the blade with the paper edge, then press forward for a clean cut that’d make any wrapper proud. The key? I guide my cutter along the ruler or grid underside during each pass, keeping everything aligned and even. After cutting, I trim any excess paper that’s four to five inches too long. This prevents those bulky, awkward edges when I’m folding later. Before I move forward with wrapping, I always verify my cut edges are perfectly even. Taking time here makes the whole project easier and far more satisfying.
Position the Book and Fold the Left Side

Laying your book flat on the wrapping paper is where you begin. Here’s what to do:
- Center your book so it sits comfortably with wrapping paper extending three-quarters around it
- Check that you have about one inch of extra paper at the bottom for overlap
- Fold the left side of wrapping paper over your book’s edge as your initial wrap
- Check that the paper reaches adequately to cover the top and left side for pocket formation
Now fold that left side over smoothly. You’re creating the foundation for everything that comes next. The paper should lie flat without wrinkles or bunching. This first fold sets the tone for a professional-looking package. Keep that momentum going as you prepare for the remaining folds ahead.

INVISIBLE TAPE: 3 rolls of Scotch Magic Tape with dispenser mends rips and tears acquired during the holidays securely, permanently and invisibly

16 Rolls Clear Tape for Gift Wrapping: Includes 16 rolls transparent tape refills rolls, gift tape enough to meet your needs like sealing, wrapping, mending and DIY. office tapes bulk for wrapping gifts, desk supplies, home, school.
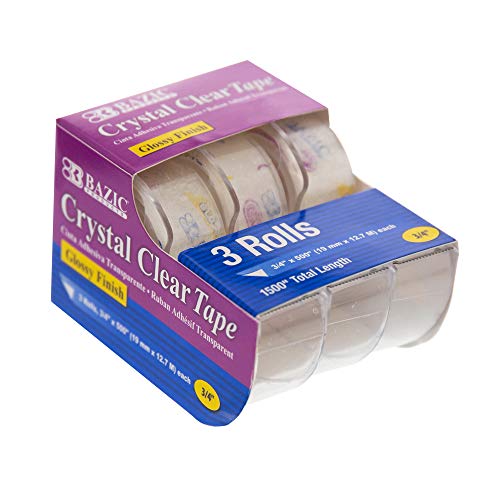
Crystal clear tape - 3 glossy-finish rolls in 0.75" x 250" for gift wrap, paper repairs, and display work
Create Triangular Pockets on the Right Edge
Now I’ll show you how to fold those corner triangles and lock them down tight. First, fold your top right corner inward to make a triangle, then pull the center of the paper toward the bottom corner to create a second triangle—crisp creases are your friend here, so use your fingernail or a blunt edge to press firmly along each fold. Once you’ve got those triangles looking sharp, fold the top triangle over the book’s spine and secure everything with tape so your pockets stay put and your wrapping job looks polished.

Durable And Long-Lasting Material: crafted from high-quality metal with a rust-resistant and corrosion-proof finish, these corner protectors ensure durability and preserve their elegant appearance over time.

15 Styles Available: package includes 60 pcs metal corner protectors in 15 styles, each style 4 pcs can meet your different DIY needs.

WHAT’S INCLUDED:This book corner protector is made of metal and contains 80 pieces in 4 styles, each with 20 pieces. Sturdy and durable, it protects the corners of books from being easily damaged.
Folding Technique for Corners
How do you keep wrapping paper from sliding around on your book’s edges? I’ll show you my folding corners technique for creating those triangular pockets.
Here’s what I do:
- Fold the top edge over to form a triangle sitting snugly on the book’s corner
- Pull the center toward the bottom corner, shaping a smaller triangle underneath
- Fold that top triangle over the book and crease it neatly against the cover edge
- Repeat on the opposite end for mirror-image pockets
The trick is maintaining consistent pressure along all your folds. You’re building pockets that’ll grip your book without tearing the paper. I turn the book over afterward to check my work, verifying everything aligns perfectly on the right edge. These clean, flat surfaces are ready for tape, and I know I’ve achieved the professional look.
Securing Pocket Flaps Properly
Once you’ve got those triangular folds shaped on your book’s right edge, it’s time to make sure they actually stay put. I fold the triangle pocket firmly and crease that edge—seriously, don’t skip this step. When you flip your book over, you’ll see the pocket opening on the right side. Now here’s the important part: securing flaps keeps everything locked down. I use clear tape along the triangle’s folded edge, pressing it flat against the book cover so nothing shifts during handling. This triangle pocket won’t budge once taped. If you’re feeling ambitious and want matching pockets on both sides, repeat the process on the left edge. Either way, your wrapped gift stays perfectly neat and secure.
Fold and Secure the Top Triangle
- Fold the paper edge down over the book so a triangular flap sits perfectly at the outer corner
- Create sharp, defined edges by creasing the triangle firmly into place
- Repeat the same folding process on the opposite end to mirror that professional finish
- Secure the top triangle with tape along the folded edge to prevent unraveling
The key is pressing those creases hard. They’re what holds everything together and keeps your wrapping from looking sad and droopy.


Discover the perfect blend of elegance and charm with our enchanting pink bookmark. This delicate accessory adds a touch of soft color and sophisticated style to your reading routine, making it an ideal gift for any book-loving woman who appreciates beautiful details

CLASSIC DESIGN: This bookmark features a timeless bow design, simple yet elegant, with a pink white blue color that adds a touch of romance to your books, making it an ideal choice for book lovers and craft enthusiasts
Mirror the Pocket Fold on the Left Side

Now I’ll create matching triangle folds on the left side to keep things balanced and professional-looking. You’ll fold the paper into a triangle just like you did on the right, then press that crease hard so it stays put and looks sharp. Once that triangle’s formed, I’ll tape it down to secure the pocket, and you’ll have yourself a wrapped book with a polished appearance.

【HIGH-QUALITY NON-COATED CLASSIC KRAFT PAPER】Our kraft paper roll is made of natural, pure, virgin pulps, ensuring the highest quality. It is pliable, soft, and made from 100% recyclable material, which originates in Canada or Japan. The unwaxed and uncoated design allows for breathability, preventing moisture condensation. Moreover, it is made from natural and child-safe materials.

Perfect Size: Each roll measures 17 inches wide x 9.8 feet long, which provides you with a total of 13.95 square feet of paper. It's perfect for any small sized gift and is also very convenient to store.

Perfect Size: Each roll measures 17 inch wide x 33 feet long. Providing you with a total of 46.5 square feet of paper, perfect for any Small or Medium sized gift.
Creating Symmetrical Triangle Folds
Want to know how to create a wrapped book that looks professionally balanced? Creating symmetrical triangle folds is the foundation of polished gift wrapping. I’ll walk you through achieving perfect folding and symmetry for your wrapped books.
Here’s what I do:
- Fold the left flap toward the bottom edge, forming a sharp triangle that mirrors the right side
- Match the triangle’s base exactly to the book’s edge, ensuring equal distances from the spine
- Crease firmly along diagonal folds to establish a stable pocket that matches the right side
- Collapse the triangle by folding the top edge over and pressing it down securely
When you close the wrap and check your work, both triangular pockets should be identical in size and angle. That’s when you’ll know the technique is working correctly. Your wrapped book now displays professional symmetry that demonstrates attention to detail.
Securing The Left-Side Pocket
Why does the left side always seem trickier than the right? I’ll tell you—securing that left pocket requires precision. Once your triangles are folded inward and the pocket sits flat against your book’s surface, it’s time for securing tape. Grab your tape and run a strip along the edge where that final flap meets the pocket. Press firmly so it holds tight and won’t unravel during handling. The securing tape acts like your wrap’s insurance policy, keeping everything locked in place. Make sure you’ve covered the entire seam for maximum hold. Now flip your book and repeat this process on the right side, mirroring what you’ve done on the left. Your book’s edges should match perfectly, creating a professional, polished finish.
Wrap and Secure the Bottom Edges

Ever notice how the bottom of a wrapped book can make or break the whole look? I’m here to show you how to nail this final step.
The wrapping paper at your book’s bottom needs careful attention. Here’s what I do:
- Measure about one inch of extra paper beyond the book’s bottom edge
- Fold that bottom paper up and crease firmly for a neat edge
- Create two triangles by pulling the center toward each bottom corner
- Fold the bottom edge over and secure everything with tape
This technique creates a flat, stable base that looks professionally done. The bottom edges stay crisp and clean, no wrinkles or loose spots. You’ll feel satisfied seeing your wrapped book sit perfectly on a shelf, joining the ranks of truly polished gift-givers.

Replaceable blade cutter : Patented wrapping paper cutter with 3 pieces replaceable blade assembly set,easy blade replacement keeps blades sharp at all times.Easy hold the handle cutting straightly and neat.Easy cut gift wrapping paper like black & kraft wrapping paper for wedding and christmas.

Replaceable blade cutter - PERFYCUT patented wrapping paper cutter with 3 replaceable blade kit.Keep neat cut every time.Wrapping paper cutter with handle more easier to use.

【Simple Operation】:The handle of the wrapping paper cutter is ergonomically designed, and the streamlined curve fits your palm and is easy to control. You only need to hold the handle to smoothly cut the size and graphics you need.
Punch Holes for Threading String
Now that your book’s wrapped beautifully, it’s time to add string. I’ll grab my hole punch and create an even number of holes along the pocket’s edge—symmetry matters here for that polished look we’re after.
I space each hole consistently, about 1/4 to 1/2 inch apart, so threading string flows smoothly. This spacing works well when you’re weaving twine through.
Here’s the threading part: I pass the string from bottom to top through each hole in one go, then return through those same holes to form a clean loop. It’s a straightforward process.
Finally, I tie a bow at the top to secure everything and add a decorative touch. A quick trim of excess thread prevents unraveling, leaving you with a professional-looking wrapped book.


Nearly Invisible on Wrap: Unique satin finish disappears on most gift wrap paper, giving presents a neat, seamless look without the shiny tape appearance.
Thread and Tie the Finishing Bow

With your wrapped book looking sharp and those holes punched just right, you’re ready for the string work that’ll really make it shine. Threading and tying your finishing bow adds a polished touch to your gift wrap.
Here’s how I do it:
- Thread your string through the first hole, pulling it taut but not tight
- Weave the string through each punched hole in a crisscross pattern for visual interest
- Bring both string ends together at the center, keeping them even lengths
- Tie a great bow, making loops that sit flat and symmetrical
The finishing bow is your chance to show off. I like using contrasting colors that pop against the paper. Adjust your loops until they look balanced and professional. That bow is the final detail that signals to your reader that you put care into this gift.

Durable Protection - Our metal book corners are crafted from premium iron, ensuring robust durability and impact resistance to effectively safeguard your books and albums;

Lovely Size: 0.87*0.87*0.12inch / 2.2*2.2*0.25cm(Three edges), Color: Gold, Silver, Rose Gold, Antique Bronze. The package includes 100 Pcs book corners (each color 25 pcs).
Package Includes: 150 pcs iron corner protectors, can meet your different DIY needs. All book corners are packed in a clear plastic container box for easy storage.
Tuck a Surprise Inside the Pocket

Want to turn your wrapped book into an interactive gift? I love adding personal touches inside the pocket you’ve created. A bookmark is a solid choice, especially if you pick one that matches the book’s theme. Handwritten notes work great too—they add a personal connection your recipient will value.
Small stickers, pressed flowers, or a gift card slip fit perfectly in the pocket without adding bulk. Once you’ve tucked your surprise inside, secure everything with tape along the pocket’s edges. You can also tie twine or ribbon around the entire package for extra flair and security.
This finishing step elevates your wrapped book from basic to something worth noting. Your attention to these little details makes the unwrapping experience special and enjoyable.

Package includes 170 pcs 17colors pull bows(each per has 10pcs)

Abundant quantity and colors: come with 20 pieces cute yet beautiful gift wrapping bows, attractive color is provided, enough quantity for you to decorate your gifts or wedding items

50PCS Christmas Mini Bows The mini bows set includes 50 small Christmas bows in the classic Christmas colors: red, green, gold, silver, and white, with 10 bows in each color. With sufficient quantity, you will have enough bows to add Christmas atmosphere to your crafts, perfect for making Christmas cards, Christmas tree decorations, gift wrapping and more.