
Getting that perfectly tucked shirt look doesn’t have to be a daily struggle. We’ve all been there – starting the day with a crisp, tucked-in shirt only to find it bunched up, pulling awkwardly, or creating unflattering bulges by lunchtime. The truth is, most women simply weren’t taught the right techniques for achieving that polished, professional appearance that lasts all day.
Whether you’re heading to the office, attending a formal event, or just want to elevate your everyday style, mastering the art of shirt tucking can transform your entire look. We’re about to share the game-changing methods that fashion insiders use to create that effortlessly chic silhouette you see on style icons and in magazines.
From choosing the right shirt styles to learning exact tucking techniques that work with your body type, we’ll walk you through everything you need to know. Say goodbye to constant readjusting and hello to confidence that lasts from morning to night.
Choose the Right Shirt Style for Tucking
Selecting the perfect shirt style makes all the difference in achieving a clean, professional tuck. We’ll explore the key characteristics that determine whether a shirt works well for tucking.

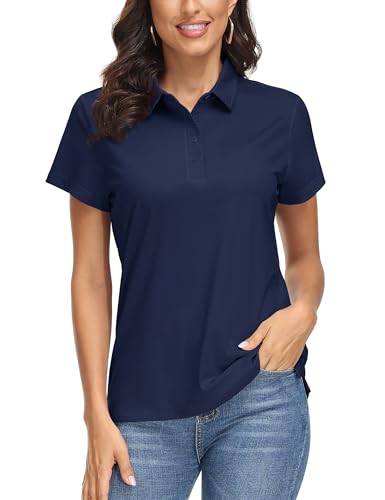
WRINKLE-FREE WORK ESSENTIAL: Smooth, wrinkle-resistant fabric turns this classic button down shirts style blouse into an easy work staple, keeping you polished from commute to dinner with no ironing.

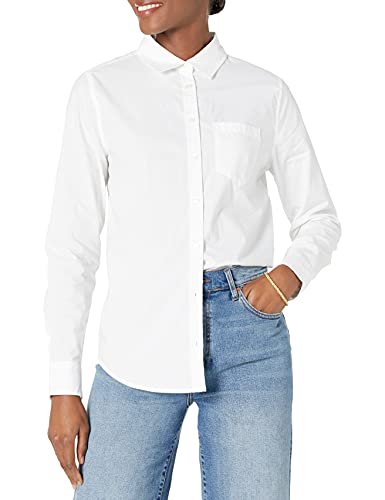
<p>CLASSIC PURE COLOR OXFORD SHIRT: Our work shirts for women are made from cotton and polyester for maximum comfort.lapel womens dress shirts will allow you to stay comfortable for all day long. Say goodbye to stiff, scratchy fabrics at work. Perfectly paired with a dress, jeans, shorts, and sandals for a decent look.</p>

Hidden Buttons : Womens hidden buttons shirts not only provide a clean appearance but also ensure no discomfort or snagging during wear, offering a seamless and comfortable experience
Fitted vs. Loose-Fitting Shirts
Fitted shirts offer superior tucking performance compared to their loose counterparts. We recommend choosing shirts with a customized silhouette that follows your natural waistline without being overly tight. These styles create smooth lines under pants or skirts and resist bunching throughout the day.
Structured shirts with princess seams or side darts work exceptionally well for tucking. They provide shape without excess fabric while maintaining comfort during movement. We’ve found that shirts with stretch materials offer the best combination of fit and flexibility for active lifestyles.
Loose fitting shirts require special consideration when tucking. While they’re comfortable, they often create unwanted bulk around your midsection. We suggest avoiding extremely oversized styles unless you’re planning to use advanced tucking techniques like the half tuck method.
Shirt Length Considerations
Proper shirt length determines the success of your tucking efforts. We measure optimal length by extending our arms overhead and checking if the shirt stays tucked. Shirts should reach approximately 4 to 6 inches below your natural waistline for secure tucking.
Hip length shirts provide the most reliable tucking foundation. They offer enough fabric to stay in place during daily activities while preventing the dreaded shirt tail gap. We prefer this length for office wear and formal occasions where maintaining a polished appearance matters most.
Cropped shirts work best for high waisted bottoms. They eliminate excess fabric that can create bulk when tucked into pants or skirts with higher waistlines. We recommend this length for casual tucking styles and fashion forward looks.
Fabric Weight and Drape
Medium weight fabrics deliver the ideal balance for tucking success. We choose cotton blends, ponte knits, and structured polyester materials that hold their shape without being too thick. These fabrics resist wrinkles while providing enough body to create clean lines.
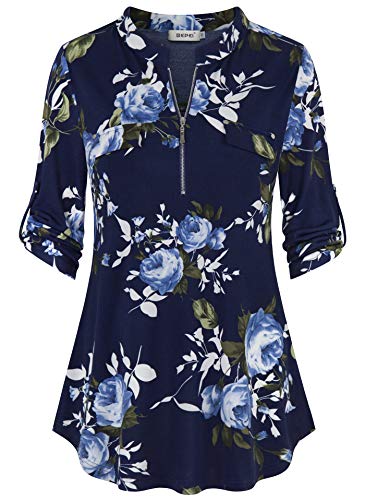
Lightweight fabrics like silk and chiffon require careful handling when tucking. They tend to shift and wrinkle easily but can create elegant looks when properly secured. We suggest using these fabrics for partial tucks or special occasion styling where frequent adjustments are manageable.
Heavy fabrics such as thick cotton and wool can overwhelm your silhouette when tucked. They add unnecessary bulk and may cause discomfort throughout the day. We reserve these materials for untucked styling or strategic half tuck techniques that showcase the fabric’s natural drape.
Master the Classic Full Tuck Method

We’ll walk you through the foundational technique that forms the backbone of professional shirt tucking for women. This method creates a clean silhouette that works perfectly with fitted bottoms and provides all-day security.

MATERIAL:89% Polyester & 11% Spandex, Silky-soft, Lightweight, Breathable, Comfortable And Stretchy

【Comfy & Breathable Fabric】Women's short sleeve polo shirt is made of Soft and breathable fabric which can wicks moisture away from your skin, breathes freely and dries quickly for cool comfort
Step-by-Step Tucking Process
Start by putting on your shirt while leaving it completely untucked. Button the shirt fully and ensure the collar lies flat against your neck. Pull the fabric taut at your waistline to eliminate any loose material around your torso.
Grab the shirt material at both side seams simultaneously. Hold the fabric between your thumbs and forefingers about 2 inches below your natural waistline. This grip position gives you maximum control during the tucking process.
Insert the shirt fabric straight down into your pants or skirt. Push the material down using both hands in one smooth motion until you reach the bottom of your waistband. Avoid twisting or bunching the fabric as you guide it downward.
Work your way around your entire waistline systematically. Move from the side seams to the back center seam, then to the front center. Tuck each section completely before moving to the next area to maintain even distribution.
Pull your pants or skirt up to your natural waist position. Fasten your bottoms securely while keeping the shirt material pressed down inside the waistband. This final step locks the tuck in place for extended wear.
Smoothing Out Wrinkles and Bunching
Run your hands along the outside of your waistband to identify problem areas. Feel for bunched fabric or lumps that create an uneven appearance through your clothing. These bumps typically occur at the side seams and back waistline.
Reach inside your waistband to redistribute excess fabric. Gently pull any bunched material toward your back where it’s less visible. Spread the fabric evenly around your waistline rather than allowing it to accumulate in one spot.
Use the mirror check method to assess your silhouette from multiple angles. Turn sideways to examine your profile and ensure no fabric creates bulk at your hipline. The tucked shirt should create a smooth line from your bust to your waist.
Perform gentle tugging motions on the shirt’s front panels. Pull the fabric slightly away from your body and let it settle naturally against your torso. This technique eliminates tension wrinkles while maintaining the secure tuck.
Adjusting for Different Body Types
Apple body shapes benefit from looser tucking at the front waistline. Allow slightly more fabric to drape over your midsection while keeping the sides and back firmly tucked. This approach creates a flattering silhouette without emphasizing your middle section.
Pear body types should focus on creating volume in the upper body area. Tuck your shirt more snugly around your waist to highlight your narrowest point. Keep the hip area smooth to balance your proportions effectively.
Hourglass figures can embrace the full tuck method completely. Pull the shirt fabric taut at your natural waistline to showcase your curves. This body type handles the classic tuck beautifully without requiring special modifications.
Athletic builds work best with strategic fabric placement around the waist. Create subtle curves by allowing minimal blousing above your waistband. Tuck the shirt securely while leaving just enough fabric to soften your straight silhouette.
Plus-size women should prioritize comfort while maintaining a polished appearance. Choose a tucking depth that feels secure without creating uncomfortable pressure. Focus on achieving a smooth line rather than an extremely tight tuck that might cause discomfort throughout the day.
Perfect the French Tuck Technique

The French tuck offers a relaxed alternative to the classic full tuck while maintaining a polished appearance. This effortless styling method creates visual interest through strategic partial tucking that works across various body types.

FLATTERING Y-NECK DESIGN WITH CONTRAST STITCHING - Our scrub top for women features a Y-neckline accented with bold triple stitching & two roomy patch pockets a stylish twist on classic scrub tops that combines utility and modern.

Just The Tip I Promise Darts Player Funny Sexy Pinup Girl Vintage design Sports. Retro graphic showing dartboard or dart board and target for men, women, dart throwers, darts players or dartists who love dart-throwing sport or target sport.

Show how you love darts-throwing with this dartboard in pulse line artwork. Perfect for professional dartist dad, mom, father, mother, husband, wife, uncle, aunt, brother or sister. Funny style for darts enthusiast him, her, grandpa, grandma or nana.
Partial Front Tuck Execution
Start by selecting the center front portion of your shirt that measures approximately 3 to 4 inches wide. Position your hands at the natural waistline and gather this central section between your fingers.
Insert only the gathered front section into the waistband of your bottoms while leaving the sides completely untucked. The key lies in tucking just enough fabric to create a defined waistline without overwhelming your silhouette.
Smooth the tucked portion downward to eliminate any bunching or puckering around the waistband area. Adjust the depth by pulling the fabric slightly upward if you’ve tucked too much material.
Check the side sections to ensure they hang naturally at hip level without appearing too long or unbalanced. The untucked portions should create a relaxed drape that complements your body’s natural curves.
Creating the Right Amount of Casual Volume
Aim for subtle volume rather than excessive bulk when executing the French tuck technique. The untucked sections should create gentle movement without adding unnecessary width to your frame.
Pull the side sections slightly away from your body to achieve the perfect amount of casual drape. This prevents the shirt from clinging too closely while maintaining a flattering silhouette.
Adjust the length of the untucked portions based on your torso proportions and personal preference. Most women find that letting the sides fall to mid hip level creates the most balanced appearance.
Consider your shirt’s fabric weight when determining volume levels since heavier materials naturally create more bulk than lightweight options. Cotton blends and silk shirts typically work best for achieving that effortless French tuck look.
Best Occasions for the French Tuck
Weekend casual outings represent the perfect opportunity to showcase your French tuck skills with jeans, shorts, or casual skirts. This styling method works exceptionally well for brunch dates, shopping trips, and relaxed social gatherings.
Business casual environments welcome the French tuck when paired with customized trousers or midi skirts. The technique strikes an ideal balance between professional polish and approachable style for office settings.
Date nights and social events benefit from the French tuck’s effortless sophistication when you want to look put together without appearing overly formal. Pair this technique with statement accessories to elevate your overall look.
Travel and vacation styling makes the French tuck invaluable since it creates visual interest while remaining comfortable throughout long days of sightseeing or activities. The technique works equally well with dressy shorts, flowing pants, or casual skirts.
Execute the Side Tuck for Asymmetrical Style

The side tuck offers a trendy alternative that creates visual interest through intentional asymmetry. This technique works exceptionally well for casual and semi-casual occasions when you want to add modern flair to your outfit.

Size:XS(US 0-2),S(US 4-6),M(US 8-10),L(US 12-14),XL(US 16-18),XXL(US 20),3XL(US 22)

Elegant Dressy Casual Blouse For Women – Designed for modern women, this 3/4 sleeve ruffle bell blouse features a flattering V neck and flowy silhouette, making it a perfect business casual top for women, ideal for work, office, interviews, church and formal occasions
Material: 95% Polyester and 5% Spandex,this dressy blouses for women is lightweight,soft and comfy,will not cling your skin and make you feel breathable,a professional looking and trendy 3/4 sleeve top for you.
One-Side Tucking Method
Start by identifying which side feels most natural for your dominant hand and body position. We recommend choosing the right side for right-handed individuals as it allows easier adjustment throughout the day.
Gather approximately 4 to 6 inches of shirt fabric at your preferred side, creating a controlled bunch that sits just above your hip bone. Smooth the fabric downward to eliminate any visible wrinkles or bunching before tucking. Insert the gathered fabric into your waistband at a slight forward angle, ensuring the tuck sits about 2 inches forward from your side seam.
Pull the untucked side down gently to create a flattering drape that falls naturally over your hip. Adjust the tension by loosening or tightening the tucked portion until you achieve your desired silhouette. Check that the hemline creates a subtle curve rather than a harsh straight line across your torso.
Balancing Proportions
Create visual balance by considering your body’s natural proportions when executing the side tuck. Women with wider hips should tuck on their narrower side to draw attention upward and create a more balanced silhouette. Those with broader shoulders can tuck on either side but should ensure the drape doesn’t add bulk to their midsection.
Position the tuck at your natural waistline rather than at your hip to maintain proper proportions and avoid disrupting your body’s natural curves. The untucked portion should fall no lower than mid-thigh to prevent overwhelming your frame with excess fabric.
Adjust the amount of fabric you tuck based on your torso length and shirt style. Petite frames require less fabric manipulation, typically 3 to 4 inches, while taller women can handle 5 to 7 inches of gathered material without looking disproportionate.
Styling with Different Bottom Types
High-waisted jeans pair perfectly with the side tuck technique, as the elevated waistband provides ample space for secure tucking while creating an elongated leg line. Tuck into the front belt loop area and allow the fabric to cascade naturally over the opposite hip.
Skirts with defined waistbands work exceptionally well with asymmetrical tucking, particularly A-line and pencil styles that provide structure for the tuck. Wide-leg trousers benefit from a looser side tuck that doesn’t compete with the pants’ flowing silhouette.
Avoid pairing side tucks with low-rise bottoms, as insufficient waistband height makes it difficult to secure the fabric properly. Skinny jeans and leggings showcase the side tuck technique most effectively, as their fitted nature prevents the shirt from shifting throughout the day.
Try the Knot Tuck for a Trendy Look

The knot tuck transforms oversized shirts into stylish statement pieces while creating a flattering silhouette. We’ll show you how to master this popular technique that fashion bloggers and celebrities swear by.

Tummy Control & High Compression - This women's shapewear camisole provides firm compression to smooth the tummy, waist, abdomen, and back for a slimmer, more defined silhouette under clothes.

Sizing Tip for Best Results: Please check our size chart to find your match. Between sizes? Size up for a smooth, natural fit, or size down for enhanced shaping and a contoured look.

Elastic Closure: The pleated skirts for women are made of 100% Polyester. very comfortable to wear in fall and winter. The waist is designed with a highly elastic band with strong adjustment performance, no worry about strangulation of the waist, making beauty burden free
Gathering and Knotting Techniques
Gathering the right amount of fabric sets the foundation for a successful knot tuck. We recommend starting with 3 to 4 inches of shirt material at the center front or side seam, depending on your desired look. Pinch the fabric between your thumb and forefinger, then twist it slightly to create a natural gathering point.
Creating the perfect knot requires a simple over-under technique that holds securely without looking bulky. We twist the gathered fabric once and pull the end through the loop, similar to tying your shoelaces. Pull the knot tight enough to stay in place but loose enough to maintain a relaxed, effortless appearance.
Double-knotting works best for lightweight fabrics that tend to slip throughout the day. We secure the initial knot with a second smaller knot directly underneath, ensuring the tuck stays put during movement. Cotton blends and silk materials particularly benefit from this extra security measure.
Positioning for Flattering Results
Placement determines whether your knot tuck enhances or overwhelms your silhouette. We position front knots at the natural waistline or slightly below for the most flattering effect on all body types. Higher placements create a cropped look that works well with high-waisted bottoms.
Side knot positioning offers a more casual, asymmetrical style that flatters apple and pear-shaped figures. We place these knots at hip level on your smaller side to create visual balance and define the waistline. Left-side placement typically works better for most people due to natural body proportions.
Adjusting knot tightness creates different silhouette effects depending on your outfit goals. We recommend looser knots for relaxed weekend looks and tighter knots for more polished casual settings. The knot should feel secure without restricting your movement or creating uncomfortable tension.
Avoiding Common Knotting Mistakes
Over-gathering creates bulky knots that add unwanted volume to your midsection. We limit fabric gathering to no more than 4 inches to maintain a sleek appearance that complements rather than competes with your natural shape. Excessive fabric makes the knot look messy and unprofessional.
Knotting too high above the natural waistline shortens the torso and creates an unflattering proportion. We avoid placing knots above the rib cage, which can make you appear shorter and disrupt the natural flow of your outfit. Mid-torso placement works best for most body types.
Using the wrong fabric weight leads to knots that either won’t hold or look too prominent. We skip this technique with very thick materials like heavy flannel or chunky knits that create excessive bulk. Medium-weight cotton, linen blends, and lightweight denim work best for achieving that perfect knot tuck balance.
Select the Best Bottoms for Shirt Tucking

Choosing the right bottoms makes all the difference when creating a polished tucked shirt look. We’ve found that certain styles work better than others for maintaining that crisp, professional appearance throughout the day.

Stretch Fit Design: Enhance your style and comfort with our button down shirts for women featuring a stretch fit. The wrinkle-free, stretchy fabric keeps you polished and comfortable all day, whether at work or on the go
REGULAR FIT: Close but comfortable fit with easy movement

Stretch Fit Design: Our button down shirts for women short sleeve are designed with a stretchy fit that combines fashionability and functionality. High-quality stretch fabric, soft and breathable, not easy to wrinkle, make you feel comfortable all day long.
High-Waisted vs. Low-Rise Options
High-waisted bottoms offer the most secure foundation for shirt tucking. These styles create a natural anchor point that prevents shirts from pulling out during movement. We recommend choosing high-waisted pieces that sit at or above your natural waistline for maximum security.
Low-rise options present important challenges for effective shirt tucking. The shorter rise provides less fabric coverage, making it difficult to keep shirts properly positioned. We’ve noticed that shirts tend to bunch and pull out more frequently when paired with low-rise styles.
Waistband width affects tucking success significantly. Wide waistbands distribute fabric more evenly and create a smoother silhouette under fitted shirts. We prefer waistbands that measure at least 2 to 3 inches wide for optimal tucking results.
Skirt Styles That Work Best
A-line skirts complement tucked shirts beautifully across all body types. The fitted waist and gradual flare create a balanced silhouette that accommodates different shirt styles. We find that A-line skirts work particularly well with both full tucks and French tucks.
Pencil skirts create the most streamlined look with tucked blouses. The fitted design eliminates excess fabric bulk and maintains clean lines from waist to hem. We recommend choosing pencil skirts with a slight stretch for comfort and ease of movement.
Circle and fit-and-flare skirts offer versatility for casual tucked looks. These styles provide more room for fabric drape while still maintaining structure at the waistline. We suggest pairing these skirts with lighter fabrics to avoid overwhelming the silhouette.
Mini and midi lengths work better than maxi skirts for tucking. Shorter lengths create better proportions and prevent the tucked shirt from getting lost in the overall look. We prefer midi lengths that hit at mid-calf for the most flattering proportion.
Pants and Jeans Considerations
Straight-leg and skinny jeans provide the cleanest tucked shirt appearance. These fitted styles minimize fabric bulk and create smooth lines that complement tucked blouses. We recommend choosing jeans with a slight stretch content for comfort and movement.
Wide-leg pants require careful consideration when tucking shirts. The voluminous leg shape can overwhelm a tucked top if not balanced properly. We suggest using a French tuck or partial tuck with wide-leg styles to maintain proportion.
Trouser styles with pleats can add unwanted bulk when tucking. Flat-front pants create cleaner lines and reduce fabric accumulation at the waistline. We prefer customized trousers with minimal detailing for the most polished tucked look.
Rise height significantly impacts comfort and appearance. Mid-rise to high-rise pants provide adequate coverage and support for tucked shirts. We recommend avoiding anything below a 9-inch rise for optimal tucking success.
| Bottom Type | Best Rise Height | Recommended Style | Tucking Method |
|---|---|---|---|
| Skinny Jeans | High-rise (10-12″) | Minimal stretch | Full tuck |
| Straight Pants | Mid to High-rise (9-11″) | Flat front | Full or French tuck |
| A-line Skirts | Natural waist | Structured waistband | Any method |
| Pencil Skirts | High-waisted | Stretch fabric | Full tuck |
| Wide-leg Pants | High-rise (11″+) | Minimal pleating | French tuck |
Use Strategic Layering with Tucked Shirts

Layering transforms a basic tucked shirt into a sophisticated ensemble while providing additional structure and style definition. Strategic layering helps secure your tuck throughout the day by creating natural barriers that prevent fabric from shifting.

Soft Material: TNNZEET long sleeve shirts for women are made of 92% polyester and 8% spandex stretch fabric. Casual, lightweight, and comfortable, perfect for everyday wear and a versatile staple for your capsule wardrobe


Size - XS=US(0-2),S=US(4-6), M=US(8-10), L=US(12-14), XL=US(16-18),XXL=US(20-22),choose your normal size,see details in rich description.
Adding Blazers and Cardigans
Blazers create the most polished layering foundation for tucked shirts in professional settings. Structured blazers with defined shoulders naturally hold tucked fabric in place while creating a streamlined silhouette. We recommend choosing blazers that hit at or just below the hip bone to maintain proper proportions with your tucked shirt.
Cardigans offer versatile layering options that work beautifully with both casual and business casual tucked looks. Open front cardigans create vertical lines that elongate the torso while allowing your tucked shirt to remain the focal point. Button front cardigans provide more coverage and structure, making them ideal for cooler weather when you need additional warmth without sacrificing your polished tuck.
Length considerations play a crucial role in successful blazer and cardigan layering. Cropped blazers that end at the natural waist highlight your tucked silhouette perfectly, while longer styles should extend no more than 4 inches below the waistline to avoid overwhelming your proportions. Waterfall cardigans create elegant draping that complements both full tucks and French tucks without adding bulk.
Belt Selection and Placement
Belt width significantly impacts how your layered tucked look appears and functions throughout the day. Medium width belts ranging from 1.5 to 2 inches provide optimal support for tucked shirts while remaining proportional to most body types. Wide belts exceeding 3 inches can overwhelm petite frames, while thin belts under 1 inch may not provide sufficient structure for thicker fabrics.
Placement positioning determines the success of your entire layered ensemble. We position belts at the natural waistline, approximately 2 inches above the hip bone, to create the most flattering silhouette with tucked shirts. This placement works seamlessly with blazers and cardigans while ensuring your tuck remains secure beneath layered pieces.
Material choices affect both comfort and style when layering over tucked shirts. Leather belts provide classic structure that pairs beautifully with blazers for professional settings, while fabric belts offer flexibility that works better under cardigans. Chain belts add metallic interest to casual layered looks, though they require careful positioning to avoid creating unwanted bulk over tucked fabric.
Creating Visual Interest with Layers
Color coordination between your tucked shirt and layering pieces creates cohesive outfits that appear intentionally styled. Monochromatic layering using different shades of the same color family elongates your silhouette while maintaining sophistication. Contrasting colors between your tucked shirt and outer layers create ever-changing visual separation that highlights your waistline definition.
Texture mixing adds depth and dimension to layered tucked shirt ensembles. Pairing smooth cotton shirts with textured blazers like tweed or bouclé creates tactile interest without overwhelming your silhouette. Silk blouses tucked beneath chunky knit cardigans provide beautiful contrast between sleek and cozy textures.
Proportion balancing ensures your layered look remains flattering rather than bulky. We recommend limiting layers to three pieces maximum when wearing tucked shirts to prevent excessive fabric buildup around your waistline. Fitted base layers work best under structured outer pieces, while slightly relaxed shirts can handle more fitted blazers or cardigans without creating unwanted tightness.
Avoid Common Shirt Tucking Mistakes

Even with proper techniques mastered, several tucking pitfalls can undermine your polished appearance. We’ll address the most frequent errors that prevent women from achieving that effortless tucked look.

FLATTERING Y-NECK DESIGN WITH CONTRAST STITCHING - Our scrub top for women features a Y-neckline accented with bold triple stitching & two roomy patch pockets a stylish twist on classic scrub tops that combines utility and modern.

Funny Darts Shirt, Teammate Carrying

DESIGN ON BACK - Funny Darts sport Game. Play 301 Leg 501 901 with steeldarts or softdarts double out or hit the bullseye or throw some triple treble 180 throws. American flag design.
Preventing Fabric Bunching
Excess fabric gathering at your waistline creates an unflattering silhouette that detracts from the clean lines you’re trying to achieve. Smooth out wrinkles before tucking by gently pulling the shirt taut around your torso, ensuring the fabric lies flat against your body. Pull the shirt down firmly after initial tucking to eliminate any puckering or gathering at the waistband area.
Avoid oversized shirts when attempting full tucks, as extra material inevitably leads to bunching regardless of your technique. Choose fitted or semi-fitted styles that provide enough fabric for secure tucking without overwhelming your frame with unnecessary bulk.
Tuck in sections rather than attempting to stuff all fabric in at once, working systematically around your waistline to distribute material evenly. Adjust gradually by lifting your arms and moving naturally to identify areas where bunching occurs, then smooth those spots before finalizing your look.
Maintaining the Tuck Throughout the Day
Select high-quality undergarments that provide a smooth foundation and prevent shirt fabric from sliding against slippery materials. Invest in shapewear or fitted camisoles when wearing lightweight shirts, as these create friction that helps maintain your tuck position throughout daily activities.
Check your tuck periodically during bathroom breaks or private moments, making minor adjustments before fabric shifts become noticeable. Avoid excessive stretching or reaching that can dislodge even well-executed tucks, and retuck discreetly when necessary.
Choose appropriate activities for your tucking style, recognizing that full tucks work better for desk jobs while partial tucks suit more active schedules. Plan strategic touch-ups during your day, knowing that some adjustment is normal and doesn’t indicate poor technique.
Choosing Inappropriate Shirt-Bottom Combinations
Pair lightweight fabrics only with high-waisted bottoms that provide sufficient grip and coverage for proper tucking support. Avoid low-rise jeans with full tucks, as they lack the waistband height needed to secure fabric and create unflattering muffin top effects.
Match shirt formality to your bottom choice, ensuring business shirts pair with customized pants rather than casual denim for professional settings. Consider proportions carefully when combining oversized shirts with wide-leg pants, as this combination can create overwhelming bulk that drowns your silhouette.
Skip sheer or see-through fabrics for tucking unless you’re layering appropriately, as these materials highlight bunching and create unflattering lines. Choose structured bottoms like pencil skirts or fitted trousers when working with delicate shirt fabrics that require extra support to maintain their shape.
Conclusion
Mastering the art of shirt tucking opens up endless styling possibilities while ensuring you look polished and put-together. We’ve equipped you with multiple techniques that cater to different occasions and personal preferences—from the timeless full tuck to the trendy side tuck and versatile French tuck.
The key lies in understanding your body type and selecting the right combination of shirt styles bottoms and accessories. Remember that practice makes perfect and these techniques become second nature once you’ve tried them a few times.
With these proven methods in your styling arsenal you’ll never have to worry about unflattering bunching or constant readjustments throughout your day. You’re now ready to confidently rock that perfectly tucked look whether you’re heading to the office or enjoying a casual weekend outing.

LIGHTWEIGHT TEXTURED FABRIC - Crafted from premium lightweight fabric with a subtle texture, blouse for women dressy casual feels soft, breathable, and airy against the skin. The fabric drapes smoothly without clinging and is fully opaque, so you can wear it with confidence—no see-through concerns.

Material:our tank tops is made of high quality knit soft fabrics, which are smooth, elastic and stretchable, flexible and breathable, comfortable to wear.

❤95% polyester fiber 5% spandex.A nice silky feeling against the your skin gently
Frequently Asked Questions

Smooth Material: 95%Polyester, 5%Spandex. High-quality satin material, soft, lightweight, breathable. When wearing these silk camisole tops for women, you will feel that the fabric is silky smooth and skin friendly

White and pink have full front lining. All other colors feature self-fabric shelf bra

Smooth Material: 95%Polyester, 5%Spandex. High-quality satin material, soft, lightweight, breathable. When wearing these silk camisole tops for women, you will feel that the fabric is silky smooth and skin friendly
What type of shirt works best for tucking?
Fitted shirts with a tailored silhouette work better than loose-fitting ones as they minimize bulk. Choose shirts that reach 4 to 6 inches below your natural waistline and are made from medium-weight fabrics. Avoid extremely lightweight or heavy fabrics that can complicate the tucking process and create unwanted bulk.
How do I do a classic full tuck properly?
Start by putting on your shirt and bottoms. Tuck the shirt evenly around your waist, smooth out any wrinkles, and ensure the fabric lies flat against your body. Adjust the tuck based on your body type – apple shapes should avoid tight tucks, while pear shapes can benefit from a snug fit around the waist.
What is the French tuck technique?
The French tuck involves partially tucking only the front portion of your shirt while leaving the back and sides loose. This creates a relaxed, polished look that defines your waistline without the formality of a full tuck. It works great for weekend outings and business casual settings.
When should I use the side tuck method?
The side tuck creates an asymmetrical, trendy look perfect for casual and semi-casual occasions. Tuck one side of your shirt while leaving the other loose. This technique works best with high-waisted bottoms like jeans or structured skirts and adds visual interest to simple outfits.
How do I create a knot tuck with oversized shirts?
Gather excess fabric from an oversized shirt at your natural waistline and tie it into a small knot. Position the knot slightly off-center for the most flattering look. This technique transforms baggy shirts into fitted, stylish pieces while creating a defined silhouette.
What bottoms work best with tucked shirts?
High-waisted bottoms provide the most secure foundation for tucking. Choose pants or skirts with wide waistbands for better fabric distribution. A-line and pencil skirts, straight-leg jeans, and skinny pants work exceptionally well. Avoid low-rise bottoms as they make tucking more difficult.
How can I prevent my tucked shirt from coming undone?
Select high-quality undergarments that provide a smooth base, choose properly fitted shirts, and tuck in sections rather than all at once. Plan for strategic touch-ups throughout the day and consider using shirt stays or tucking products for extra security during long wear.
What are common shirt tucking mistakes to avoid?
Avoid choosing shirts that are too loose, which creates bulk and bunching. Don’t tuck heavy fabrics into tight bottoms, and ensure you smooth out wrinkles before tucking. Also, avoid pairing inappropriate shirt-bottom combinations and neglecting to adjust your tuck for your specific body type.