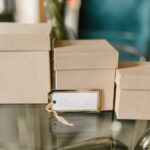
Creating beautiful gift boxes at home has never been easier with the right DIY templates and a few simple materials. We’ve all been there – rushing to find the perfect gift box at the last minute only to discover expensive options that don’t quite match our vision.
With our comprehensive guide to DIY gift box templates, you’ll discover how to create stunning custom boxes that’ll make your presents stand out from the crowd. Whether you’re preparing for birthdays, holidays, or special occasions, these templates offer endless possibilities for personalization and creativity.
The best part? Most templates require just basic supplies you likely already have: cardstock, scissors, glue, and a printer. We’ll show you step-by-step techniques that transform simple paper into professional-looking gift boxes that recipients will treasure almost as much as what’s inside.
Choose Your Perfect DIY Gift Box Template Style
Selecting the right template style transforms your handmade gift box from ordinary to extraordinary. We’ll explore three popular template styles that suit different gift types and occasions.

*FAWENUCY Metal Die Cut-Packed include 1 set Christmas snowmen, branches, stars, snowflakes, Santa Claus, dolls, lantern, tree, deer, flower dies, size detail on the picture


▶Color: Silver, Size: 15.5 * 14cm/6.1 *5.51inch(Approx). 3D Folding Gift boxes Metal Cutting Dies Paper Cards Cutting Dies Cut Stencils for DIY Embossing Card Making Book Tags Decorative Paper Dies Scrapbooking
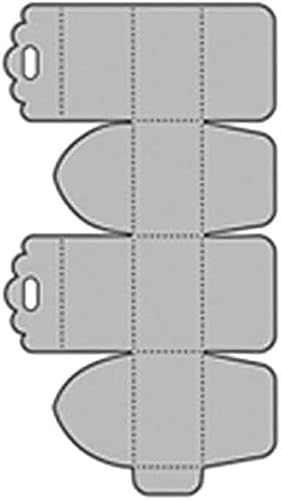
Square and Rectangular Templates
Square templates work perfectly for jewelry, small electronics, and compact items like watches or gift cards. These classic shapes offer maximum stability and stackability for storage. Rectangular boxes accommodate longer items such as books, picture frames, or clothing accessories with ease. We recommend using 200gsm cardstock for these templates to ensure durability without adding bulk.
Creating square boxes requires precise folding along the scored lines to achieve crisp corners. The assembly process involves folding four equal sides and securing them with adhesive tabs. Rectangular templates follow similar construction principles but allow for varied proportions to match your exact gift dimensions.
Pillow Box Templates
Pillow boxes create elegant curved packaging that’s ideal for small gifts, party favors, and delicate items like earrings or chocolates. These templates feature distinctive rounded ends that give them their characteristic pillow shape. Assembly requires careful curving of the cardstock along the natural grain direction.
We suggest using lighter weight paper (160-180gsm) for pillow boxes since the curved design requires more flexibility during construction. The unique shape eliminates the need for complex folding techniques while creating an upscale appearance. Pillow templates work exceptionally well for wedding favors, baby shower gifts, and promotional items.
Pyramid and Triangular Templates
Pyramid templates offer a striking geometric appearance that makes any gift feel special and unique. These templates work best for lightweight items such as candy, small toys, or gift certificates. The triangular construction creates natural handles when you add ribbon or twine through the top point.
Assembly involves folding three or four triangular sides together and securing them at the apex. We find that metallic or patterned cardstock enhances the dramatic effect of pyramid boxes. Triangular templates also include tent style boxes that stand upright and work well for displaying small items or creating party centerpieces.
Gather Essential Materials for Your DIY Gift Box Template

Before we start crafting our custom gift boxes, let’s collect the materials we’ll need for successful template construction.


Add the perfect finishing touch to products, gifts, and favors with printable tags that feature a charming scalloped design and come ready to use with strings included

Paper Selection and Weight Considerations
Cardstock serves as the foundation for durable gift boxes that won’t collapse under pressure. We recommend using 65-80 lb cardstock for standard gift boxes, which provides the perfect balance between flexibility and strength. Medium weight papers like 80-100 lb stock work exceptionally well for larger boxes that need extra stability.
Specialty papers offer unique textures and finishes that elevate your gift presentation. Kraft paper creates a rustic, eco-friendly appearance that’s perfect for handmade gifts. Metallic cardstock adds shimmer and sophistication to holiday presents. Patterned scrapbook paper brings color and personality to birthday gift boxes.
Paper thickness affects assembly techniques and the final appearance of your box. Thinner papers around 40-50 lb weight fold easily but may require reinforcement at stress points. Heavier papers above 100 lb provide maximum durability but need scoring tools for clean folds.
Basic Tools and Cutting Equipment
Precision cutting tools ensure clean edges and professional looking results in your finished boxes. We use create knives with replaceable blades for straight cuts and detailed work around tabs and fold lines. Sharp scissors work perfectly for curved cuts and quick trimming tasks.
Scoring tools create professional fold lines that prevent cracking and ensure crisp edges. Bone folders smooth down creases and eliminate air bubbles when gluing surfaces together. Metal rulers guide straight cuts and provide accurate measurements for template adjustments.
Adhesive options determine assembly speed and holding strength throughout the box construction process. Double sided tape offers quick application without drying time. Glue sticks provide repositionable adhesion during initial assembly. Create glue creates permanent bonds for long lasting gift boxes.
Optional Decorative Materials
Ribbon and twine add finishing touches that transform simple boxes into elegant gift presentations. Satin ribbon creates formal appearances suitable for wedding favors and special occasions. Natural twine provides rustic charm that complements kraft paper boxes perfectly.
Embellishments personalize gift boxes according to recipient preferences and seasonal themes. Stickers allow quick decoration without additional tools or drying time. Stamps with ink pads create custom patterns and messages on box surfaces. Washi tape adds colorful borders and geometric designs.
Hardware elements provide functional beauty that enhances both appearance and usability of finished boxes. Eyelets reinforce ribbon holes and prevent tearing during repeated use. Brads secure decorative elements while adding metallic accents to box corners and centers.
Download and Print Your DIY Gift Box Template

Getting your template ready is the first step to creating professional-looking gift boxes. We’ll walk you through finding quality templates and printing them perfectly.
3D Square Box Design: The delicate 3D square box can be used as a gift box, being carefully packed with precious cards, waiting for the moment when it is opened to surprise the recipient. It is like an emotional support, expressing the sender's good wishes to the recipient

❤Color&Size: Silver, 14.6 * 6.2cm/5.75 * 2.24inch(Approx). Square Gift Box Frame Metal Die Cuts Cutting Dies Paper Cards Cutting Dies Cut Stencils for DIY Embossing Card Making Book Tags Decorative Paper Dies Scrapbooking

Free Template Resources and Websites
Pinterest offers thousands of free DIY gift box templates that you can download instantly. We recommend searching for “printable gift box template PDF” to find the most print-ready options. Many creators share their designs with cutting lines and fold marks already included.
Canva provides customizable gift box templates that let you adjust colors and add personal text before downloading. The platform’s free tier includes basic templates while premium subscriptions unlock advanced designs and commercial use rights.
Template.net hosts over 500 gift box designs ranging from simple cube shapes to intricate hexagonal boxes. Their templates come in multiple formats including PDF and AI files for different software compatibility.
Craftsy and AllFreeCrafts feature seasonal collections that update throughout the year with holiday-themed templates. These sites often include step-by-step assembly instructions alongside the downloadable files.
Printing Tips for Best Results
Set your printer to “Actual Size” or 100% scale to ensure templates print at their intended dimensions. Many printers default to “Fit to Page” which can shrink or distort your template measurements.
Use the highest quality print settings available on your printer to achieve crisp fold lines and clear cutting marks. Draft or economy modes can result in blurry guidelines that make assembly difficult.
Print a test page on regular paper first to verify the template fits properly and all elements are visible. This saves expensive cardstock if adjustments are needed.
Check your printer’s margins before printing on cardstock to ensure no template edges get cut off. Most home printers require a quarter-inch border around all edges.
Clean your printer rollers regularly when working with thicker cardstock to prevent paper jams and ensure smooth feeding through the mechanism.
Sizing and Scaling Your Template
Measure your gift dimensions first to determine if template scaling is necessary. Add one inch to each dimension for comfortable fit and padding space inside the box.
Use percentage scaling for proportional adjustments rather than changing individual width or height measurements. This maintains the template’s structural integrity and fold ratios.
Adobe Reader’s print scaling options allow precise percentage adjustments from 25% to 400% of original size. We recommend staying between 75% and 125% for best results.
Test your scaled template with cardboard before cutting expensive materials to ensure proper proportions and structural stability at the new size.
Create sizing charts for common gift dimensions like standard book sizes, jewelry boxes, and small electronics to streamline future template selection and scaling decisions.
Cut and Score Your DIY Gift Box Template Accurately

Precision cutting and scoring transform your printed template into a professional-looking gift box. We’ll guide you through the essential techniques that ensure clean edges and perfect folds every time.

Alinacutle METAL DIE CUT - Including 2 size pillow box dies

ADD A CREATIVE TOUCH: Create beautiful box for gift wrapping measuring 5 x 5.45 inches (12.58 x 13.83 cm). Ideal for making cards, albums, envelopes, invitations, table decorations, or scrapbooking projects

Metal cutting molds can be designed according to your needs for all kinds of DIY decorations, photo scrapbook decorations, album decorations, greeting cards, invitations, DIY craft decorations. It can meet your needs of DIY crafts.
Proper Cutting Techniques
Sharp create knives create cleaner cuts than scissors for intricate template designs. Replace your blade frequently to maintain precision throughout the cutting process. Position your ruler firmly along straight lines and apply steady pressure while cutting through the cardstock.
Cutting mats protect your work surface and provide measurement guidelines for accuracy. We recommend using a self-healing cutting mat with grid lines to keep your cuts perfectly straight. Start each cut slightly before the marked line and extend slightly beyond to ensure complete separation.
Rotate your template instead of your cutting tool when handling curves and corners. This technique maintains better control over the blade angle and prevents accidental slips. Keep your non-cutting hand away from the blade path and use slow, deliberate movements around detailed areas.
Test cuts on cardstock scraps help you adjust pressure before cutting your actual template. Different cardstock weights require varying amounts of pressure to cut cleanly without tearing. Practice on the same weight paper you’re using for your gift box to perfect your technique.
Scoring Lines for Clean Folds
Scoring tools create precise fold lines that prevent cracking in heavier cardstock materials. We use bone folders or scoring wheels to indent the paper without cutting through it. Apply consistent pressure along the entire length of each fold line marked on your template.
Score on the inside of folds for clean exterior appearances on your finished gift box. This technique keeps the scored indentation hidden while creating sharp, professional-looking edges. Place your ruler along the fold line and run your scoring tool once with firm, even pressure.
Multiple light passes work better than one heavy score for thick cardstock above 80 lb weight. Heavy pressure can tear through the paper or create uneven fold lines that compromise your box structure. Build up the score gradually with 2-3 passes using moderate pressure.
Pre-folding scored lines before assembly ensures accurate alignment during construction. Gently fold each scored line in both directions to create a flexible crease. This preparation step makes the final assembly process smoother and prevents misaligned corners.
Using Templates for Multiple Boxes
Cardboard backing extends template lifespan when creating multiple identical gift boxes. Mount your paper template onto thin cardboard or chipboard using spray adhesive for durability. This reinforced template withstands repeated tracing and cutting without tearing or warping.
Tracing techniques speed up the process while maintaining accuracy across multiple boxes. Use a fine-tip pencil to trace around your template edges onto new cardstock sheets. Mark all fold lines and cut lines clearly before removing the template to avoid confusion.
Assembly line methods maximize efficiency when producing several boxes simultaneously. Complete all cutting for multiple templates first, then move to scoring all pieces, and finish with assembly. This approach reduces setup time and maintains consistent quality across all boxes.
Template storage in flat folders protects your patterns for future gift-giving occasions. Label each template with box dimensions and assembly notes for quick reference. Store templates between sheets of cardstock to prevent curling and damage from repeated handling.
Assemble Your DIY Gift Box Template Step by Step

Once we’ve cut and scored our template pieces, the assembly process transforms flat cardstock into beautiful three-dimensional gift boxes. Proper assembly techniques ensure our finished boxes maintain their shape and present gifts elegantly.

25 Black Shimmer pyramid shaped favor boxes and 1/8" wide black satin ribbon

This DIY party favor and décor kit was designed to help celebrate birthdays, anniversaries, babies firsts, graduations, and so much more!
Following Fold Lines Correctly
Valley folds create inward creases that form the interior angles of our gift box structure. We position the cardstock face down and fold along scored lines so the crease points away from us, creating a valley shape when viewed from the side.
Mountain folds bend outward to form the exterior corners and edges of our boxes. These folds require us to position the cardstock face up and fold so the crease points toward us, resembling a mountain peak from the side view.
Sequential folding prevents stress fractures in our cardstock material. We start with the longest fold lines first, then progress to shorter segments, working systematically around the template pattern.
Gentle pressure along each fold line ensures crisp edges without tearing delicate cardstock fibers. We use a bone folder or the back of a spoon to reinforce creases, applying consistent pressure from one end of the fold to the other.
Securing Edges and Flaps
Double-sided tape provides invisible adhesion for clean professional seams in our gift box construction. We apply thin strips along tab edges, ensuring coverage extends to within 2mm of tab borders for secure bonding without visible adhesive.
Glue dots offer precise adhesion points for small flaps and decorative elements on our DIY gift boxes. Each dot provides immediate tack while allowing slight repositioning during the first few seconds of application.
Liquid glue works best for larger surface areas where we need extended working time. We apply thin, even coats using small brushes or glue applicators, avoiding excess that might seep through cardstock fibers.
Pressure application activates adhesive bonds and ensures lasting connections between box components. We hold each joint for 15-20 seconds, applying firm even pressure to eliminate air bubbles and gaps.
Creating Professional-Looking Corners
Mitered corners eliminate bulky overlaps where multiple cardstock layers meet at box edges. We trim each corner tab at a 45-degree angle, leaving approximately 1mm of material to tuck beneath adjacent panels.
Corner reinforcement strengthens high-stress areas where box sides meet the bottom panel. We add small triangular cardstock pieces to interior corners, doubling the material thickness at these critical junction points.
Alignment precision ensures our gift box corners form perfect right angles for professional appearance. We use a quilting square or book corner as a guide, checking each assembly step to maintain geometric accuracy.
Edge burnishing creates sharp, defined corners that rival commercially manufactured boxes. We run a bone folder along completed corner seams with firm pressure, compressing fibers and creating crisp geometric lines.
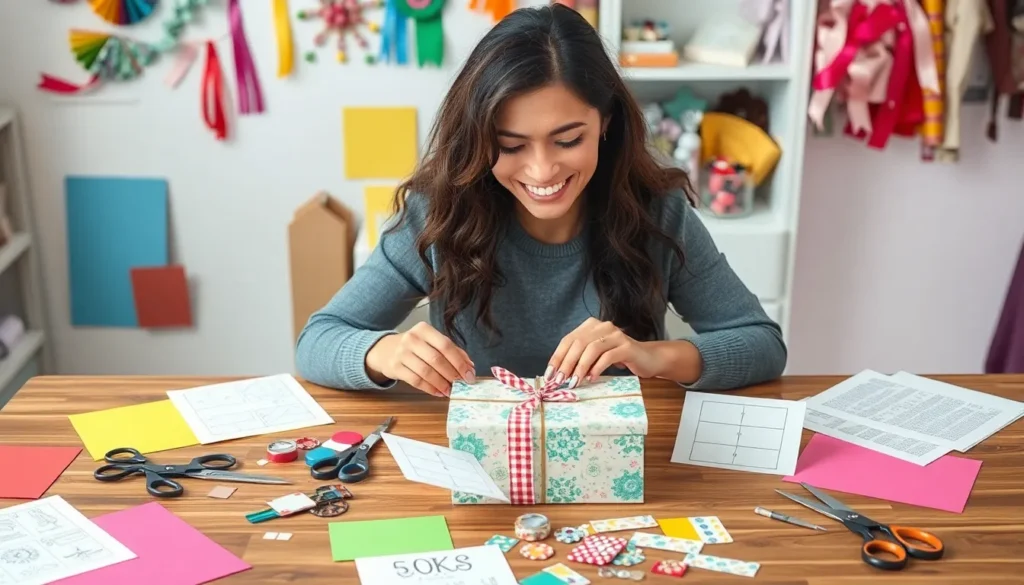
Customize Your DIY Gift Box Template Design

Transform your basic template into a personalized masterpiece by adding design elements that reflect your style and the recipient’s preferences. We can enhance any template with creative customization techniques that make each gift box truly unique.
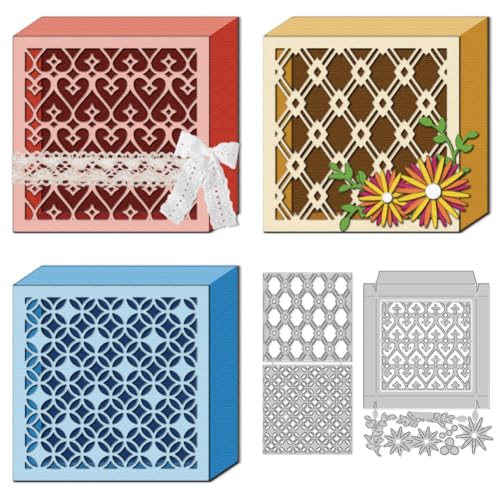
VERSATILE DESIGN: Perfect for creating custom gift boxes, cards, and scrapbook decorations with intricate patterns and detailed designs
Package Contents: you will receive 1 big DIY Christmas fireplace background banner in classic red brick fireplace design, 50 pieces of Christmas stocking cutouts in 10 patterns, 5 pieces for each pattern, and 15 pieces of gift box cutouts in 5 patterns, 3 pieces for each pattern, and equipped with 200 glue points, sufficient quantity and complete combination to meet your various decorative needs for Christmas

Versatile Die-Cutting Tool: This metal cutting die set allows you to create beautiful embossed gift boxes, perfect for DIY scrapbooking, card making, and other paper crafts.
Adding Personal Touches and Colors
Choose colors that complement your gift by selecting cardstock or paint that matches the recipient’s favorite hues or the item inside. We recommend using color theory principles to create harmonious combinations, such as pairing complementary colors like blue and orange or using analogous colors like purple and pink for a softer effect.
Apply custom lettering and names directly onto your template using calligraphy pens, vinyl letters, or hand drawn designs. We’ve found that metallic markers on darker cardstock create striking contrast, while embossed letters add tactile appeal to luxury presentations.
Create themed color schemes for exact recipients or occasions by researching their preferences beforehand. We suggest using photo editing software to test color combinations on your template before printing, ensuring the final result matches your vision perfectly.
Add decorative borders and frames around template edges using washi tape, painted designs, or printed borders from design software. We often layer different colored tapes to create geometric patterns that complement the box’s overall aesthetic.
Incorporating Patterns and Textures
Select patterned cardstock or scrapbook paper to replace plain template materials, choosing designs like florals, stripes, or geometric patterns that suit your gift’s theme. We recommend ensuring the pattern scale works well with your box dimensions, avoiding overly busy designs on smaller templates.
Create textured surfaces using embossing folders, stamps, or scoring tools to add dimensional interest to flat template surfaces. We’ve discovered that subtle textures like linen or canvas effects enhance the perceived quality of handmade boxes without overwhelming other design elements.
Layer different paper types such as vellum, tissue paper, or translucent materials over your base template to create depth and visual interest. We suggest using spray adhesive for even coverage when working with delicate overlay materials.
Apply fabric or ribbon accents to template surfaces before assembly, securing them with double sided tape or fabric glue for permanent attachment. We find that incorporating small fabric swatches that match the recipient’s home decor creates thoughtful, personalized touches.
Matching Box Design to Occasion
Research color psychology for exact celebrations to ensure your template design evokes the right emotional response, such as using warm reds and golds for Christmas or soft pastels for baby showers. We recommend creating a mood board with representative colors and patterns before finalizing your template customization.
Incorporate seasonal elements like autumn leaves for fall gifts, snowflakes for winter celebrations, or floral motifs for spring occasions using stamps, stencils, or printed overlays. We suggest scaling these elements appropriately to maintain the template’s structural integrity while adding thematic appeal.
Match formality levels by adjusting design complexity and color sophistication to suit the occasion, using minimalist designs for professional gifts and elaborate decorations for milestone celebrations. We’ve learned that elegant simplicity often creates more impact than overly complex designs.
Add occasion exact symbols such as hearts for Valentine’s Day, graduation caps for academic achievements, or wedding bells for matrimonial celebrations using die cuts, stencils, or hand drawn elements. We recommend positioning these symbols strategically to enhance rather than compete with the gift itself.
Troubleshoot Common DIY Gift Box Template Issues

Even experienced crafters encounter challenges when working with DIY gift box templates. We’ll help you resolve the most frequent problems that can compromise your finished boxes.

Create high-quality hanging tags from heavyweight, textured white cardstock that is acid-free to help preserve memories and come pre-punched for easy attachment (strings not included)

Horror collectible merchandise design. This Chucky Doll Box graphic design makes a killer gift for any nostalgic horror fan.

Voice Activated AI Interaction & Child-Safe & APP Custom Printing: This kids AI sticker printer adopts advanced high-precision AI voice recognition to accurately capture kids' commands and quickly turn creativity into stickers. The child-safe content filter strictly blocks inappropriate content for a healthy playing environment. The included thermal sticker paper is non-toxic and BPA-free, giving parents full peace of mind. Parents can customize printing settings and patterns via the APP, and built-in local templates support offline use for all scenarios
Fixing Misaligned Cuts
Misaligned cuts happen when your knife veers off the template lines, creating uneven edges that prevent proper assembly. We recommend using a metal ruler as a cutting guide to keep your create knife straight along marked lines. Sharp blades make clean cuts more easily, so replace dull blades before starting your project.
Template shifting during cutting causes the most alignment issues we see in DIY projects. Secure your template with removable tape or use quilting weights to hold it firmly in place. Check that your cutting mat provides adequate grip beneath the template to prevent slipping.
Measuring twice before cutting saves time and materials in the long run. We suggest marking critical fold lines with a pencil before cutting to ensure accuracy. Light scoring along fold lines before cutting helps maintain straight edges and prevents the create knife from wandering.
Solving Assembly Problems
Assembly problems typically stem from incorrect fold directions or insufficient scoring of crease lines. We always test fold our templates on scrap cardstock first to identify potential assembly issues. Valley folds should bend toward you while mountain folds bend away, creating the proper box structure.
Tabs that won’t align properly indicate measurement errors or cutting mistakes in earlier steps. Trim oversized tabs gradually until they fit snugly against their corresponding panels. We find that slightly undersized tabs work better than oversized ones for clean assembly.
Weak joints occur when adhesive doesn’t bond properly with your chosen cardstock weight. Heavier cardstock requires stronger adhesives like liquid glue or glue sticks rather than double sided tape. We recommend testing your adhesive on cardstock scraps before committing to your final assembly.
Box corners that won’t close properly usually result from inaccurate scoring or fold line placement. Re score problem areas with a bone folder or scoring tool to create deeper creases. Light sanding of thick cardstock edges can help stubborn corners fold more easily.
Preventing Template Tearing
Template tearing happens most often with lightweight paper or when scoring lines are too deep. We use 65 lb cardstock as our minimum weight to prevent accidental tears during assembly. Scoring should create a fold line without cutting completely through the paper fibers.
Excessive pressure when scoring causes tears that weaken your entire box structure. We recommend making multiple light passes with your scoring tool rather than one heavy pass. Test your scoring pressure on cardstock scraps to find the right technique for your exact paper weight.
Sharp creases require proper technique to avoid tearing delicate areas around tabs and corners. Hold the cardstock firmly while folding and use a bone folder to smooth creases without excessive force. We’ve found that working slowly prevents most tearing accidents during the folding process.
Humidity affects cardstock flexibility and can make templates more prone to tearing. Store your cardstock in a dry environment and allow it to acclimate to room temperature before cutting or folding. We keep silica gel packets with our cardstock supplies to maintain optimal moisture levels.
Store and Reuse Your DIY Gift Box Template

Preserving our carefully crafted templates ensures we can create beautiful gift boxes whenever we need them. Smart storage methods protect templates from damage while organizing them for quick access.

300 pcs 2 Inch square paper piecing quilting template

Metal Material: Craft cutting dies is made of good quality hard carbon steel, durable and strong for longtime use

Proper Template Storage Methods
Physical templates require protection from moisture, tears, and warping to maintain their accuracy. We recommend storing cardstock templates between acid-free tissue paper in flat file folders. Document storage boxes work perfectly for keeping multiple templates organized by size and style.
Laminating frequently used templates extends their lifespan significantly. Clear lamination sheets protect against wear while maintaining the template’s flexibility for tracing. We suggest using 3-mil lamination thickness for durability without excessive stiffness.
Digital backup copies serve as insurance against physical template loss. Scanning completed templates at 300 DPI resolution preserves all cutting and scoring lines for future printing. Cloud storage services like Google Drive or Dropbox ensure our templates remain accessible from any device.
Temperature controlled storage prevents cardstock warping and adhesive degradation. Room temperature environments between 65-75°F protect templates from expansion and contraction damage. Avoid storing templates in basements, attics, or garages where humidity fluctuates dramatically.
Creating Template Libraries
Organizing templates by occasion streamlines our gift box selection process. We create separate folders for holidays, birthdays, weddings, and general occasions. Color coding each category with sticky tabs provides instant visual identification.
Cataloging templates with detailed information saves time during project planning. Each template entry should include dimensions, recommended cardstock weight, and assembly difficulty level. Digital spreadsheets allow us to sort templates by multiple criteria quickly.
Photographing completed boxes alongside their templates creates visual references. These images help us remember how each template looks when assembled and decorated. We attach printed photos to template storage folders for easy comparison shopping.
Version tracking prevents confusion when we modify existing templates. Numbering each template iteration and noting changes made keeps our library current. Date stamps on template corners indicate the most recent version for accuracy.
Sharing Templates with Others
Digital sharing platforms make template distribution effortless for create groups and friends. PDF files preserve template accuracy across different devices and operating systems. We recommend uploading templates to shared folders on Google Drive or Dropbox for easy access.
Social media communities provide venues for template exchange and feedback. Facebook crafting groups and Pinterest boards showcase our designs while connecting us with fellow DIY enthusiasts. Instagram posts featuring completed boxes often generate requests for template sharing.
Create swaps allow us to trade templates for new designs and inspiration. Local crafting meetups provide opportunities to exchange physical templates and share assembly techniques. Online forums like Reddit’s crafting communities help virtual template exchanges.
Including assembly instructions with shared templates ensures successful results for recipients. Step by step photos or video links help others achieve professional looking boxes. We attach difficulty ratings and time estimates to help crafters select appropriate projects for their skill levels.
Conclusion
Creating DIY gift boxes transforms our approach to gift-giving by allowing us to create personalized packaging that’s both meaningful and cost-effective. We’ve covered everything from selecting the right materials and templates to mastering cutting techniques and troubleshooting common issues.
The beauty of DIY gift box templates lies in their versatility and reusability. Whether we’re preparing for holidays birthdays or special occasions we now have the skills to create professional-looking boxes that perfectly complement our thoughtful gifts.
With proper storage techniques and digital backups we can build a collection of templates that’ll serve us for years to come. We’re no longer limited by store-bought options or last-minute packaging dilemmas – we have the power to create stunning custom gift boxes whenever inspiration strikes.
Cutting dies for card making can be applied to a wide range of materials such as paper, felt, leather and fabric. Metal cutting dies can create beautiful and unique crafts....
Frequently Asked Questions
What materials do I need to make DIY gift boxes?
You’ll need cardstock (65-80 lb weight recommended), scissors or craft knife, cutting mat, ruler, scoring tool, and adhesive like double-sided tape or glue dots. Optional decorative materials include ribbons, twine, stamps, and embellishments to personalize your boxes.
Where can I find free DIY gift box templates?
Popular resources include Pinterest, Canva, Template.net, Craftsy, and AllFreeCrafts. These platforms offer a variety of free and customizable templates in different styles including square, rectangular, pillow box, and pyramid designs.
What’s the best cardstock weight for gift boxes?
Use 65-80 lb cardstock for standard gift boxes. This weight provides good durability while remaining easy to fold. For specialty looks, consider Kraft paper for rustic appeal or metallic cardstock for elegant presentations.
How do I print templates accurately?
Set your printer to “Actual Size” (not “Fit to Page”), use high-quality print settings, and check margins before printing. Always test print on regular paper first to ensure proper sizing before using your cardstock.
What’s the difference between valley and mountain folds?
Valley folds create creases that fold inward (toward you), while mountain folds create creases that fold away from you. Following the correct fold directions is essential for proper box assembly and preventing stress fractures.
How can I customize my gift boxes?
Add personal touches through color choices that reflect the recipient’s preferences, custom lettering, decorative borders, and patterned cardstock. Consider occasion-appropriate colors and seasonal elements to match the gifting purpose.
What should I do if my template tears while cutting?
Use appropriate cardstock weight and ensure your cutting tools are sharp. Score fold lines gently to avoid over-pressuring the paper. If tears occur, reinforce with tape on the back or start with a fresh template.
How do I store templates for future use?
Store flat templates in acid-free tissue paper within document storage boxes. For frequently used templates, consider laminating them for durability. Create digital backups and organize by occasion for easy access.
Can I resize templates for different gift sizes?
Yes, measure your gift first and make proportional adjustments to the template. Maintain the structural integrity by scaling all dimensions equally. Test with paper before cutting expensive cardstock.
What’s the best way to secure box edges?
Use double-sided tape for clean finishes, glue dots for temporary holds, or liquid glue for permanent bonds. Create mitered corners for professional appearance and reinforce high-stress areas for better durability.