
We’ve all been there – staring at a perfectly good shirt that’s just a bit too long or wanting to transform an old tee into a trendy cropped style. Learning how to crop a shirt isn’t just about following fashion trends; it’s about giving your wardrobe a fresh, personalized touch without spending a fortune on new clothes.
Whether you’re looking to breathe new life into an oversized band tee or create the perfect cropped look for layering, cropping shirts is easier than you might think. With the right tools and techniques, we can help you achieve professional-looking results from the comfort of your home.
The best part? You don’t need years of sewing experience to master this skill. We’ll walk you through everything from measuring and cutting to finishing techniques that’ll make your DIY crop top look store-bought. Ready to transform your closet one shirt at a time?
Gather Your Essential Shirt Cropping Supplies
Before we start transforming our shirts, we need to assemble the right tools that’ll make our cropping project smooth and professional-looking.

Longer cut ideal for patterns, seams or long swaths

Ultra Sharp Fabric Scissors: Wteehn sewing scissors for fabric cutting is made of high-quality galvanized manganese, exquisite hand-forged craftsmanship, high hardness, sharp, durable, rust-proof and not easy to deform, and can cleanly cut thick materials such as multi-layer fabrics and leather

SEWING & QUILTING STAPLE: 8" Knife-edge Serrated Shears are made of a knife-edge blade that enables it to cut multiple layers easily and a serrated blade that gently grips fabric to make a clean, precise cut through smooth, lightweight fabric
Sharp Fabric Scissors
Sharp fabric scissors are absolutely crucial for achieving clean, precise cuts on our shirt material. We recommend investing in high-quality fabric shears that measure 8 to 10 inches long, as these provide the best control and leverage for cutting through various fabric weights. Dull scissors will create jagged edges and can cause fabric to fray excessively, ruining the professional appearance we’re aiming for.
Quality fabric scissors like Gingher or Fiskars brand shears will slice through cotton, polyester blends, and even thicker materials like denim with minimal effort. We should reserve these scissors exclusively for fabric use since cutting paper or other materials will dull the blades quickly.
Measuring Tape or Ruler
Measuring tape helps us achieve consistent crop lengths and ensures our cuts remain straight across the shirt’s width. We prefer flexible measuring tapes over rigid rulers because they conform to the shirt’s curves and allow us to measure around the body for a perfect fit. A standard 60-inch measuring tape provides enough length for most shirt cropping projects.
Clear rulers work well for shorter measurements and creating straight cutting lines. We often use 18-inch clear quilting rulers because they’re transparent, making it easy to see fabric patterns underneath while maintaining accuracy.
Fabric Chalk or Washable Marker
Fabric chalk allows us to mark cutting lines that disappear easily after washing or brushing away. We find that tailor’s chalk in white or colored varieties works best on darker fabrics, while washable fabric markers show up clearly on lighter materials. These marking tools ensure our cuts stay straight and help us visualize the final result before making any permanent changes.
Water-soluble markers are particularly useful because they vanish completely when dampened with a cloth. We always test our marking tool on a hidden area of the shirt first to confirm it won’t leave permanent stains.
Safety Pins
Safety pins secure our marked cutting lines and prevent fabric from shifting while we cut. We use them to pin layers together when working with doubled fabric or to hold hems in place for trying on the shirt before making final cuts. Medium-sized safety pins work best for most shirt cropping projects without creating large holes in the fabric.
These pins also help us mark exact measurement points around the shirt’s circumference. We can pin at multiple points to ensure our crop line remains even all the way around, especially important when working with curved hemlines or fitted shirts.
Choose the Right Shirt for Cropping Success

Not every shirt makes a good candidate for cropping, so we’ll help you identify the best options for your project. Making the right selection upfront saves time and ensures better results.

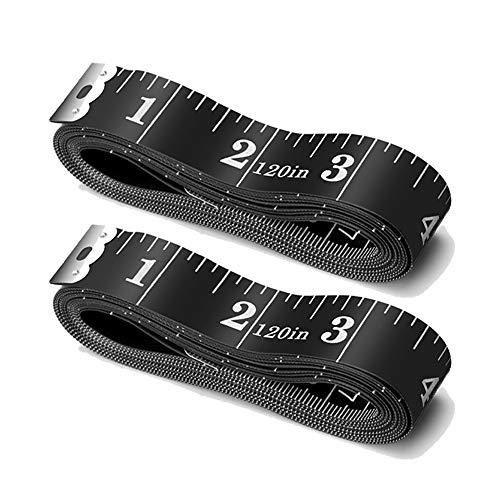
Measuring range: 0 to 60 inches and 0 to 150 centimeters. There is a centimeter scale on the back, which is accurately printed in inches and centimeters. Both sides can be measured according to your requirements. You can put one in your pocket or backpack without taking up too much space

2 Pack Soft Fashion Measuring Tape Set. Double sided, 60 inch / 150 cm, portable,durable tape measure. Small and light pocket size measuring tape.

Select Appropriate Fabric Types
Cotton blends work exceptionally well for cropping projects because they hold their shape and resist fraying after cutting. We recommend choosing shirts made from 100% cotton or cotton-polyester blends for the most manageable cropping experience.
Avoid stretchy fabrics like jersey knits or spandex blends as they tend to curl and distort after cutting. These materials require specialized techniques and serger machines to prevent unraveling edges.
Natural fibers including linen and cotton respond beautifully to cropping since they maintain clean cut lines and accept various finishing techniques. Synthetic materials like polyester can be more challenging but still workable with proper preparation.
Heavy fabrics such as denim or canvas create structured cropped pieces that maintain their shape throughout multiple washes. Lightweight materials like chiffon or silk require extra care and professional finishing methods.
Consider the Original Shirt Length
Longer shirts provide more flexibility for achieving your desired crop length while leaving room for adjustments if you cut too much initially. We suggest starting with shirts that fall below your hip bone for maximum versatility.
Measure the distance from your desired crop line to the shirt’s bottom hem to ensure you have at least 2-3 inches of extra fabric for testing cuts. This buffer zone prevents irreversible mistakes during the cropping process.
Oversized shirts offer the best foundation for cropping experiments because their extra length allows for multiple attempts at finding the perfect proportions. Regular fit shirts work well but provide less margin for error.
Tunic length tops transform beautifully into cropped styles that hit right at the waistline or slightly above. Short shirts already sitting at your natural waist aren’t suitable candidates for cropping projects.
Evaluate the Shirt’s Overall Fit
Well fitted shirts through the shoulders and chest area create the most flattering cropped silhouettes regardless of how loose they are through the body. Focus on finding pieces that sit properly across your upper torso.
Examine the shirt’s side seams to ensure they fall in the right position before committing to cropping. Side seams should align with your natural waistline or slightly toward your back for optimal proportions.
Baggy shirts can be cropped successfully but may require additional tailoring to achieve a balanced look between the fitted top portion and cropped bottom. Consider the time investment needed for these adjustments.
Shirts with interesting details like unique necklines or sleeve styles make excellent cropping candidates since the focus shifts to these design elements. Plain basic tees also work wonderfully and provide a clean canvas for experimentation.
Measure and Mark Your Desired Crop Length

Getting the measurements right makes the difference between a flattering crop and a fashion mistake. We’ll walk you through the precise steps to ensure your cropped shirt hits exactly where you want it.

Mr. Pen erasable fabric marking pens set provides 5 pens, each with a specialized water-soluble ink that allows for temporary marking on fabrics, perfect for tailoring, sewing, and crafting applications.

MAKE TEMPORARY MARKINGS – Works well on garments, quilting pieces, and other textile projects with Madam Sew Fabric Marking Pens for sewing. Cleaner and more precise than tailor’s chalk pencil, these fabric pens let you make smooth marks to denote alterations or embellishment placement.

Complete Set with Break-Resistant Design – Includes 4 brightly colored tailors chalk pieces, wrapped in plastic sponge cushioning to prevent breakage. All pieces are neatly stored in a clear plastic box. A practical and durable fabric chalk markers for sewing set
Try on the Shirt and Determine Length
Put on the shirt and stand in front of a full-length mirror to visualize your desired crop length. We recommend starting conservatively since you can always trim more fabric later but can’t add it back. Mark your preferred length with your finger while wearing the shirt, then have someone help you mark that spot with fabric chalk or a washable marker.
Consider your body proportions when choosing the crop length. Petite frames typically look best with crops that hit at the natural waist, while taller figures can experiment with longer crops that fall below the waistline. Take note of how the crop will look with different bottoms in your wardrobe, from high-waisted jeans to skirts.
Mark the Cutting Line Evenly
Remove the shirt and lay it flat on a clean, hard surface with the front facing up. We suggest using a ruler or measuring tape to ensure your marked point creates a straight line across the entire width of the shirt. Measure the distance from the shoulder seam to your marked point, then replicate this measurement on the opposite side of the shirt.
Connect your marks using fabric chalk and a straight edge or ruler to create an even cutting line. Double-check your measurements by folding the shirt in half vertically to ensure both sides match perfectly. Small discrepancies at this stage will become obvious imperfections in your finished crop top.
Add Seam Allowance for Hemming
Account for hemming by adding an extra 1 to 2 inches below your desired finished length before cutting. We typically recommend 1 inch for a simple folded hem or 2 inches if you plan to create a more substantial rolled hem. Mark this seam allowance with a different colored chalk to distinguish it from your finished length line.
Consider the fabric type when determining seam allowance. Cotton and cotton blends need standard allowances, while fabrics that fray easily require slightly more material for a clean finish. Remember that this extra fabric will be folded under and sewn, creating the professional finished edge that prevents fraying and gives your cropped shirt a polished appearance.
Cut Your Shirt Using Proper Techniques

Sharp fabric scissors and steady hands make all the difference when transforming your marked shirt into a perfectly cropped piece. The actual cutting process requires patience and precision to achieve professional results at home.

High Quality Cotton Thread: Discover the superior quality of Essential Thread by Connecting Threads, our exclusive 50-weight thread crafted from 100% triple-ply, long-staple cotton. This premium thread features a smooth, low-lint finish and a soft satin sheen that adds a touch of elegance to every stitch.

Matched Colors - 25 Pcs sewing thread and 25 pcs prewound bobbins thread, with bobbin case. 400 Yard each thread spool, total 10000 yard. Bright and vibrant, Sewing Machine Threads meet the requirements of projects needing a variety of colors.

Sewing Thread Set : 10 colored sewing threads,with 1 set of sewing needles and 1 needle threader and 1 Thimble, 200 yards of sewing thread per roll.
Make Clean, Straight Cuts
Position your fabric scissors at a 90-degree angle to the shirt material for the cleanest possible cut. Sharp fabric shears work best because they slice through cotton blends without catching or pulling the fibers. We recommend cutting in one continuous motion across the entire width of the shirt rather than making small snips.
Keep your cutting hand steady while using your non-dominant hand to hold the fabric taut. This technique prevents the material from bunching or shifting during the cutting process. Move slowly across the marked line to maintain control and accuracy.
Cut through both layers simultaneously if you’ve folded the shirt along the side seams for symmetry. This approach ensures both sides match perfectly and saves time during the cropping process. Single-layer cutting works better for shirts with asymmetrical designs or when you want slight variations in the crop line.
Follow Your Marked Guidelines
Stay directly on your chalk or fabric marker lines throughout the entire cutting process. Veering from these carefully measured guidelines can result in an uneven crop that looks unprofessional. Use the tip of your scissors to trace along the marked line before making the actual cut.
Check your progress frequently by lifting the fabric and examining the cut from different angles. This allows you to catch any deviations early and make minor corrections before continuing. We suggest pausing every few inches to ensure you’re maintaining the proper cutting line.
Reference your original measurements if you need to reposition the shirt during cutting. Sometimes the fabric shifts as you work, making it necessary to realign with your initial markings. Keep your measuring tape nearby for quick verification of the crop length.
Avoid Common Cutting Mistakes
Never cut without marking first, even if you think you can eyeball the correct length. This common mistake leads to uneven hems and crooked crop lines that are difficult to fix later. Always take the extra time to measure and mark properly.
Don’t cut too close to your desired final length on the first attempt. We recommend leaving at least 1 to 2 inches of extra fabric for hemming and adjustments. You can always trim more material, but you can’t add fabric back once it’s cut.
Resist the urge to stretch the fabric while cutting, as this distorts the natural shape and can lead to irregular edges. Cotton blends should lay flat and relaxed during the cutting process. Pulling or stretching creates uneven cuts that become apparent once you release the tension.
Avoid using dull scissors that crush or fray the fabric edges instead of making clean cuts. Invest in sharp fabric shears specifically designed for textile work rather than using household scissors. Dull blades require more pressure and often result in jagged, unprofessional looking edges.
Create a Professional Hem Finish

Professional hemming transforms your cropped shirt from a raw DIY project into a polished garment that rivals store-bought pieces. We’ll walk you through three essential steps to achieve a clean, durable finish that prevents fraying and adds sophistication to your creation.

[Leather Needles for Hand Sewing]: The leather sewing needle set includes 9pcs needles of various sizes and shapes. Each type needle has a unique purpose, which are suitable for various sewing or maintenance projects to meet your different sewing and repair needs.

Durable Stainless Steel Sewing Needles: Made of Premium stainless steel, these large eye needles are rustproof, durable, and designed to maintain their shape even after repeated use. They won't bend or break easily when piercing thick materials, Ensures it will not deform during frequent sewing and long-term handcrafting.

Fold and Pin the Raw Edge
Folding creates the foundation for a neat hem that’ll withstand regular washing and wearing. We recommend starting with a double fold hem by turning the raw edge up ¼ inch first, then folding it again by your desired hem width of ½ to 1 inch. This method encases the raw fabric edge completely and prevents any fraying over time.
Pinning ensures your fold stays perfectly even as you work around the shirt’s circumference. We suggest placing pins perpendicular to the hem every 2 to 3 inches, checking that the fold width remains consistent throughout. Try the shirt on at this stage to verify the length looks exactly how you want it before committing to stitching.
Pressing the fold with an iron creates a crisp crease that makes sewing much easier and more accurate. We always use a medium heat setting appropriate for your fabric type and press firmly for 3 to 5 seconds on each section.
Choose Your Hemming Method
Machine stitching delivers the fastest and most durable results for cotton and cotton blend fabrics. We recommend using a straight stitch with matching thread color, sewing approximately ¼ inch from the inner fold edge. This creates a clean line that’s virtually invisible from the shirt’s right side.
Hand hemming offers more control and works exceptionally well for delicate fabrics or curved hems. We prefer the blind hem stitch technique, which catches only a few threads of the shirt’s front fabric with each stitch, making it nearly invisible from the outside.
Hem tape provides a no sew solution that’s perfect for beginners or quick fixes. We apply the tape between the folded fabric layers and use an iron to activate the adhesive, following the manufacturer’s exact time and temperature instructions.
Secure the Hem with Stitching
Stitching locks your hem in place permanently and adds professional durability to your cropped shirt. We start by removing pins as we sew, maintaining a steady ¼ to ⅜ inch seam allowance from the inner fold edge. Keep your stitching line parallel to the hem edge by using your sewing machine’s seam guides or marking the distance with fabric chalk.
Backstitching at the beginning and end prevents your seam from unraveling during wear and washing. We typically backstitch for about ½ inch, then continue with regular forward stitching around the entire hem circumference.
Trimming excess thread and pressing the finished hem creates that final polished appearance. We use small scissors to cut thread tails close to the fabric and give the completed hem a final press with the iron to set the stitches and eliminate any puckering.
Style Your Newly Cropped Shirt

You’ve successfully created your custom cropped shirt, and now it’s time to explore the countless styling possibilities that await.

DURABLE Strong Stainless Steel Rust Resistant Blades: Forging press manufacturing process enables high-density steel that makes 5 times harder than normal stainless steel and are smoother cutting.

ULTRA SHARP FABRIC SHEARS: Made of high carbon steel which is stronger than stainless steel, the craft scissors have great qualities including good edge retention and ability to make clean cut through multiple layers of fabric.well worth investing to help you cut down on time and money and perfect your sewing creations.

Shears have a black handle with a stainless steel blade which offers superior cutting
Pair with High-Waisted Bottoms
High waisted jeans create the most flattering silhouette when paired with your newly cropped shirt. We recommend choosing styles that sit at or above your natural waistline to eliminate any gap between your shirt and bottoms. Skinny jeans, straight leg denim, and mom jeans all work beautifully with cropped tops, creating a balanced proportion that elongates your legs.
High waisted skirts offer endless versatility for your cropped creation. We suggest pairing your shirt with pencil skirts for professional looks, A line skirts for casual outings, or mini skirts for trendy weekend styles. Leather skirts, denim skirts, and pleated styles each bring their own unique aesthetic to your cropped shirt ensemble.
High waisted trousers elevate your cropped shirt for more formal occasions. We love styling cropped tops with wide leg trousers, palazzo pants, or customized work pants that create sophisticated silhouettes. Linen trousers, dress pants, and culottes provide professional polish while maintaining the playful edge of your cropped shirt.
Layer for Different Looks
Blazers and jackets transform your cropped shirt into a versatile wardrobe staple. We recommend unbuttoning blazers to showcase your cropped creation underneath while maintaining professional appeal. Denim jackets, leather jackets, and oversized blazers each create distinct styling moods that take your look from casual to chic.
Cardigans and sweaters offer cozy layering options for cooler weather. We suggest choosing open front cardigans that frame your cropped shirt or lightweight sweaters that can be tied at the waist. Cropped cardigans, longline sweaters, and wrap styles create interesting proportions and add textural interest to your outfit.
Tank tops and camisoles work perfectly as base layers under your cropped shirt. We love styling sheer or lightweight cropped tops over contrasting tank tops for added coverage and visual depth. Lace camisoles, ribbed tanks, and silk camis peek through to create layered looks that feel intentional and stylish.
Accessorize Your Cropped Creation
Statement jewelry draws attention to your newly exposed midriff area in the most flattering way. We recommend choosing body chains, layered necklaces, or bold earrings that complement your cropped shirt’s neckline. Belly chains, pendant necklaces, and hoop earrings add glamorous touches that enhance your cropped shirt styling.
Belts and waist accessories define your silhouette when wearing your cropped creation. We suggest using chain belts, fabric belts, or corset style waist accessories to accentuate the high waisted bottoms you’ve paired with your shirt. Wide belts, skinny belts, and obi style sashes create different aesthetic effects that personalize your cropped shirt look.
Bags and footwear complete your cropped shirt ensemble with purposeful finishing touches. We love pairing cropped tops with crossbody bags, belt bags, or small purses that don’t overwhelm your proportions. Ankle boots, sneakers, and heeled sandals each bring their own energy to your cropped shirt styling, from edgy to elegant.
Troubleshoot Common Cropping Problems

Even experienced crafters encounter challenges when cropping shirts. We’ll help you solve the most frequent issues that arise during the cropping process.

2 Pack Measuring Tape Double-sided, 60-inch / 150 cm, portable,durable tape measure. Small and light pocket-size measuring tape, White, Blue color
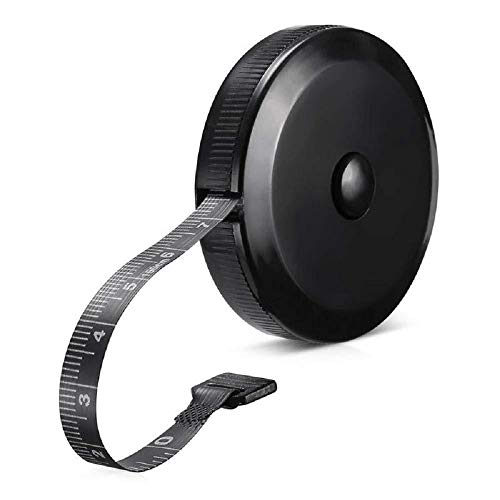
Package Include:1 Pack Soft Retractable Black Dual Sided Tape Measure Body Measuring Tape Set, Dual sided, 150cm/60inch in length, large and clear markings in both Inches and CM for easier reading, Retractable black measuring tape size 2 x 2 x 0.5 inches, weight 0.02 KG/0.7 OZ
Ultra Long Measuring Range: Different than normal 60 Inch soft tape measure, ours are 120 Inch long, which can meet more needs and get you out of the trouble of insufficient length
Fix Uneven Hem Lines
Uneven hem lines happen when we rush through the cutting process or skip proper measuring. Check your hemline by laying the shirt flat on a table and measuring from the collar to the hem at multiple points along the bottom edge.
Trim the longer sections carefully using sharp fabric scissors to match the shortest measurement. Mark the correction points with fabric chalk before cutting to ensure accuracy. Press the shirt flat with an iron to eliminate any wrinkles that might affect your measurements.
Create a new hemline by folding the fabric up slightly and trimming along the fold for a perfectly straight edge. Use a ruler or quilting square as a guide to maintain consistency across the entire width of the shirt.
Address Fraying Issues
Fraying occurs when fabric fibers begin to unravel at the cut edge, especially with cotton and cotton blend materials. Apply clear nail polish or fabric glue along the raw edge as a quick temporary fix to stop immediate fraying.
Carry out a proper hem using our double fold technique from the previous section for the best long term solution. Fold the raw edge under twice and stitch it down to completely encase the fraying fibers.
Use pinking shears to cut a zigzag pattern along the edge if you prefer a more casual finish. This method reduces fraying while creating an intentionally raw look that works well with certain shirt styles. Wash the shirt in cold water and hang dry to minimize additional fraying during care.
Adjust Length if Too Short
Cutting too much fabric creates a crop that sits higher than intended on your torso. Add decorative trim or lace to the bottom hem to increase length while creating a unique design element that looks intentional.
Layer your cropped shirt over a longer tank top or camisole in a coordinating color to extend the coverage. This styling trick creates visual interest while solving the length issue and adds versatility to your outfit options.
Attach fabric from a coordinating shirt or purchase matching material to create a color block extension. Cut a strip of fabric 3 to 4 inches wide and sew it to the bottom of your cropped shirt using a straight stitch or decorative serged seam that becomes part of the design aesthetic.
Conclusion
We’ve shown you that cropping a shirt doesn’t require professional tailoring skills or expensive equipment. With the right tools and techniques we’ve outlined, you can transform any basic tee into a trendy piece that perfectly fits your style and body.
Remember to take your time with measurements and cutting – rushing through these steps often leads to disappointing results. The finishing touches we discussed will make all the difference between a DIY project and a professional-looking garment.
Your newly cropped shirts are now ready to become versatile wardrobe staples. Whether you’re dressing them up with high-waisted trousers or keeping it casual with denim, you’ll have endless styling options at your fingertips.
Most importantly, don’t be afraid to experiment. Each shirt you crop builds your confidence and skills for future projects. Start with pieces you’re comfortable altering and work your way up to more challenging fabrics and styles.
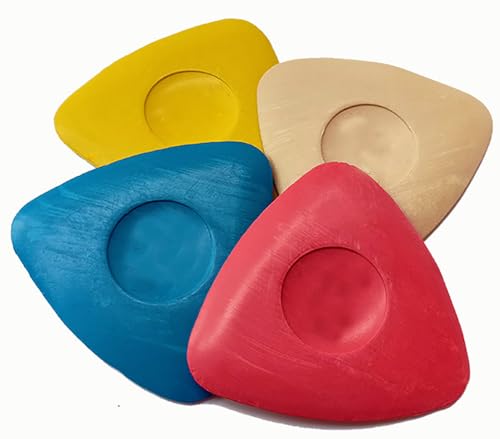
Colors:Blue, Red, White, Yellow,4 Pcs

The chalk fits in the large end and the narrow end has a metal roller that draws the chalk on your fabric while you roll it along

Mark easily and line very clearly:Tailors Chalk neither too hard, nor too soft,gently press,mark easily and line very clearly, works good on garments, quilting pieces and other textile project fabrics.
Frequently Asked Questions

Package: 1 Spool of Jeans Sewing Thread 20s/2. Length: 1500 yards. Color: Gold thread, Yellow core.

72 PCS Sewing Thread: Includes 36 brightly colored sewing threads and 36 matching spools, offering endless creative options from everyday sewing repairs to embroidery, quilting, and personalized DIY sewing projects

Lightweight, Classic fit, Double-needle sleeve and bottom hem
What supplies do I need to crop a shirt at home?
You’ll need sharp fabric scissors, measuring tools (ruler or measuring tape), fabric chalk or washable markers for marking, and safety pins. These essential supplies ensure accuracy and help you achieve professional-looking results without investing in expensive equipment.
What type of shirt works best for cropping?
Cotton blends are ideal because they hold their shape well after cutting. Avoid stretchy fabrics like jersey knits as they tend to curl and are harder to work with. Look for shirts that are slightly longer than your desired crop length and have well-fitted shoulders and chest areas.
How do I determine the right crop length for my body?
Try on the shirt and use a full-length mirror to visualize different crop lengths. Consider your body proportions and start conservatively – you can always cut more, but you can’t add fabric back. Mark your desired length while wearing the shirt for the most accurate placement.
Do I need to add extra fabric when cutting for hemming?
Yes, always add 1-2 inches below your marked line for seam allowance. This extra fabric is essential for creating a proper hem that prevents fraying and gives your cropped shirt a professional, finished appearance.
What’s the best way to cut the fabric?
Use sharp fabric scissors positioned at a 90-degree angle to the fabric. Cut in one continuous motion while keeping the fabric taut. Always cut along your marked line and check your progress frequently to maintain accuracy and evenness.
How do I prevent the edges from fraying after cutting?
Create a double-fold hem by folding the raw edge twice, then secure with machine stitching or hand hemming. For quick fixes, you can also use hem tape or apply clear nail polish to the edges to prevent fraying.
What should I do if I cut the shirt too short?
If you’ve cut too much, try layering with longer tank tops or camisoles underneath. You can also add decorative trims or lace to extend the length, or embrace the shorter style and pair it with high-waisted bottoms.
How should I style my newly cropped shirt?
Pair cropped shirts with high-waisted bottoms like jeans, skirts, or trousers for a flattering silhouette. Layer with blazers, jackets, or cardigans for versatility. Add statement jewelry, belts, and appropriate footwear to complete your look.
Can I fix an uneven hem after cutting?
Yes, measure the hem all around and trim any uneven sections to match the shortest point. Use a ruler to ensure evenness, then re-hem the entire bottom edge for a professional finish.