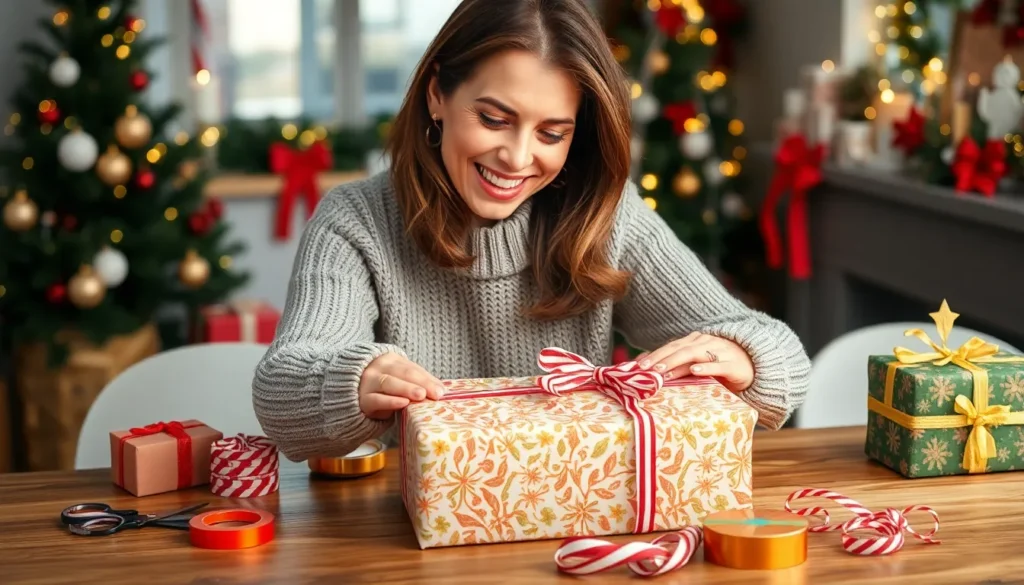
Gift wrapping transforms an ordinary present into something truly special – it’s the first glimpse your recipient gets of your thoughtfulness. Whether you’re preparing for birthdays, holidays, or any celebration, we all know that beautifully wrapped gifts create anticipation and show you’ve put extra care into your gesture.
We’ve all been there: struggling with uneven cuts, crooked corners, and tape that seems to stick to everything except what it’s supposed to. The good news? Perfect gift wrapping isn’t about expensive materials or years of practice – it’s about knowing the right techniques and having a solid plan.
In this comprehensive guide, we’ll walk you through every step of the gift-wrapping process, from choosing the right materials to mastering those crisp, professional-looking corners. You’ll discover time-saving tricks, creative alternatives, and answers for wrapping oddly shaped items that’ll make your gifts stand out under any tree.
Gather Your Essential Gift Wrapping Supplies
Having the right materials makes the difference between a frustrating wrapping experience and a smooth, enjoyable process. We’ll help you assemble everything you need before you start wrapping your first gift.

【PREMIUM NON-COATED CLASSIC BROWN PAPER】Dimensions: 17.5" x 1,200" (100 feet) with a thickness of 120μm. Our kraft paper roll is produced using natural, pure, virgin pulp, ensuring superior quality. It is both flexible and soft, made entirely from 100% recyclable materials originating from Canada. The unwaxed, uncoated design allows for excellent breathability, preventing moisture accumulation. Moreover, it is crafted from natural, child-safe materials.

Superior Wrapping Paper for Large Presents; Use for wrapping Christmas, birthday or wedding gifts

【CLASSIC KRAFT PAPER】This solid kraft paper roll is a must-have paper roll item for packing, crating, shipping, moving, mailing, postal, parcel, sublimation printing, packaging fillers, table runner and floor coverings.
Choose the Right Wrapping Paper
Consider the gift recipient’s personality when selecting wrapping paper patterns and colors. Bold geometric designs work well for modern tastes, while floral patterns suit traditional preferences, and cartoon characters delight children.
Measure your wrapping paper needs by calculating roughly 2.5 times the length of your gift box plus twice its width. This formula ensures you’ll have enough paper without excessive waste.
Quality matters more than price when choosing wrapping paper. Thicker papers like kraft paper, premium gift wrap, or decorative cardstock resist tearing and create cleaner folds than thin alternatives.
Solid colors offer versatility for multiple gifts and occasions. Metallics like gold, silver, or copper provide elegant options, while classic colors such as navy, burgundy, or forest green work year round.
Select Appropriate Tape and Scissors
Sharp fabric scissors or dedicated gift wrapping shears create clean, straight cuts through multiple layers of paper. Dull scissors cause jagged edges and can tear delicate wrapping materials.
Double sided tape eliminates visible tape lines and creates a professional appearance on your wrapped gifts. We recommend keeping both regular and extra strong versions for different paper weights.
Transparent tape dispensers with weighted bases stay put on your work surface and provide consistent tape application. Look for dispensers that cut cleanly without leaving sticky residue on the tape end.
Washi tape serves dual purposes as both functional tape and decorative accent. These colorful Japanese tapes come in hundreds of patterns and can replace traditional ribbon for a modern look.
Pick Complementary Ribbons and Bows
Ribbon width should match your gift size to maintain proper proportions. Use 1/4 inch ribbon for small gifts, 1/2 to 3/4 inch for medium packages, and 1 to 2 inch widths for larger presents.
Satin ribbons provide classic elegance and work well with most wrapping paper styles. Grosgrain ribbons offer durability and texture, while velvet ribbons add luxury to special occasion gifts.
Pre made bows save time when wrapping multiple gifts, but handmade bows allow customization of size and style. We suggest keeping both options available for different wrapping situations.
Natural materials like twine or raffia complement kraft paper and eco friendly wrapping approaches. These rustic options pair beautifully with dried flowers, pine cones, or small ornaments as package toppers.
Measure and Cut Your Wrapping Paper Correctly

Proper measurements make the difference between professional-looking wrapped gifts and amateur attempts that waste paper. We’ll show you the exact techniques to calculate paper dimensions and achieve perfect cuts every time.

VARIETY PACK: Contains 6 rolls - 3 clear tapes (3/4" x 650"), 2 invisible tapes (3/4" x 650"), and 1 double-sided tape (1/2" x 300") with dispensers

DOUBLE SIDED TAPE FOR ARTS AND CRAFTS: 3 rolls of Scotch Double Sided Tape, each with a Tape Dispenser, offers a neat, clean, strong and long-lasting way to hold art and crafts projects together, making it a great addition to your crafting supplies

Determine the Proper Paper Length
Measure your gift’s circumference by wrapping a measuring tape around the widest part of the package. Add 2-3 inches to this measurement to ensure adequate overlap for securing the seam. For rectangular boxes, wrap the tape around the length and width, then add the extra inches for a clean fold.
Calculate additional length for end flaps by measuring your gift’s height. Multiply the height by two and add 4 inches for proper folding coverage. This formula ensures your paper extends far enough to create neat triangular folds at each end without leaving gaps.
Account for irregular shapes by adding 20-30% more length than your initial calculation. Round objects like bottles or cylindrical containers require extra paper to accommodate their curves and create clean gathering points at the top and bottom.
Calculate the Necessary Paper Width
Determine width requirements by measuring your gift’s height plus depth. Add these two measurements together, then include an extra 4-6 inches for proper overlap and folding. This calculation works perfectly for standard rectangular packages and ensures complete coverage.
Consider your gift’s proportions when calculating width for unusually shaped items. Tall, narrow gifts need width measurements that account for their height, while flat, wide packages require calculations based on their broadest dimensions plus folding allowance.
Use the “wrap around” method for accuracy by loosely positioning paper around your gift before cutting. Mark where the paper meets with a pencil, then add your overlap measurements to avoid cutting too little paper.
Make Clean, Straight Cuts
Position your wrapping paper on a flat, clean surface with the decorative side facing down. Use a large table or cleared floor space to prevent creases and ensure your measurements remain accurate throughout the cutting process.
Mark your cutting lines with a pencil using a ruler or straight edge as your guide. Draw light lines that won’t show through thin paper, and double-check your measurements before making any cuts to avoid costly mistakes.
Cut with sharp scissors in one continuous motion rather than making small snips. Keep your scissors perpendicular to the paper and follow your marked lines precisely. Dull scissors create jagged edges that make your finished wrap look unprofessional.
Use a rotary cutter and cutting mat for perfectly straight lines on thick or metallic papers. These tools provide superior control and create cleaner edges than scissors, especially when working with multiple layers or specialty papers that tend to tear.
Position Your Gift for Optimal Wrapping

Strategic placement transforms wrapping from frustrating struggle into smooth process. We’ll ensure your gift sits perfectly for professional results every time.

ARTS AND CRAFTS STAPLE: All Purpose Fiskars Scissors for cutting a wide variety of fabric and crafts, including wrapping paper, paper, fabric, and more

ARTS AND CRAFTS STAPLE: Fiskars All-Purpose Left-Handed Scissors for cutting a wide variety of materials including wrapping paper, paper, denim, silk, and multiple layers of fabric

The handle is made of rubber material, which is soft and comfortable and takes care of your delicate hands. The ergonomic comfortable grip handles make for easy controlled cuts. reduce hand fatigue.
Place the Gift Face-Down on the Paper
Position the most attractive side of your gift facing the wrapping paper. This placement prevents the decorative front from getting scratched or damaged during the wrapping process. We recommend identifying any logos, patterns, or special features on your gift box first.
Turn rectangular boxes so their seam or opening faces down. Most gift boxes have a slight imperfection where they’re assembled, and this method keeps those details hidden. Square items work best when placed with their heaviest side down for stability.
Check that fragile items have adequate padding before positioning. Delicate gifts need extra protection, so we suggest wrapping them in tissue paper first. This additional layer prevents damage and creates a smoother surface for wrapping.
Center the Item for Even Coverage
Measure equal distances from each edge of the wrapping paper to your gift. We use the paper’s grid lines or patterns as guides when available. This technique ensures balanced proportions and prevents lopsided wrapping.
Align rectangular gifts with the paper’s natural edges. Square corners should run parallel to the paper’s borders for the cleanest finish. Diagonal placement creates unnecessary complications and wastes wrapping material.
Position round or irregularly shaped items using the widest point as your reference. We place circular gifts so their center aligns with the paper’s center point. This method guarantees adequate coverage on all sides.
Leave approximately 2 to 3 inches of paper extending beyond each edge. We’ve found this measurement works for most standard gift sizes. Smaller items need proportionally less overlap, while larger packages require slightly more.
Ensure Adequate Paper Overlap
Check that paper extends at least 2 inches past each side of your gift. This measurement provides enough material to create clean, professional folds without stretching the paper. We measure from the gift’s edge to ensure consistency.
Verify top and bottom coverage by lifting the paper edges gently. The paper should reach approximately halfway across the opposite side when folded over. Insufficient coverage creates gaps that expose the gift underneath.
Add extra overlap for thick or bulky items that require more material. Books, picture frames, and electronics need additional paper because of their rigid edges. We typically add an extra inch for items thicker than 2 inches.
Test your positioning by loosely draping the paper over the gift. This preview method lets you adjust placement before committing to cuts or folds. We catch potential problems early using this simple check.
Create Crisp, Professional Edges

Sharp, clean edges transform amateur-looking packages into professional gifts that rival store-bought wrapping. We’ll walk you through the precise folding techniques that eliminate bulk and create those enviable razor-sharp lines.
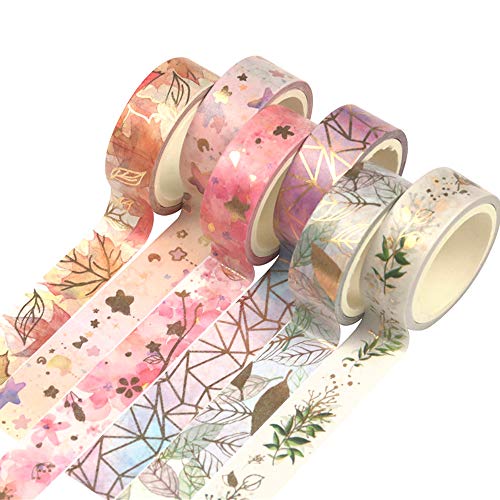
GORGOUS DESIGN: This beautiful washi tape collection comprises of variety of colors, which is very fresh and charming, offering a great selection for everyone
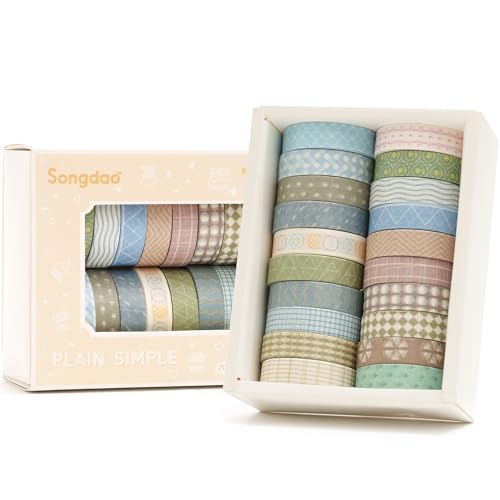
👍【EXQUISITE DESIGNS】This decorative tape set is composed of 20 different well-designed patterns, with a total of 6 combinations to choose from (no repetition). It shows rich texture, and they will make your works full of vitality!

GORGEOUS DESIGN: This beautiful washi tape collection comprises of variety of colors, which is very fresh and charming, offering a great selection for everyone
Fold and Secure the First Long Edge
Start with the edge that faces you when the gift sits centered on the paper. Pull this edge up and over the top of your gift, ensuring it extends about 1 to 2 inches beyond the center line. Create a clean crease by running your finger firmly along the edge where the paper meets the gift’s surface.
Fold the raw edge under itself by about half an inch to create a finished seam. This technique hides the cut edge and prevents tearing while giving your package a polished appearance. Press the fold firmly with your thumb and forefinger to establish a sharp crease.
Secure this folded edge to the top of your gift using a small piece of tape. Place the tape perpendicular to the fold line rather than parallel to it for maximum holding power. We recommend using just enough tape to hold the edge in place without creating visible bulk.
Pull Tight and Tape the Opposite Edge
Grasp the remaining long edge and pull it taut across the gift’s surface. The paper should feel snug but not so tight that it tears or distorts the gift’s shape underneath. This tension creates the foundation for crisp edges and prevents sagging.
Overlap the second edge over your first secured edge by about an inch. Check that your overlap is consistent across the entire width of the package to maintain a professional appearance. The seam should run straight down the center of your gift’s top or bottom surface.
Apply tape along the entire length of this overlap in one continuous strip. Press down firmly as you go to eliminate any air pockets between the tape and paper. We find that running your finger along the tape’s edges helps create an invisible seal.
Smooth Out Any Wrinkles or Air Bubbles
Use the flat side of your scissors or a bone folder to burnish the paper surface. Run the tool along the gift’s edges and corners with firm pressure to eliminate any puffiness or loose areas. This step transforms ordinary wrapping into professional-quality presentation.
Work systematically from the center outward to push trapped air toward the edges. Pay special attention to areas where the paper changes direction or overlaps, as these spots tend to trap air most readily. Small bubbles near corners can often be worked out by gently stretching the paper.
Apply gentle heat from a hair dryer for stubborn wrinkles on smooth papers. Keep the dryer on low heat and maintain a distance of 6 to 8 inches from the surface. The warmth relaxes the paper fibers and allows them to conform better to your gift’s shape.
Master the Art of Corner Folding

Perfect corners transform an ordinary wrapped gift into a professional presentation that rivals any store display. We’ll focus on techniques that create sharp angles and eliminate bulky paper bunching.

You Will Receive: each package contains 24 pieces of colorful present bows in 6 colors, 4 pieces per color, which measure around 5 cm/ 2 inches in diameter, and 6 rolls of 32.8-foot long colorful ribbons; Abundant quantity and colors to meet your various usages, and you can also share them with others

PACKAGE: The set includes 10 multi colored gift bows in 2 sizes ( 3" Bows + 4.5" Bows), 2 crimped curling ribbons, 1 curly bow and 1 tinsel bow. They are packaged in a clear PVC Box for extra protection and presentation

PACKAGE: The set includes 12 multi colored gift bows in 2 sizes ( 3" Bows + 4.5" Bows) and 2 crimped curling ribbons. They are packaged in a clear PVC Box for extra protection and presentation.
Create Hospital Corners on Each End
Hospital corners deliver the cleanest finish for rectangular and square gifts. Start by folding down the top flap at a 45-degree angle, creating a triangular fold that lies flat against the gift’s surface. Pull the side flaps inward to form tight diagonal creases that meet at the box’s corner edge.
Smooth each fold with your fingers or a bone folder to eliminate air pockets and wrinkles. The paper should hug the gift’s shape without gaps or loose areas. Press firmly along all creased edges to set the folds permanently.
Work systematically from one end to the other, maintaining consistent tension throughout the process. Each corner should mirror the others in tightness and precision for a cohesive appearance.
Tuck and Fold for Clean Lines
Tucking excess paper creates sharp edges without visible bulk or overlapping layers. Begin by identifying areas where paper naturally wants to bunch up, typically at the corners and seam intersections. Fold these sections inward using small, precise movements rather than large sweeping motions.
Create accordion-style folds for thicker wrapping paper that resists laying flat. This technique distributes bulk evenly and prevents unsightly lumps from forming along the gift’s edges. Smooth each fold as you work to maintain control over the paper’s placement.
Practice the “triangle tuck” method for challenging corner angles. Fold the paper into a small triangle, then tuck it behind the main surface for a seamless finish that disappears from view.
Secure with Minimal Tape Usage
Strategic tape placement holds corners securely without creating visible lines or bumps on the gift’s surface. Use small strips of double-sided tape placed directly on fold intersections rather than covering large paper areas. This approach maintains the wrapping’s clean aesthetic while providing strong adhesion.
Position tape pieces no larger than half an inch for most gift sizes. Longer strips often wrinkle or create uneven surfaces that detract from the overall appearance. Press tape firmly for 3-5 seconds to ensure proper bonding with both paper surfaces.
Apply tape to the gift’s underside whenever possible to keep the top surface completely smooth. This technique works especially well for hospital corners where the fold naturally creates a hidden attachment point.
Add Finishing Touches with Style

Perfect corners and smooth edges create the foundation, but thoughtful finishing touches transform our wrapped gifts from ordinary to extraordinary.
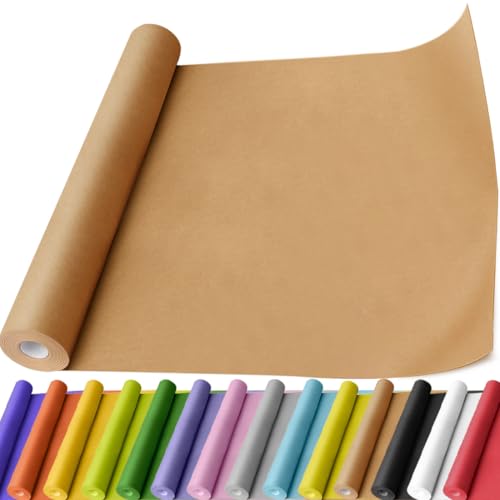
【HIGH-QUALITY NON-COATED CLASSIC KRAFT PAPER】Our kraft paper roll is made of natural, pure, virgin pulps, ensuring the highest quality. It is pliable, soft, and made from 100% recyclable material, which originates in Canada or Japan. The unwaxed and uncoated design allows for breathability, preventing moisture condensation. Moreover, it is made from natural and -safe materials.

【HIGH-QUALITY NON-COATED CLASSIC KRAFT PAPER】Our kraft paper roll is made of natural, pure, virgin pulps, ensuring the highest quality. It is pliable, soft, and made from 100% recyclable material, which originates in Canada or Japan. The unwaxed and uncoated design allows for breathability, preventing moisture condensation. Moreover, it is made from natural and child-safe materials.

PERFECT SIZE: Each roll measures 17 inch wide x 9.8 feet long
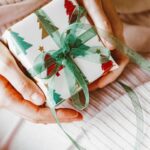
Attach Ribbons and Bows Strategically
Position ribbons to enhance your gift’s shape rather than simply wrapping them around randomly. We recommend starting with vertical placement for tall boxes and horizontal alignment for wide packages to create visual balance. Cross ribbons at the back of the package where they’re less visible, securing them with double sided tape before bringing both ends to the front.
Create professional bows by leaving adequate ribbon length for each loop and tail. We suggest cutting ribbon pieces that measure three times your gift’s perimeter plus an extra 12 inches for bow construction. Velvet ribbons work best for formal occasions while grosgrain ribbons offer durability for packages that’ll be handled frequently.
Secure ribbon placement with strategic tape application underneath the bow’s center knot. We place small pieces of clear tape on the back of ribbons before positioning them to prevent sliding during transport. Wired ribbons hold their shape better and allow us to adjust loops after initial placement.
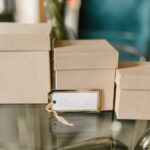
Include Gift Tags and Personal Messages
Select gift tags that complement your wrapping paper’s color scheme without overwhelming the overall design. We choose tags roughly one inch smaller than our ribbon width to maintain proper proportions. Metallic tags pair beautifully with solid colored papers while kraft tags enhance natural or rustic wrapping themes.
Write personal messages using archival quality pens to prevent ink bleeding or fading over time. We recommend gel pens for smooth writing on glossy tag surfaces and fine tip markers for textured or handmade papers. Keep messages concise but heartfelt, focusing on the recipient’s qualities or shared memories.
Attach tags using coordinating string or thin ribbon rather than adhesive that might damage the wrapping paper. We thread tags onto ribbon before tying bows or use small safety pins for delicate papers. Position tags where they’re easily readable without covering decorative elements like bows or patterns.
Consider Additional Decorative Elements
Layer different textures to create visual depth without overwhelming the gift’s presentation. We might add dried flowers to natural kraft paper, small bells to holiday packages, or textured stickers to complement solid colored wrapping. Limit decorative elements to three types maximum to maintain elegant simplicity.
Incorporate seasonal or themed elements that reflect the occasion or recipient’s interests. We use small ornaments for Christmas gifts, pressed leaves for autumn celebrations, or seashells for summer birthdays. Natural elements like pinecones, twigs, or flower petals cost nothing but add important visual appeal.
Apply decorative elements with removable adhesive so recipients can save special touches if desired. We use glue dots for lightweight items and small pieces of double sided tape for heavier decorations. Position these elements asymmetrically for modern appeal or symmetrically for traditional elegance, depending on our overall design goal.
Troubleshoot Common Gift Wrapping Problems

Even with careful preparation, gift wrapping challenges can arise unexpectedly. We’ll help you solve the most common issues that can frustrate even experienced gift wrappers.

𝗠𝗲𝘀𝘀-𝗳𝗿𝗲𝗲 & 𝗙𝗮𝘀𝘁: Different from the ordinary glue or glue stick, Double Sided Tape won't cause any mess, there is no drying time and no wrinkling, the tape is acid free and archival safe for scrapbooking.

Sticky & Safe to Use: Our double sided tape for crafts was made of high quality glue, it is sticky but not destructive and will help to save your scrapbook or photos for a long time

328 ft ULTRA-LONG ADHESIVE TAPE SET – Each double sided tape roller gives you 65.62 ft of clear tape; 5-pack totals 328 ft—more yards per dollar, so your scrapbooking, gift-wrapping and craft marathons keep rolling without running out
Fix Tears and Imperfections
Patch small tears with decorative tape or washi tape that complements your wrapping paper design. Position the tape strategically over the tear and smooth it down gently to prevent air bubbles from forming underneath.
Cover larger rips by placing a decorative element like a gift tag, bow, or seasonal sticker directly over the damaged area. This approach transforms an imperfection into an intentional design feature that enhances your package’s overall appearance.
Remove wrinkles using the flat edge of your scissors or a bone folder to gently smooth the paper from the center outward. Apply light pressure in long, continuous strokes to avoid creating new creases while eliminating existing ones.
Fix crooked seams by carefully lifting the tape and repositioning the paper before the adhesive sets completely. Work quickly and maintain even tension across the paper to achieve a straight, professional looking edge.
Repair corner imperfections by adding a small piece of matching or coordinating paper underneath the damaged area. Trim the patch slightly smaller than the damaged section and secure it with double sided tape for an invisible repair.
Handle Oddly Shaped Items
Wrap cylindrical objects like wine bottles or poster tubes using the candy wrapper technique. Center the item on your paper lengthwise, roll it tightly, and gather both ends with ribbon or twist ties before adding decorative bows.
Package spherical gifts by placing them in the center of a large square of paper and bringing all corners up to meet at the top. Gather the excess paper together and secure with a wide ribbon, creating an elegant pouch effect.
Cover irregularly shaped items using tissue paper layers first, then wrapping paper over the smoothed surface. This creates a more uniform shape that’s easier to wrap with traditional techniques while protecting delicate protrusions.
Disguise awkward shapes by attaching them to a flat piece of cardboard or placing them in a decorative box before wrapping. This approach gives you clean edges to work with and prevents the recipient from guessing the gift’s identity.
Wrap multiple small items together by bundling them in tissue paper first, then treating the bundle as a single rectangular package. Secure loose pieces with rubber bands before adding your outer wrapping layer.
Work with Limited Paper Supply
Measure twice before cutting to ensure you have adequate coverage without waste. Use our earlier formula of adding 4 to 6 inches to each dimension, but adjust these measurements based on your available paper quantity.
Create paper extensions by overlapping two pieces of wrapping paper by 2 inches and securing with double sided tape on the inside surface. Position this seam on the bottom of your package where it won’t be visible.
Use creative combinations like wrapping the main body with one paper and the lid with coordinating tissue paper or fabric. This technique works especially well with boxes and adds visual interest while conserving materials.
Focus on key areas by wrapping only the top and front faces of rectangular boxes when paper is extremely limited. Cover the remaining surfaces with coordinating ribbon or decorative paper strips for a modern, minimalist look.
Repurpose alternative materials like brown kraft paper, newspaper, or magazine pages when traditional wrapping paper runs out. Enhance these unconventional choices with colorful ribbons and decorative elements for a unique, eco friendly presentation.
Conclusion
Perfect gift wrapping isn’t about having the most expensive materials or years of experience. With the techniques we’ve shared you can transform any present into something that looks professionally wrapped. The key lies in taking your time with measurements cutting clean lines and paying attention to those finishing details that make all the difference.
Remember that even experienced wrappers encounter challenges. When you hit snags don’t get discouraged – use our troubleshooting tips to turn potential disasters into beautifully wrapped gifts. Whether you’re wrapping a simple box or tackling an oddly shaped item these skills will serve you well for every occasion.
Your thoughtfully wrapped gifts will speak volumes about the care you put into giving. Every crisp corner smooth edge and perfectly placed bow shows your recipient just how much they mean to you.

ULTRA SHARP FABRIC SHEARS: Made of high carbon steel which is stronger than stainless steel, the craft scissors have great qualities including good edge retention and ability to make clean cut through multiple layers of fabric.well worth investing to help you cut down on time and money and perfect your sewing creations.

Longer cut ideal for patterns, seams or long swaths

✔ 【 Achieve Perfectly Straight Cuts with Laser Guidance 】The built-in red laser projects a clear guiding line up to 2m (6.5 ft) ahead, ensuring flawless accuracy on fabric, paper, leather, and crafts. Eliminates mistakes, saves up to 30% material waste, and is ideal for quilting, pattern cutting, and gift wrapping.
Frequently Asked Questions
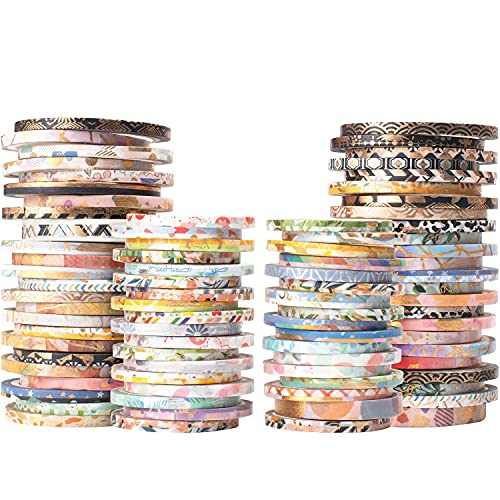
100g VALUE SET: This is a discounted washi tape set, packed with more than 80 rolls of very fine washi tape. Most of them are foiled with gold, very suitable for use as a dividing line.

GREAT VALUE FLOWER SET: 50 different styles of floral patterns are well-designed, and the beautiful printing makes these flowers real and beautiful. No need to wait, take away 50 flower tapes at once

What supplies do I need for professional gift wrapping?
Essential supplies include quality wrapping paper, sharp scissors, double-sided tape, ribbons or bows, and gift tags. Consider adding a transparent tape dispenser for convenience and washi tape for decorative touches. Choose wrapping paper based on the recipient’s personality and opt for versatile options like solid colors or metallics that work for multiple occasions.
How do I measure wrapping paper to avoid waste?
Place your gift on the paper and ensure 2-3 inches of overlap on each side. For length, wrap the paper around the gift’s circumference plus 2 inches for seam overlap. For width, measure the gift’s height plus twice its depth, then add 4 inches total for clean end folds.
What’s the best way to cut wrapping paper cleanly?
Use sharp scissors and mark your cutting lines with a pencil for accuracy. For thick or specialty papers, consider using a rotary cutter with a cutting mat. Always cut on a flat surface and follow straight lines, using the paper’s grid pattern or edge as a guide when possible.
How do I create professional-looking corners?
Master the hospital corner technique by folding one side flat against the box, then folding the adjacent sides to create sharp, clean edges. Tuck excess paper to eliminate bulk and use minimal tape strategically placed to maintain a polished appearance without visible tape lines.
How do I fix common wrapping mistakes like tears or wrinkles?
For small tears, use decorative elements like stickers or bows to cover them. Smooth wrinkles with a bone folder or the flat side of scissors. For stubborn wrinkles, use gentle heat from a hair dryer. If seams are crooked, carefully reposition the paper while the tape is still adjustable.
What’s the best way to wrap oddly shaped items?
Use tissue paper or bubble wrap to create a more regular shape first, then wrap normally. Alternatively, use gift bags for very irregular items, or create a decorative bundle with fabric or cellophane. Consider using multiple pieces of paper strategically placed and secured with ribbons to accommodate unusual shapes.
How do I choose the right ribbon and bow size?
Match ribbon width to gift size – use 1/4 inch ribbon for small gifts and up to 2 inches for large packages. Ensure you have enough ribbon length (typically 4-5 times the package circumference) for creating full, professional bows. Choose materials that complement your wrapping paper and occasion.
Should I place gifts face-up or face-down when wrapping?
Always place gifts face-down on the wrapping paper to protect the most attractive side. For rectangular boxes, position them with seams facing down and center the item to ensure even paper coverage on all sides. This technique results in a cleaner, more professional appearance.