The 100th day of school marks a special milestone that deserves celebration – and what better way to commemorate this achievement than with a creative 100 days of school shirt? We’ve all been there, scrambling at the last minute to help our kids create something memorable for this beloved classroom tradition.
Whether you’re a parent looking for DIY 100 days shirt ideas or searching for ready-made options, we understand the pressure to make this day special. From simple number displays to elaborate themed designs, the possibilities are endless when it comes to showcasing those precious 100 days of learning.
We’ve compiled the ultimate guide to help you create or find the perfect shirt that’ll make your child beam with pride. Get ready to discover creative designs, time-saving tips, and inspiration that’ll transform this school milestone into an unforgettable memory.
Creative DIY 100 Days of School Shirt Ideas
We’ll transform your child’s 100 days of school shirt into a masterpiece with these hands-on designs that celebrate learning milestones. These DIY approaches let families bond while creating something truly special for this important school celebration.

Package Contents: You’ll get 30pcs 100 Days of School dtf transfers ready to press, each about 8.6×7 inches (22×18 cm). Fun school-themed designs with numbers, pencils, and buses make great iron on transfers for tshirts, bags, and crafts

JUNIORS FIT: Designed for a slimmer juniors silhouette. Please reference the size chart carefully. If you prefer a roomier or traditional women’s fit, consider sizing up.

MATERIAL: This teacher shirts is made of breathable fabric, it's not only lightweight but also absorbs sweat, very comfy fit wear
Number-Based Designs
Bold number displays make striking visual statements that instantly communicate the 100-day achievement. We recommend using fabric paint to create a large “100” across the shirt front, with each digit measuring approximately 4 inches tall for maximum impact.
Tally mark arrangements offer an educational twist that reinforces counting concepts. Create five groups of 20 tally marks using black permanent markers, arranging them in neat rows across the shirt. This design helps younger children visualize what 100 actually looks like.
Roman numeral presentations introduce older elementary students to ancient number systems. Write “C” (the Roman numeral for 100) in large block letters, then surround it with smaller decorative elements like stars or hearts.
Mathematical equation layouts turn the shirt into a learning tool by displaying “50 + 50 = 100” or “10 x 10 = 100.” Use different colored markers for each number to create visual interest and reinforce basic math concepts.
Interactive Elements
Velcro attachment systems create removable number displays that children can manipulate throughout the school day. Attach small Velcro dots to fabric pieces shaped like numbers, allowing kids to rearrange them during math activities.
Pocket counting stations transform ordinary shirt pockets into learning centers filled with 100 small items. Fill clear plastic pockets sewn onto the shirt with items like buttons, beads, or miniature erasers that classmates can count.
Flip book sections attach small notebooks to the shirt using safety pins, with each page showing groups of 10 items. Students can flip through the pages to count by tens up to 100, making learning interactive and captivating.
Scratch off areas use contact paper to cover groups of stickers arranged in sets of 10. Children can scratch off sections throughout the day, revealing colorful stickers underneath while practicing counting skills.
Photo Collage Concepts
Timeline arrangements showcase your child’s growth by displaying 10 photos from each month of school in chronological order. Print wallet-sized photos and arrange them in neat rows, creating a visual story of the school year’s progression.
Activity documentation captures special school moments through carefully curated photo selections. Choose images from field trips, classroom parties, art projects, and daily activities to create a comprehensive school experience collage.
Growth comparison displays feature side-by-side photos showing your child’s development over the 100 days. Include beginning-of-year and current photos to highlight physical changes, new skills, and academic achievements.
Friendship celebration layouts honor classroom relationships by including photos of your child with different classmates and teachers. Arrange these social memories in heart shapes or fun patterns that emphasize the community aspect of learning.
Easy No-Sew 100 Days of School Shirt Options
 1")
We understand that sewing machines and needlework aren’t everyone’s forte, especially when you’re working against the clock. These simple techniques let you create stunning 100 days shirts without touching a single thread.

Size guide - S=US(4-6), M=US(8-10), L=US(12-14), XL=US(16-18),XXL=US(18-20). Relaxed fit, please refer to our size chart and choose your suitable size

14 VIBRANT COLORS PLUS EXTRA WHITE: The Shuttle Art fabric paint set includes 14 vibrant soft fabric paints (12 ml/0.4 oz) in tubes, plus an additional white for extra versatility, along with 3 brushes. Perfect for various textile painting projects and art crafts
SOFT 100% COTTON JERSEY feels breathable, lightweight, and gentle on sensitive skin.
Iron-On Transfer Methods
Printable transfer sheets offer the quickest path to professional-looking designs. We recommend using inkjet transfer paper for light colored shirts or laser transfer paper for dark fabrics. Design your “100” using bold fonts in programs like Canva or even Microsoft Word, then print directly onto the transfer material.
Heat application requires just a household iron set to medium heat without steam. Place your design face-down on the shirt, cover with the included backing paper, and apply firm pressure for 15-20 seconds. Allow the transfer to cool completely before peeling away the backing for best adhesion.
Number cutouts from vinyl transfer material create clean, professional results. Cut individual numbers using create scissors or a cutting machine like Cricut, then arrange them creatively on your shirt. Apply heat using an iron or heat press for 30-45 seconds to ensure permanent bonding.
Fabric Marker Techniques
Permanent fabric markers let you draw directly onto cotton shirts with immediate results. We suggest using Sharpie fabric markers or Tulip ColorShot markers for vibrant colors that won’t fade through washing. Sketch your design lightly with pencil first, then trace over with markers for precision.
Stencil applications ensure uniform lettering and shapes every time. Create stencils from cardboard or purchase ready-made number templates from create stores. Secure the stencil with tape, then fill in using fabric markers or fabric paint pens for consistent coverage.
Freehand creativity works perfectly for artistic parents and children who enjoy personal touches. Let kids contribute by drawing 100 small objects like stars, hearts, or smiley faces around a central “100” design. This approach celebrates their artistic development while meeting the assignment requirements.
Sticker and Adhesive Answers
Foam number stickers provide dimension and texture without any mess or drying time. Purchase large foam numbers from dollar stores or create retailers, then arrange them on the shirt in creative patterns. Press firmly to activate the adhesive backing, ensuring edges lay flat against the fabric.
Gem and rhinestone applications add sparkle that catches classroom lights beautifully. Use fabric glue dots or adhesive gems to create the number “100” or spell out “One Hundred” across the chest. Allow 24 hours drying time before wearing to prevent pieces from falling off during school activities.
Vinyl lettering offers a modern, sleek appearance that rivals professional screen printing. Cut letters from adhesive vinyl using electronic cutting machines or purchase pre-cut numbers from create stores. Apply by removing backing paper and smoothing from center outward to eliminate air bubbles.
Educational 100 Days of School Shirt Themes
 2")
Educational themes transform your child’s 100 days shirt into a powerful learning tool that reinforces classroom concepts. These academic-focused designs celebrate both the milestone and the knowledge gained throughout the school year.

Colorful 100 Days of School Designs: This 20-piece set features cheerful heat transfer decals celebrating the 100th day of school, including rainbows, dinosaurs, stars, and bold “100” motifs that add joy and creativity to every project

Satisfy Your Decoration Needs: you will receive 20 sheets of 100 Days of School iron on transfers, which are rich in quantity and various in styles, can well meet your decoration, sharing and replacement needs
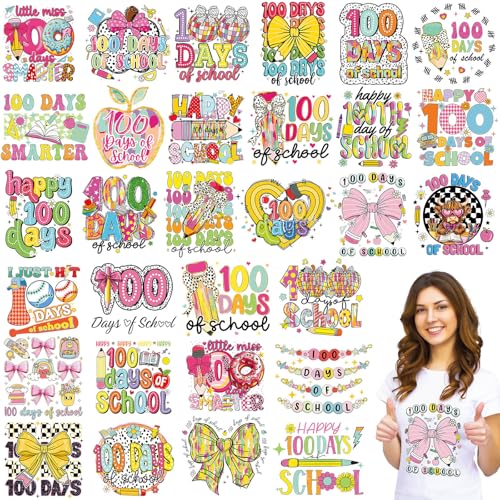
Various Design: this 30 pieces of 100 days of school heat transfer stickers feature cute designs like pencils, apples, and bows, adding fun to your clothes and bags, making your DIY works full of personality and fun, attracting the eye
Math and Counting Concepts
Mathematical designs make numbers come alive on your child’s shirt while reinforcing essential counting skills. We recommend creating equation chains like “50+50=100” or “25×4=100” across the shirt front to showcase multiplication and addition mastery. Geometric shapes offer another captivating approach—arrange 100 triangles, circles, or squares in colorful patterns that demonstrate both counting and shape recognition.
Fraction displays work exceptionally well for older elementary students who’ve learned basic fraction concepts. Design your shirt with visual representations like “1/2 + 1/2 = 1” repeated 100 times, or create pie charts showing different ways to make 100. Number line concepts translate beautifully onto shirt sleeves, with increments of 10 leading up to 100 to reinforce skip counting skills.
Place value demonstrations help solidify understanding of hundreds, tens, and ones places. Create sections on the shirt showing “1 hundred, 0 tens, 0 ones = 100” with visual representations using different colored elements for each place value category.
Historical Timeline Designs
Timeline themes connect the 100 days milestone to important historical events and educational milestones. We suggest creating a century timeline that highlights 100 years of history, featuring major inventions, discoveries, or cultural milestones that occurred in each decade from the 1920s to 2020s.
American history timelines work particularly well for elementary students learning about our nation’s past. Display key events like the first moon landing, the invention of the telephone, or the founding of national parks, spacing them across 100 years of progress and achievement.
Biographical timelines celebrate famous figures who lived approximately 100 years or made important contributions over a century span. Feature inventors like Thomas Edison, scientists like Marie Curie, or leaders like Abraham Lincoln with their major accomplishments marked along a visual timeline stretching across the shirt.
School milestone timelines create personal connections by marking important educational achievements. Include kindergarten first day, learning to read, mastering addition, or other academic victories that occurred during the first 100 days of the current school year.
Science-Inspired Ideas
Scientific concepts bring educational wonder to 100 days shirt designs while reinforcing STEM learning objectives. We love periodic table themes that highlight the first 100 elements, creating colorful squares with element symbols and atomic numbers that double as both science education and counting practice.
Animal kingdom designs showcase biodiversity by featuring 100 different species arranged by classification groups. Display mammals, birds, reptiles, fish, and insects in organized sections that demonstrate scientific categorization while achieving the 100-item count requirement.
Space exploration themes celebrate astronomical wonders with 100 stars, planets, or galaxies arranged in constellation patterns. Include fun facts about each celestial body to combine counting practice with scientific discovery and wonder about our universe.
Weather pattern designs teach meteorology concepts through 100 weather-related elements like raindrops, snowflakes, or sunshine rays. Create seasonal sections showing different weather phenomena while reinforcing scientific vocabulary and observation skills that support classroom learning objectives.
Budget-Friendly 100 Days of School Shirt Materials
 3")
Creating memorable 100 days of school shirts doesn’t require very costly. We’ve discovered many affordable materials that produce stunning results while keeping costs minimal.

What You Will Get: the package includes 2 pieces of countdown schedule wall posters in different patterns, you can put them in different places, and our abundant quantity will satisfy your using requirements

A Variety of Patterns: There are 300pcs 100th day of school foam stickers with a variety of designs, including trophies, books, school buses, sports and other campus elements.Your child can choose their favorite 100th day of school stickers for students at will to create their own unique decoration. Can not only stimulated their creativity, but also made the whole celebration more lively and fun

Package Includes: You will receive 30 sets of “100 Days Smarter” grandpa-themed craft posters and 30 sheets of 1–100 number colored dot stickers. Sufficient quantity for group craft sessions, as well as 100-day DIY craft activities.
Dollar Store Supplies
Foam stickers offer instant number displays for just $1 per pack, making them perfect for creating bold “100” designs. Most dollar stores carry multiple colors and sizes that stick directly to fabric without additional adhesive.
Washable markers provide vibrant colors for drawing equations, tallies, or decorative elements on cotton shirts. These $1 markers work well on light colored fabrics and won’t fade after washing when heat set properly.
Glue dots create secure attachment points for lightweight decorations like paper cutouts or fabric pieces. We find these adhesive circles particularly useful for temporary additions that won’t damage the shirt permanently.
Create foam sheets cut easily into numbers, shapes, or educational symbols using basic scissors. Each pack contains multiple colors for $1 and provides enough material for several shirt projects.
Ribbon spools add texture and dimension to counting displays when arranged in groups of ten. Dollar store ribbon comes in various widths and patterns that complement any shirt color scheme.
Household Items to Repurpose
Coffee filters transform into perfect circles for creating 100 dots displays when flattened and traced. We often dye these white filters using food coloring to match school colors or seasonal themes.
Bottle caps serve as excellent counting manipulatives when glued in rows of ten across the shirt front. Clean plastic caps from water bottles, soda containers, or milk jugs work equally well for this purpose.
Old magazines provide colorful number cutouts and educational images for collage style designs. We recommend cutting numbers from different fonts and sizes to create ever-changing visual interest.
Aluminum foil creates shiny accents when crumpled and shaped into mathematical symbols or decorative borders. This reflective material catches light and adds sparkle without purchasing expensive embellishments.
Cardboard tubes from paper towels or toilet paper make excellent stamps when cut and shaped into number outlines. Dip these homemade stamps in fabric paint for repeated impressions across the shirt surface.
Button collections offer perfect counting objects when sewn or glued in organized patterns of ten groups. We often find colorful button assortments in sewing boxes or old clothing destined for donation.
Free Printable Resources
Online template libraries provide professional quality number designs that print directly onto transfer paper. We recommend checking teacher resource websites and Pinterest boards for downloadable 100 days graphics.
Educational websites offer themed printables featuring math equations, historical timelines, and science facts for educational shirt designs. Many school district websites maintain collections of celebration resources available to families.
DIY blog downloads feature step by step instructions with accompanying templates for popular shirt designs. These resources often include multiple size options to accommodate different age groups and shirt dimensions.
Library computer access eliminates printing costs while providing high quality output for transfer projects. Most public libraries offer free printing services for educational materials and school celebration items.
School communication platforms frequently share printable resources created by teachers and parent volunteers. We suggest checking classroom apps, email newsletters, and school Facebook groups for community shared templates.
Font websites provide free number fonts that create uniform, professional looking text when printed and transferred. Bold, block style fonts work best for fabric applications and maintain clarity after washing.
Age-Appropriate 100 Days of School Shirt Designs
 4")
We understand that creating the perfect 100 days of school shirt requires consideration of your child’s developmental stage and abilities. Different age groups respond to varying levels of complexity in their celebratory designs.

Packing List: 1 piece counting the days pocket chart in 22.24 x 11.81 inches/ 56.5 x 30 cm, 111 base-ten blocks (including 1 piece blue flat block, 20 pieces green rods, and 100 yellow blocks), and 67 pcs place value cards, 4 stainless steel hooks

Packing List: 1 piece composition notebook counting the days pocket chart in 22.24 x 11.81 inches/ 56.5 x 30 cm, 111 base-ten blocks (including 1 piece blue flat block, 20 pieces green rods, and 100 yellow blocks), and 67 pieces place value cards, 4 stainless steel hooks

Intuitive and Effective counting chart: color board counter are used to work place value counting "ones" "tens" “hundreds”
Preschool and Kindergarten Ideas
Simple counting displays work best for our youngest learners. We recommend using large, colorful foam numbers to create bold “100” displays that preschoolers can easily recognize. Basic tally mark groups in sets of five help reinforce early counting concepts while keeping the design manageable for small hands to understand.
Sticker collections create captivating visual experiences for young children. We suggest using 100 star stickers arranged in groups of ten across the shirt front. Animal stickers work wonderfully when organized into counting categories like “10 cats, 10 dogs, 10 birds” to make the concept more relatable.
Interactive elements capture preschooler attention effectively. We recommend attaching small pockets filled with counting manipulatives like beans or buttons. Velcro strips allow children to practice attaching and removing items throughout the day, reinforcing the 100 concept through hands-on learning.
Photo collages tell personal stories that young learners love. We suggest creating simple grid layouts with pictures from each month of school. Growth comparison photos showing “then and now” moments help preschoolers visualize their learning journey in concrete terms.
Elementary Grade Options
Mathematical equations challenge elementary students appropriately. We recommend displaying creative math problems that equal 100, such as “50+50,” “10×10,” or “200-100” across the shirt design. Number pattern displays using sequences like “2, 4, 6, 8…” up to 100 reinforce multiplication concepts learned in class.
Science themes connect learning to real industry applications. We suggest incorporating periodic table elements with atomic numbers totaling 100. Weather pattern designs featuring 100 days of temperature tracking create meaningful connections to daily observations.
Historical elements make learning memorable and relevant. We recommend timeline designs showing major events from the past 100 years. Presidential facts arranged in creative layouts help students connect their milestone to American history lessons.
Creative writing displays showcase literacy development. We suggest featuring lists of 100 sight words arranged in fun patterns. Vocabulary challenges with 100 grade-appropriate terms create walking dictionaries that classmates can reference.
Middle School Concepts
Complex mathematical concepts engage advanced learners effectively. We recommend geometric pattern designs incorporating shapes with area totals equaling 100. Algebraic expressions like “x²=100” or statistical graphs showing 100 data points challenge mathematical thinking skills.
Scientific accuracy becomes important for middle school designs. We suggest detailed periodic table sections highlighting elements discovered in the last 100 years. Biology classifications featuring 100 species within exact taxonomic groups demonstrate advanced scientific knowledge.
Social studies connections provide meaningful context for learning. We recommend industry map designs highlighting countries celebrating their 100th independence anniversaries. Cultural timeline displays showing technological advances over 100 years create global awareness opportunities.
Personal goal tracking reflects middle school developmental needs. We suggest creating achievement boards listing 100 personal accomplishments or learning objectives. Future planning elements featuring 100 career possibilities help students think about their next educational steps.
Popular 100 Days of School Shirt Trends
 5")
Creative parents and teachers are embracing exciting new materials and techniques to make 100 days of school shirts more captivating than ever. These trending designs combine educational value with visual appeal that captures children’s imagination.

【First Day of Kindergarten Shirt】Kindergarten shirt boys,first day of Kindergarten shirt is made of soft, breathable cotton fabric,ensures comfortable all-day wear and is soft and non-irritating to your little kid's skin. High resolution printing technology ensures that the graphics look vibrant and colorful.
SOFT & DURABLE 100% COTTON: Made from high-quality cotton that feels gentle on skin while holding up to daily wear and frequent washing.

Design & Theme. Celebrate the last day of school with a fun and cheerful graphic tee. Perfect end of year design for teachers, students, and classrooms to say goodbye to homework and welcome summer vacation.
Glow-in-the-Dark Elements
Glow-in-the-dark paint transforms ordinary 100 days shirts into magical learning tools that continue working after lights out. We’ve seen parents create stunning number displays using phosphorescent fabric paint that charges during the day and glows brightly in darkened classrooms. Popular applications include painting the number “100” with glow paint, creating constellation patterns with 100 glowing dots, or designing math equations that reveal themselves in low light conditions.
Fabric markers with glow properties offer easier application than traditional paints and work perfectly for younger children to help with simple designs. Parents report that glow-in-the-dark elements generate excitement throughout the entire school day as children anticipate seeing their shirts illuminate during story time or indoor recess. Iron-on transfers with phosphorescent ink provide professional looking results without requiring artistic skills or steady hands.
3D Textured Designs
Dimensional elements add tactile learning opportunities to traditional flat shirt designs while creating visually striking displays. Foam number cutouts layered in different heights create depth perception exercises while showcasing counting skills through stacked arrangements. We recommend using create foam in multiple thicknesses to build number sculptures that children can trace with their fingers.
Puff paint applications create raised surfaces that dry to form permanent textured designs perfect for sensory learners who benefit from touch-based experiences. Cotton ball clusters arranged in groups of ten demonstrate place value concepts while adding soft texture contrast to shirt fabric. Fabric glue and small objects like buttons, beads, or pasta shapes can be arranged into mathematical patterns that children can count and recount throughout the day.
Felt layering techniques allow parents to create storytelling elements where each layer represents different learning milestones from the first 100 days. We’ve observed that textured designs help children with different learning styles engage more deeply with the educational content.
Color-Changing Materials
Thermochromic fabrics and paints respond to body temperature changes, creating interactive displays that reveal hidden messages or numbers throughout the school day. Heat-sensitive paint markers can hide mathematical equations that appear when children place their warm hands on the shirt surface. We’ve found that color-changing elements maintain student engagement during long school days by providing ongoing visual interest.
UV-reactive paints change colors when exposed to sunlight, making outdoor recess time an exciting reveal moment for hidden designs or additional counting elements. Parents report success using temperature-sensitive stickers that shift from dark colors to bright hues, creating countdown displays that activate with body heat. Mood ring materials adapted for fabric applications respond to environmental temperature changes throughout different classroom activities.
Reversible sequin patches offer manual color-changing options where children can brush the sequins to reveal different colors or patterns, creating interactive counting games during free time. These materials work especially well for creating before-and-after displays showing learning progress over the first 100 days of school.
Last-Minute 100 Days of School Shirt Solutions
 6")
Time constraints don’t have to compromise creativity when it comes to celebrating this important school milestone. We’ve compiled practical answers that deliver impressive results within tight timeframes.

GRAPHIC T-SHIRT — A classic, comfortable fit with graphics he'll love

Complete 100th Day of School DIY Shirt Kit:Celebrate the 100th Day of School with this all-in-one DIY Shirt Craft Kit! Each set includes 6 soft cotton T-shirts (fits kids around 130cm) featuring six fun, unique designs—Donut, Cat, Rainbow, Monster, Knowledge Tree, and Candy Jar / Gumball Machine. The kit also comes with 1 sheet of heart stickers, 1 sheet of star stickers, 2 sheets of button stickers, 400 colorful pom pom balls, 100 googly eyes, 1 bottle of craft glue, and 6 coloring pens. Everything your child needs for a creative classroom or home party is included in one set.

【Premium Acrylic Paints for Fabric】Colorful fabric paint set offers 12 rich colors of artist quality acrylic fabric medium. The creamy consistency and high pigments with designed rheology ensure easy blending and smooth application, covering large areas and fine details with great power. Quick-drying and vivid after curing, additional coats can be applied shortly for desired effects.
Quick Assembly Ideas
Grab basic supplies from around your house to create meaningful designs in under 30 minutes. Paper plates become perfect stencils for drawing large “100” numbers, while cotton swabs dipped in fabric paint create dot patterns that represent individual days.
Stick on foam numbers purchased from any create store for instant visual impact. These self-adhesive numbers require no drying time and create professional-looking results that children love to touch and count.
Use masking tape to section off areas of the shirt for painting or coloring. Geometric patterns, number grids, and striped designs become achievable even for parents with limited artistic skills.
Print out coloring pages featuring the number 100 and attach them directly to shirts using fabric glue dots. Kids can color these pages while wearing the shirt, creating an interactive element that keeps them engaged throughout the school day.
Create counting collections by gluing small items like buttons, pasta shapes, or cereal pieces directly onto the shirt fabric. Groups of 10 items arranged in rows make counting practice visible and tactile for young learners.
Store-Bought Alternatives
Visit local discount stores where pre-made celebration shirts often cost less than DIY materials. Dollar stores frequently stock generic “100th Day” shirts during February and March that work perfectly for this milestone.
Check online marketplaces like Amazon or Etsy for same-day or next-day delivery options. Many sellers offer instant download designs that can be printed on transfer paper at local print shops within hours.
Browse Target’s education section during late January and early February when they typically stock 100 days themed clothing. Their seasonal displays often include shirts, accessories, and coordinating items that create complete celebration outfits.
Ask other parents in your child’s class about bulk ordering opportunities. Group purchases often reduce per-shirt costs and ensure delivery timing that works for everyone’s schedule.
Contact local screen printing shops for rush orders on simple designs. Many businesses offer same-day services for basic text or number applications, especially during peak 100 days season.
Digital Design Options
Download free templates from educational websites like Teachers Pay Teachers or Pinterest that offer professionally designed 100 days graphics. These templates work perfectly with iron-on transfer paper available at office supply stores.
Use smartphone apps like Canva or PicMonkey to create custom designs featuring your child’s photo alongside the number 100. These apps offer pre-sized templates that fit standard transfer paper dimensions.
Access online printing services that specialize in custom apparel with 24-hour turnaround times. Companies like CustomInk and Vistaprint offer expedited processing for simple designs during busy school seasons.
Create QR codes that link to photo galleries or videos documenting your child’s first 100 days of school. These modern touches can be printed on transfer paper and applied to any shirt for an interactive digital element.
Design photo collages using free software like GIMP or online tools that arrange multiple images into number shapes or grid patterns. Print these collages on fabric transfer sheets for personalized shirts that showcase learning memories.
Involving Kids in 100 Days of School Shirt Creation
 7")
Making our children active participants in creating their 100 days of school shirt transforms this milestone celebration into a meaningful bonding experience. We’ll discover how collaborative shirt creation becomes a powerful tool for learning and skill development.

Complete DIY Craft Kit: Each 100 days of school shirt craft kit includes 1 good-quality cotton 100 days of school shirt for boys girls (pre-printed with a fun monster design), 100 adhesive googly eyes, and 100 adhesive dots,everything needed to create a unique 100 days of school celebration shirt

100 Days of School Heat Transfers: This set features 16 unique designs, each measuring 7.87in*7.09in. Select from a variety of fun patterns to personalize your clothing, making it the perfect addition to your DIY projects and 100 Days of School celebrations
Age-Safe Create Activities
Preschool activities focus on simple motor skill development through safe, supervised tasks. We encourage finger painting with washable paints to create colorful number displays. Sticker placement activities help young learners practice counting while decorating their shirts with foam numbers and shapes.
Elementary age children can handle more complex tasks that build confidence and creativity. We suggest using child-safe scissors to cut paper shapes for collages. Fabric markers become excellent tools for drawing pictures that represent their learning journey.
Middle school students thrive with independent project management and detailed work. We recommend letting them design digital templates using free online tools. Hot glue gun usage under adult supervision allows them to attach three-dimensional elements safely.
Safety considerations remain our top priority across all age groups. We always provide washable, non-toxic materials for younger children. Adult supervision ensures proper tool usage while maintaining the child’s sense of ownership over their creation.
Learning Opportunities
Math concepts naturally emerge through hands-on shirt creation activities. We incorporate counting exercises by having children place exactly 100 items like buttons or sequins on their shirts. Skip counting practice occurs when children arrange items in groups of 5, 10, or 20 to reach the century mark.
Reading skills develop as children write words and phrases that describe their school experiences. We encourage them to create word clouds featuring vocabulary they’ve learned throughout the year. Storytelling opportunities arise when children explain their design choices and what each element represents.
Science exploration happens through experiments with different materials and textures. We let children test which adhesives work best on various fabric types. Color mixing activities teach basic chemistry concepts while creating unique shirt designs.
Social studies connections form when children research historical events that occurred 100 years ago. We suggest incorporating timeline elements that show how the industry has changed. Cultural celebrations from different countries provide inspiration for diverse design elements.
Skill Development Benefits
Fine motor skills strengthen through precise cutting, gluing, and drawing activities. We notice children’s hand-eye coordination improving as they work with small decorative elements. Threading activities using beads or sequins help develop dexterity and patience.
Creative problem solving emerges when children face design challenges and material limitations. We watch them brainstorm alternative answers when their first ideas don’t work as planned. Resource management skills develop as children work within budget constraints and available supplies.
Communication abilities grow as children explain their design process and creative decisions. We encourage them to present their finished shirts to family members or classmates. Collaborative discussions about design elements build vocabulary and confidence in expressing ideas.
Independence and responsibility flourish when children take ownership of their shirt creation project. We provide guidance while allowing them to make their own choices about colors, layouts, and decorative elements. Time management skills develop as they plan their work sessions and meet project deadlines.
Self-confidence builds through the accomplishment of completing a meaningful project from start to finish. We celebrate their unique creative expressions and help them see the value in their individual approaches. Pride in their work translates to increased enthusiasm for future school projects and learning opportunities.
Care and Maintenance for 100 Days of School Shirts
 8")
Protecting your child’s 100 days shirt creation ensures this special milestone memory lasts for years to come. Proper care techniques help preserve the decorative elements while maintaining the shirt’s quality and sentimental value.
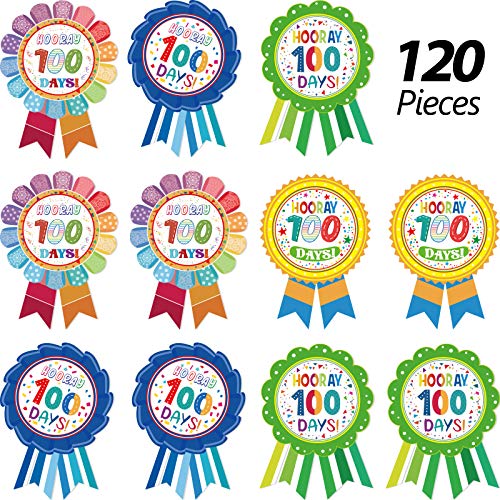
You will receive: 120 pieces adhesive incentive badges in 4 different designs, 30 pieces per design, each sticker measures approx. 3 x 4 inches, enough quantity for your long use
Package includes: 2 rolls of 100 days of school badge stickers in 6 styles, a total of 204 pieces; Different colors and styles are enough for 100 days of school party decorations, creating a cheerful atmosphere for the party

Package includes: You will receive 5 hanging garlands, each featuring 6 number 100 cutouts in 6 colors—a total of 30 decorative pieces. A generous quantity that easily covers bulletin boards, hallways, and party areas for the 100th day of school
Washing Instructions
Turn your shirt inside out before every wash to protect decorative elements like stickers, foam numbers, and iron-on transfers from direct agitation. Cold water settings work best for preserving colors and preventing heat-sensitive materials from peeling or cracking.
Select gentle cycle options on your washing machine to minimize stress on attached decorations and delicate fabric markers. Mild detergent without bleach keeps colors vibrant while protecting adhesive bonds on stickers and vinyl lettering.
Separate the shirt from heavy fabrics like jeans or towels that could snag loose elements during the wash cycle. Place the shirt in a mesh laundry bag for extra protection if you’ve used multiple small decorations like gems or rhinestones.
Air dry your creation instead of using the dryer heat, which can cause foam stickers to curl and iron-on transfers to crack. Lay the shirt flat on a clean towel to prevent stretching while maintaining the shape of three-dimensional elements.
Spot clean stubborn stains with a damp cloth and gentle soap before they set, especially around areas with washable markers or food-related decorations from classroom celebrations.
Storage Tips
Fold your shirt carefully along natural seam lines to avoid creasing decorative elements or creating permanent wrinkles in photo collages and printed designs. Place tissue paper between folds to prevent sticking when storing shirts with rhinestones or puffy paint.
Choose acid-free storage boxes that protect the shirt from yellowing and deterioration over time, especially important for preserving printed photos and paper elements. Cedar blocks naturally deter insects without harsh chemicals that could damage delicate decorations.
Store in a cool, dry location away from direct sunlight that can fade fabric markers and cause adhesive elements to lose their bond. Basement storage areas with consistent temperature work better than attics with extreme temperature fluctuations.
Lay the shirt flat in storage containers when possible to prevent stress on three-dimensional elements like foam numbers or bottle cap decorations. Rolling can work for simple designs but avoid this method for shirts with multiple layers or textured elements.
Include silica gel packets in storage containers to absorb excess moisture that could cause mold growth or damage to paper-based decorations and photo elements.
Preservation Methods
Document your creation with high-quality photos from multiple angles before the shirt experiences any wear, capturing both overall design and close-up details of special elements. These photos serve as backup memories if the physical shirt deteriorates over time.
Create a shadow box display for particularly elaborate designs that showcase the shirt while protecting it from handling and environmental damage. Museum-quality mounting techniques prevent fabric stress and maintain the shirt’s original shape.
Apply fabric protector spray to shield against stains and moisture damage, testing first on a hidden area to ensure compatibility with all decorative elements. UV-blocking sprays help prevent fading when displaying the shirt in areas with natural light.
Make digital copies of any printed elements or templates used in the creation process, storing these files with the physical shirt for potential future restoration needs. Scan important elements at high resolution before they show signs of wear.
Frame important portions of heavily decorated shirts by cutting and preserving the most meaningful sections in acid-free matting, allowing you to display the memory while storing the remainder safely. This technique works especially well for shirts with extensive photo collages or educational timeline elements.
Conclusion
The 100th day of school represents more than just a calendar milestone – it’s a celebration of growth learning and shared experiences. We’ve shown you that creating memorable shirts doesn’t require expensive materials or advanced crafting skills. Whether you choose simple sticker designs elaborate photo collages or educational themes every approach offers meaningful ways to mark this special day.
These shirts become treasured keepsakes that capture your child’s personality and academic journey. From last-minute answers to elaborate projects we’ve provided options for every family’s needs and timeline. The key lies in involving your children in the creative process which transforms a school requirement into a bonding experience.
Remember that the perfect 100 days shirt is the one that brings joy to your child and celebrates their unique learning adventure. With proper care these creations will preserve precious memories for years to come.

Elegant Bow Design for the Stylish Educator: This is no ordinary 100 days of school shirt! We've elevated it with a chic bow detail, creating a refined bow top for women. Specifically designed for the female teacher who values both style and comfort, this 100th day of school shirt teacher version ensures you stand out in class photos and celebrations.

Package Included: you will get 1 nylon pocket chart(19.7x13inch), 3 sets cards,each set including place value,ones,tens,hundreds and 10numbers of 0 to 9, 200pcs of color counting sticks. It is great value for teaching supplies and daily use

100th Days Of School Design Tees --- Teacher shirts for women, 100th days of school graphics tee shirts, kindergarten and pre-k teachers tee tops, school days celebration tshirts, classic round neck design and loose fit stylish will matching with anybody.
Frequently Asked Questions
What is the 100th day of school celebration?
The 100th day of school is a milestone celebration that marks 100 days of learning. Students typically create special shirts or outfits featuring the number 100 in creative ways. This celebration helps children visualize their educational progress and reinforces counting concepts while making learning fun and memorable.
What are some easy DIY ideas for 100 days shirts?
Simple DIY options include using iron-on transfers, fabric markers, foam number stickers, and stencils. You can create designs with bold “100” displays, tally marks, or mathematical equations. No-sew methods like gem applications and vinyl lettering work well for parents who prefer quick, professional-looking results.
How can I make a 100 days shirt on a budget?
Use dollar store supplies like foam stickers, washable markers, and glue dots. Repurpose household items such as coffee filters, bottle caps, and old magazines for creative designs. Free printable templates and educational graphics are available online to help create professional-looking shirts without expensive materials.
What educational themes work well for 100 days shirts?
Math and counting themes are popular, featuring equation chains and geometric shapes. Science-inspired designs can include periodic table elements, animal classifications, or space exploration themes. Historical timelines connecting the 100-day milestone to significant events also make excellent educational shirt designs.
Are there age-appropriate design suggestions?
Yes! Preschoolers benefit from simple counting displays and interactive elements like Velcro attachments. Elementary students can handle mathematical equations and science themes. Middle schoolers can engage with complex mathematical concepts, scientific accuracy, and personal goal tracking on their shirts.
What if I’m running out of time to make a shirt?
Quick solutions include using paper plates as stencils, cotton swabs for dot patterns, and basic household supplies. Store-bought alternatives are available at discount stores and online marketplaces. Digital design options with free templates and smartphone apps offer expedited solutions for last-minute needs.
How can I involve my child in creating their shirt?
Assign age-appropriate tasks: finger painting and sticker placement for preschoolers, measuring and cutting for elementary students, and digital design for middle schoolers. These activities reinforce academic concepts while developing fine motor skills, creativity, and communication abilities through collaborative project work.
How do I care for and preserve the finished shirt?
Wash the shirt inside out using cold water and air dry to protect decorative elements. Store in acid-free boxes in cool, dry locations. Document with photos, create shadow box displays, and apply fabric protector sprays to maintain quality and preserve this special memory for years to come.
Can interactive elements be added to the shirt?
Absolutely! Consider Velcro attachments, pocket counting stations, flip book sections, and scratch-off areas to make learning engaging. These interactive features help reinforce counting concepts while providing hands-on learning experiences that children can enjoy throughout the school day.
What materials create the most durable designs?
Iron-on transfers, vinyl lettering, and heat-set fabric paints offer excellent durability. Avoid glued-on elements that may fall off during washing. When using stickers or gems, choose high-quality adhesive options and follow proper heat-setting techniques to ensure your design withstands regular wear and washing.