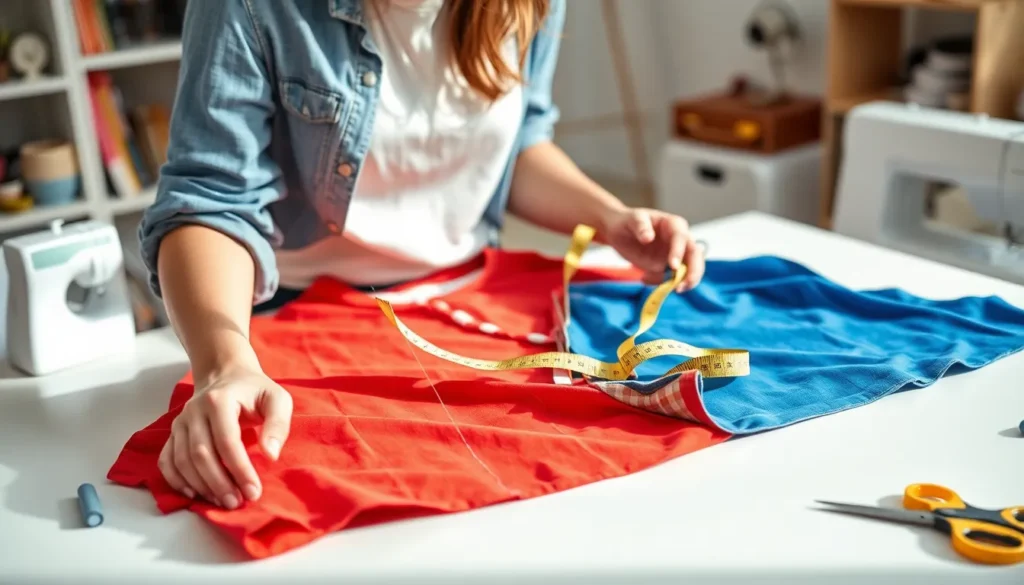
We’ve all been there – staring at a perfectly good shirt that just doesn’t fit quite right or feels too plain for our style. Whether you’re looking to transform an oversized tee into a trendy crop top, create unique cut-out designs, or simply resize a garment that’s too big, learning how to cut a shirt properly can save you money and unleash your creativity.
Cutting shirts isn’t just about grabbing scissors and hoping for the best. With the right techniques and tools, we can help you achieve professional-looking results that’ll have people asking where you bought your “new” shirt. From basic hemming to advanced distressing techniques, mastering shirt cutting opens up endless possibilities for customizing your wardrobe.
The best part? You don’t need expensive equipment or years of sewing experience to get started. We’ll walk you through everything you need to know to confidently transform any shirt into exactly what you envision.
Gather Your Essential Tools and Materials
Having the right tools makes all the difference when cutting shirts professionally. We’ve compiled the essential items you’ll need to achieve clean cuts and precise alterations.

Pinking shears for Fabric, Linings, Paper,leather,PU and Craft Uses. Ideal Craft Shears for Professional and Domestic Use. These pinking shears for fabric cutting can be used to add decorative edging to ribbon, paper, and other materials.

Tailor Scissors made form high-density Stainless Steel Rust Resistant

If You Use My Fabric Scissors I Will Cut You is perfect for women and men who love making things with fabric. A sarcastic joke for quilters, seamstress, crocheters, knitters, tailors, or fashion designers.
Sharp Fabric Scissors
Invest in quality fabric scissors to ensure clean, precise cuts that won’t fray your shirt material. Dull scissors create jagged edges and can damage delicate fabrics like cotton, polyester, or blends.
Keep your fabric scissors exclusively for fabric cutting to maintain their sharpness. Using them on paper, cardboard, or other materials will dull the blades quickly and compromise your results.
Choose 8-10 inch fabric scissors with comfortable handles that fit your hand size. Professional tailoring scissors or heavy-duty crafting scissors work best for most shirt cutting projects.
Measuring Tape or Ruler
Use a flexible measuring tape for curved areas like armholes, necklines, and hemlines where accuracy matters most. The flexibility allows you to follow the natural contours of your shirt while maintaining precise measurements.
Keep a clear plastic ruler handy for straight cuts and marking parallel lines across your shirt. An 18-inch quilting ruler provides excellent visibility and stability when creating geometric cuts or cropped designs.
Double-check all measurements before cutting by measuring twice and marking your cutting lines clearly. This simple practice prevents costly mistakes that can’t be undone.
Fabric Chalk or Washable Marker
Mark your cutting lines with fabric chalk that brushes away easily after completing your alterations. White chalk works well on dark shirts, while colored chalk shows up better on light fabrics.
Choose washable fabric markers for more permanent guidelines that won’t smudge during cutting. These markers disappear completely when washed, leaving no trace on your finished shirt.
Test your marking tool on a hidden area of the shirt first to ensure it won’t leave permanent stains. Different fabric blends react differently to various marking materials.
Seam Ripper
Use a seam ripper to carefully remove existing seams when you need to resize shirts or modify sleeve attachments. The sharp point and curved blade make quick work of tight stitching without damaging the fabric.
Replace dull seam ripper blades regularly to maintain clean cuts through thread without pulling or tearing your shirt material. Sharp blades glide through seams effortlessly.
Work slowly with your seam ripper to avoid accidentally cutting through the shirt fabric itself. Patience during seam removal saves you from irreparable damage to your project.
Choose the Right Shirt for Your Project
 1")
Now that we’ve gathered our essential tools, selecting the perfect shirt becomes our next critical step toward achieving professional looking results.

Measuring range: 0 to 60 inches and 0 to 150 centimeters. There is a centimeter scale on the back, which is accurately printed in inches and centimeters. Both sides can be measured according to your requirements. You can put one in your pocket or backpack without taking up too much space

2 Pack Soft Fashion Measuring Tape Set. Double sided, 60 inch / 150 cm, portable,durable tape measure. Small and light pocket size measuring tape.
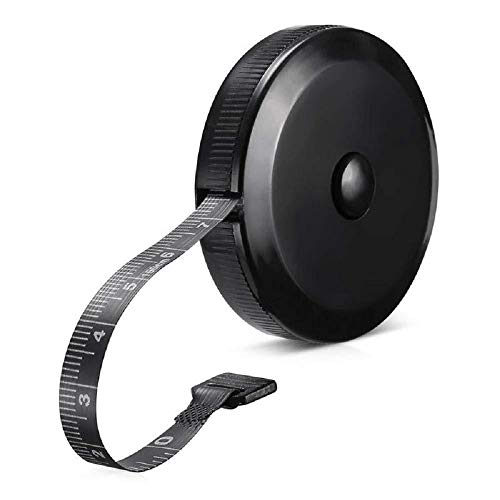
Package Include:1 Pack Soft Retractable Black Dual Sided Tape Measure Body Measuring Tape Set, Dual sided, 150cm/60inch in length, large and clear markings in both Inches and CM for easier reading, Retractable black measuring tape size 2 x 2 x 0.5 inches, weight 0.02 KG/0.7 OZ
Select Appropriate Fabric Types
Cotton shirts offer the easiest cutting experience for beginners since they hold their shape well and resist fraying. We recommend starting with 100% cotton or cotton blends when you’re learning shirt cutting techniques.
Knit fabrics like jersey or stretchy materials require extra caution because they can curl at the edges after cutting. These fabrics work best for casual projects like crop tops or loose fitting designs where perfect edges aren’t essential.
Avoid synthetic blends with high polyester content initially since they can melt when exposed to heat from pressing or sealing cut edges. We suggest saving silk, linen, or delicate fabrics for advanced projects once you’ve mastered basic cutting skills.
Denim and heavy cotton work exceptionally well for structured cuts and geometric designs because their thickness prevents unwanted stretching during the cutting process.
Consider the Shirt’s Fit and Size
Oversized shirts provide more fabric to work with and allow for creative cutting without worrying about the final fit being too tight. We find that shirts one to two sizes larger than your normal size give you room for mistakes and design adjustments.
Fitted shirts work better for precise alterations like sleeve modifications or neckline adjustments where you want to maintain the shirt’s original silhouette. These projects require more careful measuring since there’s less excess fabric available.
Consider the shirt’s length when planning vertical cuts or hem modifications since shorter shirts limit your design options. We recommend choosing longer shirts for projects involving bottom hem cutting or creating high low hemlines.
Sleeve length affects your ability to create cap sleeves, tank tops, or other arm modifications, so select shirts with appropriate sleeve dimensions for your intended design.
Check for Pre-existing Damage
Inspect seams carefully for loose threads, small holes, or weak spots that could expand during cutting or wearing. We always examine stress points like underarms, shoulder seams, and necklines before starting any project.
Look for stains or discoloration that might become more noticeable after cutting since some alterations can change how light hits the fabric surface. Minor stains near cutting lines won’t affect your project, but prominent marks in visible areas should influence your design choices.
Check fabric thickness consistency throughout the shirt because some areas may have worn thinner over time, making them more prone to tearing during cutting. We test fabric strength by gently stretching small sections between our fingers.
Examine existing hems and seams for quality since these areas often serve as guides for your new cuts and can indicate the shirt’s overall construction quality.
Plan Your Design Before Making Any Cuts
 2")
Planning prevents permanent mistakes and ensures we achieve the exact look we’re envisioning. Rushing into cutting without a clear plan often leads to uneven lines, poor proportions, or complete project failures.

GREAT FOR ANY FABRIC - Trade in dusty tailors chalk or messy sewing chalk for these Heat Erasable Pens for fabric. Ideal for quilting supplies clearance, these fabric pens glide smoothly over any sewing fabric for clear, easy-to-see lines.
Colors:Blue, Red, White, Yellow,4 Pcs

MAKE TEMPORARY MARKINGS – Works well on garments, quilting pieces, and other textile projects with Madam Sew Fabric Marking Pens for sewing. Cleaner and more precise than tailor’s chalk pencil, these fabric pens let you make smooth marks to denote alterations or embellishment placement.
Sketch Your Vision on Paper
Drawing our design concept helps us visualize the final result before making irreversible cuts. We recommend using graph paper to maintain accurate proportions and create clean, symmetrical designs. Start by outlining the shirt’s basic shape, then add the exact cut lines, removed sections, or style modifications we want to achieve.
Create multiple sketches to explore different design options. We can experiment with various neckline shapes like scoop necks, off-the-shoulder cuts, or asymmetrical designs on paper first. Add measurements and notes to each sketch, including exact dimensions for cut-outs, fringe lengths, or tie placements.
Consider drawing both front and back views of our design. This comprehensive approach helps us spot potential issues and ensures we don’t overlook important details that could affect the shirt’s structure or wearability.
Mark Key Measurements
Taking precise measurements ensures our cuts align perfectly with our body proportions. We should measure our chest, waist, hip circumference, and desired finished lengths before marking anything on the fabric. Use fabric chalk to mark these critical points directly on the shirt.
Mark the center front and center back lines first to establish symmetry guidelines. These reference lines prevent crooked cuts and help maintain balanced proportions throughout the cutting process. We can use a ruler or measuring tape to ensure these lines are perfectly straight and centered.
Identify and mark exact cut points like armhole modifications, hemline changes, or decorative cut-out locations. Double-check all measurements against our sketch and our body measurements to avoid costly mistakes that can’t be undone.
Consider the Final Look You Want
Thinking about how we’ll wear the finished shirt influences our cutting decisions significantly. We need to determine whether we want a loose, flowy fit or a more fitted silhouette that requires strategic seaming. Consider the occasions where we’ll wear this customized piece and ensure our design choices align with those settings.
Evaluate how the modified shirt will work with our existing wardrobe pieces. We should think about layering options, undergarment considerations, and styling possibilities that complement our personal aesthetic. A crop top design requires different undergarments than a standard length shirt with decorative cut-outs.
Plan for any finishing touches like hemming raw edges, adding bias tape, or creating rolled hems. These details affect both the appearance and durability of our finished piece, so we must factor them into our overall design timeline and skill requirements.
Prepare Your Shirt for Cutting
 3")
Proper preparation ensures clean cuts and prevents fabric distortion during your shirt cutting project. We’ll walk through each essential step to set up your workspace and shirt for successful alterations.

Mr. Pen erasable fabric marking pens set provides 5 pens, each with a specialized water-soluble ink that allows for temporary marking on fabrics, perfect for tailoring, sewing, and crafting applications.

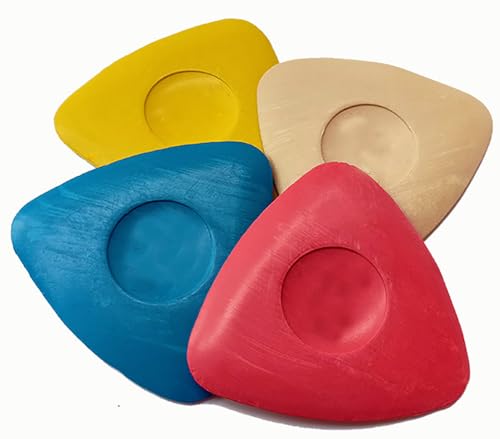
Complete Set with Break-Resistant Design – Includes 4 brightly colored tailors chalk pieces, wrapped in plastic sponge cushioning to prevent breakage. All pieces are neatly stored in a clear plastic box. A practical and durable fabric chalk markers for sewing set

Versatile: The marker allows you to create thin and thick lines on many different fabric materials and colors
Wash and Dry the Shirt
Washing your shirt before cutting prevents unexpected shrinkage after you’ve completed your project. Cotton and cotton blend fabrics can shrink up to 5% during their first wash, which would alter your carefully planned measurements. Use your regular laundry detergent and follow the care label instructions for water temperature.
Drying the shirt completely eliminates moisture that could cause cutting issues. Damp fabric tends to stretch or bunch under scissors, leading to uneven cuts and jagged edges. Air drying works best for delicate fabrics, while machine drying on low heat suits most cotton shirts.
Avoiding fabric softener during this wash helps maintain the shirt’s natural texture for easier handling. Softeners can make fabric slippery and harder to grip securely while cutting. This extra step ensures your scissors glide smoothly without the fabric sliding around unexpectedly.
Iron Out Any Wrinkles
Ironing creates a smooth surface that allows for precise cutting lines and accurate measurements. Wrinkles and creases can distort your marked cutting lines by up to half an inch, throwing off your entire design. Set your iron to the appropriate heat setting based on your fabric type.
Pressing the shirt flat eliminates fold lines that could interfere with your pattern placement. Pay special attention to areas where you plan to make cuts, ensuring they’re completely smooth. Work from the center outward to avoid creating new wrinkles as you iron.
Steam settings help relax stubborn creases without over pressing delicate fabrics. Use short bursts of steam rather than continuous application to prevent water spots or fabric damage. Allow the shirt to cool completely before moving to the next step.
Lay the Shirt on a Flat Surface
Spreading your shirt on a large, flat surface provides the workspace needed for accurate cutting. A dining table, cutting mat, or clean floor offers enough room to lay the shirt completely flat without hanging edges. Ensure the surface is clean and free from debris that could snag your fabric.
Positioning the shirt with seams aligned creates symmetrical cuts on both sides. Match up the side seams and shoulder seams so both halves of the shirt lie evenly. This alignment is crucial for cuts that go across the shirt’s width.
Smoothing out any remaining bumps or air pockets ensures your measurements stay consistent. Run your hands across the fabric surface to eliminate any trapped air between the shirt layers. Double check that sleeves and collar areas lay flat against the surface before proceeding with your cuts.
Master the Basic Crop Top Cut
 4")
The crop top represents one of the most popular and achievable shirt cutting projects for beginners. We’ll walk you through each step to create a perfectly proportioned cropped shirt that flatters your figure.
Iron required, requires heat to activate!

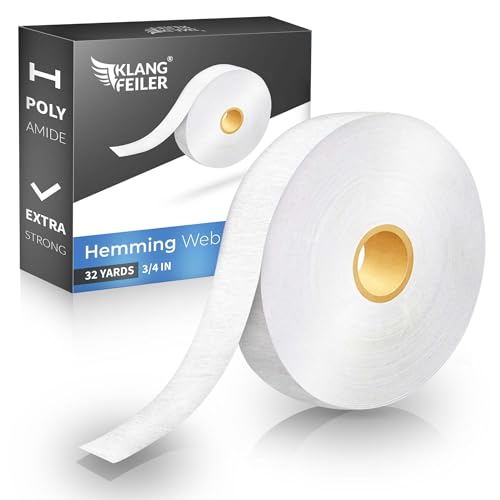
INSTANT, HASSLE-FREE HEMMING THAT LASTS – Skip the sewing and ironing! This fabric tape for hemming gives you fast, reliable results so you can fix hems and finish projects with confidence and ease.

Fabric fusing tape:hem tape width is 1/2 inch, length is 27 yards, 2 rolls of hem iron-on tapes, good for hems, no sew pillow cases, double backing ribbons and curtains, sufficient length for your daily use and replacement needs. Not suitable for very smooth or sticky fabrics
Measure Your Desired Length
Put on the shirt and stand in front of a mirror to visualize your ideal crop length. Most crop tops fall between 2-4 inches above the natural waistline, but the exact measurement depends on your body type and style preference.
Mark the spot where you want the hem to end using a small piece of tape or safety pin. We recommend measuring from your natural waist up rather than from the bottom hem down, as this ensures better proportions.
Remove the shirt and lay it flat on your cutting surface. Use your measuring tape to find the distance from the shoulder seam to your marked point, then add 1 inch for hemming allowance.
Double check your measurements by folding the shirt at the intended cut line and holding it up against your body. This preview helps you confirm the length before making any permanent cuts.
Mark the Cutting Line
Draw a straight line across the shirt using fabric chalk, starting from one side seam to the other. Keep the line perpendicular to the side seams to ensure your crop top hangs evenly.
Use a ruler or straight edge to maintain consistency across the entire width of the shirt. We find that placing the ruler along the bottom edge of the fabric chalk creates the cleanest marking line.
Check both the front and back of the shirt to ensure your marked lines align perfectly at the side seams. Misaligned cuts will result in an uneven hemline that’s difficult to fix.
Mark cutting guides at 2-inch intervals along your chalk line using small dots or dashes. These reference points help you maintain accuracy while cutting, especially on stretchy fabrics that may shift.
Cut Straight Across
Position your fabric scissors perpendicular to the cutting line, starting at one side seam. We recommend beginning cuts from the least visible area in case you need to make small adjustments.
Cut in one smooth motion across the entire width of the shirt without lifting your scissors. Stopping and starting creates jagged edges that require additional trimming to fix.
Keep the fabric taut with your non-cutting hand, gently pulling the shirt smooth without stretching it. This technique prevents the fabric from bunching and ensures clean, straight cuts.
Trim any uneven spots immediately after completing your cut, using small snips to perfect the edge. We suggest cutting slightly longer than your marked line initially, as you can always trim more but can’t add fabric back.
Create Stylish Side Slits
 5")
Side slits transform any regular shirt into a modern, flowing piece that moves beautifully with your body. These strategic cuts add visual interest while providing extra comfort and mobility.

ULTRA SHARP FABRIC SHEARS: Made of high carbon steel which is stronger than stainless steel, the craft scissors have great qualities including good edge retention and ability to make clean cut through multiple layers of fabric.well worth investing to help you cut down on time and money and perfect your sewing creations.

Ultra Sharp Fabric Scissors: Wteehn sewing scissors for fabric cutting is made of high-quality galvanized manganese, exquisite hand-forged craftsmanship, high hardness, sharp, durable, rust-proof and not easy to deform, and can cleanly cut thick materials such as multi-layer fabrics and leather

8 ½ inch fabric shears with rubberized handles
Determine Slit Placement
Position the slits at your natural hip line for the most flattering placement on your body. We recommend measuring approximately 3-4 inches up from the shirt’s original hem to find this sweet spot. Standing in front of a mirror helps you visualize how the slits will fall when you move and sit.
Consider your body proportions when deciding on slit height and width. Taller individuals can handle longer slits up to 6 inches, while shorter torsos look best with 2-3 inch cuts. The width should complement your hip measurements without creating excessive fabric bunching.
Account for the shirt’s overall length to maintain proper balance in your design. Longer shirts can accommodate dramatic slits that reach mid-thigh, while cropped pieces need shorter, more subtle openings. Your slit placement should enhance the shirt’s natural silhouette rather than competing with it.
Mark the Side Seams
Locate the side seams by finding where the front and back panels of your shirt connect. These seams run vertically from the armpit down to the hem on both sides of the garment. Marking these reference points ensures your slits will be perfectly symmetrical.
Use fabric chalk or washable markers to draw straight lines from your desired slit endpoint down to the hem. We suggest creating a small dot at your starting point, then using a ruler to draw the vertical cutting line. Double check that both sides mirror each other before proceeding.
Measure twice to ensure accuracy by comparing the distance from the center front of your shirt to each marked line. Both measurements should be identical to maintain symmetry. Pin or tape the fabric layers together at the seam line to prevent shifting during the cutting process.
Cut Upward from the Hem
Start at the bottom hem and position your scissors perpendicular to the fabric edge. We recommend using sharp fabric scissors and cutting in one smooth, confident motion rather than making small snips. This technique creates cleaner edges that require less finishing work.
Follow your marked line precisely while maintaining steady upward pressure with your scissors. Keep the fabric taut but not stretched as you cut to prevent uneven edges or accidental fabric distortion. Stop cutting exactly at your predetermined endpoint to avoid going too far.
Repeat the process on the opposite side using the same cutting technique and pressure. Check that both slits match in length and width before removing any marking lines. Gently pull at each slit opening to ensure the fabric lies flat and the cuts are complete through all layers.
Transform Sleeves with Strategic Cuts
 6")
Sleeve modifications offer one of the most dramatic ways to change a shirt’s entire aesthetic and comfort level. Strategic cuts can transform a basic tee into a trendy piece that suits your personal style.

2 Pack Measuring Tape Double-sided, 60-inch / 150 cm, portable,durable tape measure. Small and light pocket-size measuring tape, White, Blue color

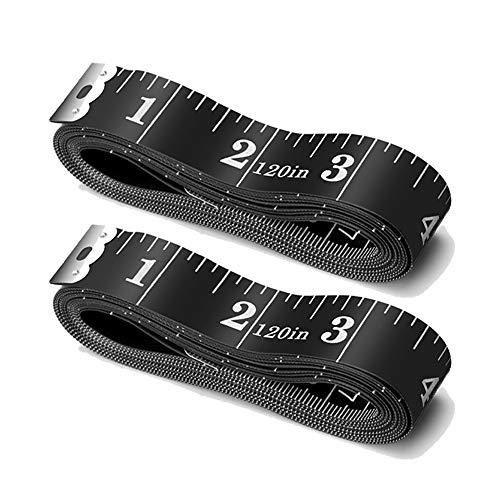
Ultra Long Measuring Range: Different than normal 60 Inch soft tape measure, ours are 120 Inch long, which can meet more needs and get you out of the trouble of insufficient length
Remove Sleeves Completely
Complete sleeve removal creates a classic tank top that’s perfect for layering or wearing alone during warmer months. We recommend starting by putting the shirt on and marking where you want the armhole to sit, typically 1-2 inches below your natural armpit.
Mark the cutting line with fabric chalk, creating a smooth curve that follows your shoulder’s natural shape. Cut slowly along the marked line, maintaining consistent pressure to achieve clean edges. Test the fit after cutting one side to ensure you’re satisfied with the armhole size before cutting the second sleeve.
Stretch the raw edges gently after cutting to create a naturally curved hem that won’t require additional finishing. This technique works particularly well with cotton jerseys that curl slightly when cut, creating a polished look without hemming.
Create Cap Sleeves
Cap sleeves provide a feminine, flattering silhouette that works well for both casual and dressy occasions. Start by measuring 2-3 inches down from the shoulder seam to determine where your cap sleeve will end.
Draw a gentle curve from the shoulder point to your marked measurement, ensuring the line flows naturally with your arm’s shape. Cut along this curved line, keeping your scissors perpendicular to the fabric for the cleanest possible edge.
Try the shirt on after cutting to assess the sleeve length and adjust if needed. Cap sleeves should sit comfortably on your upper arm without feeling tight or restrictive around the shoulder area.
Design Asymmetrical Sleeve Cuts
Asymmetrical sleeve designs create modern, edgy looks that make ordinary shirts into statement pieces. Choose different lengths for each sleeve, such as keeping one sleeve full length while cutting the other into a cap sleeve or removing it entirely.
Plan your asymmetrical design by sketching it on paper first, considering how the different sleeve lengths will balance with your body proportions. Mark both sleeves clearly before cutting, double checking that you’re creating the intended contrast between left and right sides.
Cut each sleeve according to your planned design, taking care to maintain clean lines on both sides. Asymmetrical cuts work especially well when combined with other modifications like side slits or crop cuts to create cohesive, intentionally designed pieces.
Add Trendy Cut-Out Details
 7")
Cut-out details can transform any ordinary shirt into a fashion-forward statement piece that showcases your personal style. These strategic openings add visual interest while maintaining the shirt’s overall structure and wearability.

【4PCS Triangle Tailor’s Chalk Set】This set includes four triangular tailor’s chalk pieces in white, blue, yellow and red. As essential fabric-marking tools, these chalks are designed for precise marking in DIY tailoring, quilting and crafts, suitable for both beginners and professionals.

Tailor's Chalk: 4 Colors Available (Blue, Red, White, Yellow)
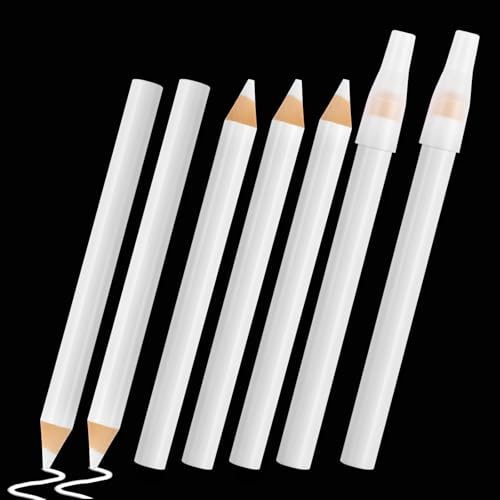
7-Piece Fabric Sewing Pencil Set with Tip Caps – Includes 7 washable white marking pencils designed for precise fabric tailoring, quilting, and DIY crafts; protective tip caps keep points sharp and hygienic between uses.
Plan Strategic Placement
Identify the most flattering areas for cut-outs by considering your body proportions and the shirt’s natural lines. We recommend focusing on the shoulders, upper back, or side panels where cut-outs create visual appeal without compromising the garment’s integrity.
Mark potential cut-out locations using fabric chalk while wearing the shirt or having someone assist you. Popular placement options include the shoulder blades, collarbone area, or along the side seams where they’ll enhance your silhouette.
Test different shapes by sketching various cut-out designs on paper first. Common options include geometric shapes like triangles and diamonds, organic curves, or linear slashes that follow the shirt’s natural lines.
Consider the shirt’s fit when planning cut-out placement, ensuring the openings won’t gape awkwardly when you move or sit. We suggest avoiding areas that experience important stretch during normal wear, such as the bust line or areas around the armholes.
Create Shoulder Cut-Outs
Position the shirt on a flat surface with the shoulders aligned evenly to ensure symmetrical cuts. We recommend folding the shirt in half lengthwise to create matching cut-outs on both shoulders simultaneously.
Mark the cut-out shape approximately 2-3 inches from the shoulder seam, creating openings that measure 3-4 inches in length for optimal visual impact. Popular shapes include teardrop openings, small triangles, or elongated ovals that follow the shoulder’s natural curve.
Cut carefully through both layers of fabric if working on folded material, or repeat the process on each shoulder individually for more control. We suggest starting with smaller openings that you can enlarge if desired, as you can’t add fabric back once it’s removed.
Finish the edges by gently stretching the cut openings to create a naturally rolled hem, or use a small zigzag stitch if your shirt tends to fray. This technique works particularly well with jersey knits and cotton blends.
Design Back Panel Windows
Create horizontal windows across the upper back by marking two parallel lines 6-8 inches apart, positioned between the shoulder blades for maximum impact. We recommend keeping these openings 1-2 inches in height to maintain the shirt’s structural integrity.
Cut vertical strips to form ladder-style openings by making 3-4 parallel cuts spaced 1 inch apart across a 4-6 inch section of the back panel. This design creates an eye-catching pattern while allowing airflow and movement.
Design diamond or rectangular shapes by marking geometric outlines on the back panel, typically positioned in the center or slightly offset for asymmetrical appeal. We suggest keeping these cut-outs between 3-5 inches in their largest dimension.
Connect multiple small openings to create intricate patterns by cutting several small shapes and linking them with thin fabric strips. This advanced technique produces complex designs while maintaining enough fabric to keep the shirt wearable and structurally sound.
Perfect the Art of Distressing
 8")
Distressing techniques transform ordinary shirts into trendy pieces with that coveted lived-in look. We’ll show you how to create authentic-looking wear patterns that appear naturally developed over time.

CREATIVE DETAIL: Draw in detail on any colored fabric & watch the colors pop! These unique fabric markers are designed to work on dark AND light fabrics.
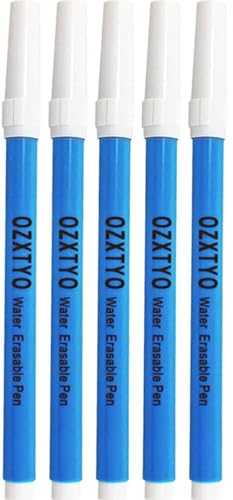
The Fine Point Water Soluble Marking Pen,5 Pack,blue

Dual-Tip Precision: Gain-Art white fabric markers w/ 1mm fine tip for detailed designs + 3mm brush tip for quick coverage—perfect for intricate art or large stains on fabrics
Create Natural-Looking Holes
Strategic hole placement makes the difference between intentional distressing and accidental damage. We recommend focusing on high-wear areas like elbow joints, shoulder blades, and hemlines where fabric naturally thins over time.
Start by stretching the fabric gently between your fingers to identify the grain direction. Pinch a small section of fabric and twist it while pulling slightly to create a natural opening. Avoid cutting perfect circles, as real holes develop organically through wear and washing.
Use a seam ripper to create small snags in the fabric, then run the shirt through a wash cycle to encourage the holes to expand naturally. This method produces more authentic results than cutting with scissors. Test the technique on a hidden area first to gauge how your exact fabric responds to distressing.
Add Frayed Edges
Raw, frayed edges create that perfectly imperfect aesthetic that defines distressed fashion. We achieve the best results by cutting the fabric slightly shorter than desired, then encouraging natural fraying through washing and handling.
Cut your hemlines, sleeves, or necklines with fabric scissors, leaving the edges unfinished. Pull individual threads from the cut edges to start the fraying process. Focus on horizontal threads first, as they’re easier to remove and create more dramatic fraying effects.
Throw the shirt in the washing machine after creating your cuts to accelerate the fraying process. The agitation and water movement will naturally separate more threads, creating authentic-looking frayed edges. Repeat this process through several wash cycles until you achieve your desired level of distressing.
Use Sandpaper for Worn Effects
Sandpaper creates convincing worn patches that mimic years of natural wear on your shirt. We use medium-grit sandpaper (around 120-grit) to achieve the perfect balance between effectiveness and control.
Focus on areas where clothing naturally experiences friction, such as the collar, cuffs, pocket edges, and areas around the waistline. Rub the sandpaper in circular motions with light to medium pressure, gradually building up the worn effect rather than attacking the fabric aggressively.
Work slowly and check your progress frequently to avoid creating unwanted holes. The goal is to thin the fabric and create a faded appearance without completely destroying the material. Different fabric weights will respond differently to sanding, so cotton blends typically show wear effects more quickly than pure cotton shirts.
Finish Your Cut Shirt Professionally
 9")
Transforming your cut shirt into a polished garment requires attention to finishing details that prevent damage and enhance appearance. Professional finishing techniques ensure your customized shirt maintains its shape and style through repeated wear and washing.

CREATE CLEAN, PROFESSIONAL HEMS WITHOUT SEWING – Whether you're tailoring pants, adjusting curtains, or finishing a dress, this hem tape iron on design offers a quick, no-sew solution that saves time and delivers lasting results. Perfect for anyone seeking a stress-free hemming method with a polished finish.

High-quality material: 2 rolls of fabric tape width is 0.59 inches, each roll is about 70 yards in length. It is similar to non-woven fabric at normal temperature, but it melts and becomes sticky at high temperature.

Effortless Garment Transformation: Transform your garments effortlessly with our hem tape for pants and dress! This 3/4 INCH x 32 Yards - 60GSM iron hem tape is suitable for quick, temporary fixes
Prevent Fraying with Hemming
Hemming creates clean edges that prevent fabric from unraveling over time. We recommend folding the raw edge under approximately 1/4 inch and securing it with a straight stitch using a sewing machine. Hand stitching works effectively for those without machine access, using a basic running stitch or blind hem technique.
Double fold hems provide extra durability for high stress areas like sleeves and bottom edges. Fold the fabric twice to encase the raw edge completely, creating a professional finish that withstands frequent washing. Press each fold with an iron before stitching to maintain crisp lines and accurate measurements.
Narrow rolled hems work perfectly for lightweight cotton shirts and delicate fabrics. Roll the edge tightly between your fingers while stitching, creating a subtle finished appearance that doesn’t add bulk to the garment. This technique proves especially useful for crop tops and tank top conversions.
Clean Up Rough Edges
Sharp fabric scissors eliminate jagged cutting lines that appear unprofessional. We suggest trimming any uneven areas immediately after your initial cuts, following the original cutting line to maintain your intended shape. Check each cut section under good lighting to identify areas needing refinement.
Pinking shears create zigzag edges that naturally resist fraying without hemming. These specialized scissors work best on cotton blends and provide an instant professional appearance for cut out details and sleeve modifications. Use steady pressure and cut through both fabric layers simultaneously for consistent results.
Fabric sealers offer quick answers for preventing fraying on synthetic materials. Apply liquid seam sealant along raw edges using the applicator tip, allowing 24 hours for complete drying before wearing. Test the sealer on a hidden area first to ensure it doesn’t discolor or stiffen the fabric.
Steam pressing smooths rough edges and sets the fabric grain for cleaner lines. Hold your iron 2 inches above the cut edges while applying steam, then gently press down to flatten any raised fibers. This technique works particularly well after trimming with scissors to achieve that store bought appearance.
Add Decorative Touches
Contrasting thread creates visual interest while serving functional hemming purposes. Choose thread colors that complement or deliberately contrast with your shirt color, turning necessary finishing into a design element. Bright threads work especially well on neutral colored shirts and casual wear pieces.
Bias tape binding adds professional edges to armholes and necklines. Cut bias tape to match your shirt measurements plus 2 inches for overlap, then pin and stitch around the raw edges for a clean finish. Pre made bias tape saves time, while custom cut tape allows perfect color matching.
Decorative stitching patterns transform basic hems into design features. Use your sewing machine’s built in stitches like zigzag, scallop, or blanket stitch to create unique edge treatments. Practice on fabric scraps first to perfect your tension settings and stitch spacing.
Iron on patches cover small mistakes while adding personality to your cut shirt. Position patches over any cutting errors or weak spots in the fabric, following manufacturer instructions for proper adhesion. Choose patches that match your shirt’s style, from minimalist geometric shapes to vintage band logos.
Fabric paint allows you to add custom designs around cut out areas and new edges. Use stencils for precise shapes or freehand painting for organic designs, applying thin layers to prevent stiffening the fabric. Heat set painted areas with an iron after 24 hours of drying time to ensure permanence through washing cycles.
Conclusion
We’ve covered everything you need to transform ordinary shirts into personalized fashion statements. With the right tools sharp scissors measuring tape and fabric chalk you’re equipped to tackle any cutting project with confidence.
Remember that practice makes perfect. Start with simple crops and side slits before moving on to complex cut-outs and distressing techniques. Each project builds your skills and expands your creative possibilities.
The finishing touches we’ve discussed hemming clean edges and decorative elements elevate your work from amateur to professional quality. Don’t skip these crucial steps as they ensure your customized shirts look intentional and polished.
Your wardrobe transformation starts now. Take that shirt you’ve been meaning to alter and put these techniques into action. You’ll be amazed at what you can create with just a few strategic cuts.
Frequently Asked Questions
What tools do I need to cut and customize shirts?
You’ll need sharp fabric scissors, a flexible measuring tape, fabric chalk for marking, and a seam ripper for removing existing seams. No expensive equipment or extensive sewing experience is required. Keep your scissors sharp and work on a clean, flat surface for the best results.
What type of shirt fabric is best for beginners?
Choose 100% cotton or cotton blends as they’re easiest to cut and work with. Avoid synthetic blends with high polyester content as they can be more challenging for beginners. Cotton fabrics cut cleanly and don’t require special techniques.
Should I wash the shirt before cutting it?
Yes, always wash and dry the shirt before cutting to prevent shrinkage after your alterations. Avoid fabric softeners as they can affect the fabric’s texture. Iron out any wrinkles to create a smooth surface for accurate cutting lines.
How do I make a basic crop top from a regular shirt?
Measure and mark your desired length using fabric chalk. Draw a straight cutting line across the shirt, ensuring it’s level. Cut in one smooth motion for clean edges. Start with a longer length than desired – you can always trim more later.
How can I prevent my cut shirt from fraying?
Use hemming techniques like double fold hems for durability or narrow rolled hems for lightweight fabrics. Clean up rough edges with sharp scissors or pinking shears. For synthetic materials, consider using fabric sealers to prevent fraying.
What’s the best way to plan my shirt design before cutting?
Sketch your vision on paper first, preferably using graph paper for accurate proportions. Mark key measurements on the fabric with chalk. Consider how the finished piece will work with your existing wardrobe and plan for any finishing touches needed.
How do I create professional-looking sleeve modifications?
For tank tops, cut close to the armhole seam. For cap sleeves, leave 2-3 inches of fabric from the shoulder seam. Always cut both sleeves simultaneously while the shirt is folded to ensure symmetry. Try on the shirt between cuts to check the fit.
Can I add cut-out details without compromising the shirt’s structure?
Yes, plan cut-out placement based on your body proportions and the shirt’s seam lines. Start with small openings and test designs on paper first. Focus on areas that won’t affect the shirt’s structural integrity, like shoulders or back panels.