We’ve all been there – standing in front of the mirror with an oversized shirt that’s drowning our silhouette. Whether it’s a beloved vintage find or a purposely loose-fitting piece, learning how to tuck in oversized shirts properly can transform your entire look from frumpy to fashionable.
The art of tucking isn’t just about shoving fabric into your pants and hoping for the best. It’s about creating clean lines, flattering proportions, and achieving that effortlessly polished appearance we all crave. The right tucking technique can define your waist, elongate your legs, and give you confidence that radiates from within.
Mastering these styling skills opens up endless wardrobe possibilities. You’ll discover how oversized pieces can become your secret weapon for creating versatile outfits that work for any occasion. Let’s jump into the techniques that’ll turn those shapeless shirts into perfectly customized statements.
Choose the Right Oversized Shirt for Tucking
Not all oversized shirts work well for tucking, so selecting the right style sets you up for success. We’ll examine the key characteristics that make certain oversized shirts perfect candidates for achieving that polished, intentional look.

Feature:These high-rise shorts feature a casual cargo design with a mid-thigh length. The solid color, roll-hem cuff, and practical flap pockets provide a trendy yet functional look suit for everyday wear.

MATERIAL: Made of high-quality fabric, soft and skin-friendly, light and breathable, giving you a comfortable summer experience.Suggest choosing a smaller size for petite individuals

Fashion summer stretchy denim shorts for women and teen girls 2024, Women mid waist denim shorts with pockets, Frayed raw hem jean shorts. Summer hot shorts. Stretchy jean shorts for women
Select Shirts with Appropriate Length
Length matters significantly when choosing oversized shirts for tucking. We recommend selecting shirts that fall between your mid-thigh and knee area when worn untucked. Shirts that are too long create excessive bulk around your waistline, making it difficult to achieve clean lines even with proper tucking techniques.
Measure the shirt length before purchasing to ensure optimal results. Stand straight and check that the hem hits no lower than 2-3 inches below your fingertips when your arms hang naturally at your sides. This measurement gives you enough fabric to work with while preventing overwhelming volume.
Consider your torso length when evaluating shirt proportions. Taller individuals can handle slightly longer shirts, while shorter torsos benefit from shirts that end closer to mid-thigh. The goal is creating balance between your upper and lower body proportions.
Consider Fabric Weight and Drape
Fabric weight determines how smoothly your oversized shirt will tuck and hold its shape. We suggest choosing medium-weight fabrics like cotton poplin, chambray, or cotton blends that offer structure without being too stiff or too flimsy.
Lightweight fabrics create unwanted bunching and wrinkles when tucked. Materials like thin cotton, silk, or rayon tend to gather awkwardly around your waistband, disrupting the clean silhouette you’re trying to achieve. These fabrics work better when left untucked or styled with alternative methods.
Heavy fabrics add unnecessary bulk that works against your tucking efforts. Thick denim, heavy flannel, or canvas materials create lumpy appearances when gathered at your waistline. Stick with fabrics that drape naturally while maintaining enough body to stay in place throughout the day.
Opt for Shirts with Structured Shoulders
Structured shoulders provide the foundation for a polished tucked look. We recommend choosing oversized shirts that maintain their shoulder line definition rather than completely slouchy styles. This structure creates intentional proportions rather than appearing sloppy or careless.
Look for shirts with seamed shoulders that sit properly on your frame. The shoulder seam should align with your natural shoulder point or extend slightly beyond it. Shirts with shoulders that droop too far down your arms create an unflattering silhouette even when perfectly tucked.
Avoid shirts with completely unstructured shoulders or extreme drop-shoulder designs. While these styles have their place in casual wear, they work against the clean, customized appearance that effective tucking creates. Choose oversized shirts that maintain some architectural elements in their construction.
Master the Basic Front Tuck Method

The front tuck transforms oversized shirts into polished, intentional looks by creating visual balance and definition. This foundational technique works across body types and occasions.

REGULAR FIT: Close but comfortable fit with easy movement

Wrinkle Free: Developed for less wrinkles and easy care

WRINKLE FREE: Developed for less wrinkles and easy care
Create a Clean Waistline Definition
Position the shirt properly by pulling it down to create a smooth surface before tucking. We recommend starting with the center front section and working outward to ensure even distribution.
Pinch approximately 2-3 inches of fabric at your natural waistline using both hands. This amount prevents excessive bulk while maintaining the shirt’s relaxed silhouette above the tuck point.
Tuck the pinched fabric straight down into your waistband without twisting or bunching. The key lies in keeping the motion deliberate and controlled rather than rushing the process.
Smooth the fabric around the tuck point by running your hands along the waistband. This step eliminates wrinkles and creates the clean line that makes oversized shirts look intentional rather than sloppy.
Adjust for Different Body Types
Apple shapes benefit from tucking only the front center panel to highlight the smallest part of the torso. We suggest leaving more fabric loose on the sides to create a flattering drape that skims rather than clings.
Pear shapes can emphasize their waistline by tucking more fabric and pulling it slightly tighter. This technique draws attention upward while the loose fabric above balances wider hips naturally.
Rectangle shapes should create curves by tucking asymmetrically with more fabric on one side. We find this adds visual interest and breaks up straight lines that can make the torso appear boxy.
Hourglass figures can tuck the entire front section to showcase their natural waist definition. The oversized shirt’s volume above and below the tuck point enhances their proportions beautifully.
Secure the Tuck for All-Day Wear
Choose fitted undergarments that create a smooth foundation without adding bulk. We recommend seamless options that won’t create visible lines under the tucked fabric.
Layer a thin camisole or bodysuit underneath when wearing lightweight oversized shirts. This prevents the tuck from shifting throughout the day and adds security during movement.
Test your tuck by sitting, standing, and raising your arms before leaving home. A properly secured front tuck should maintain its position through normal daily activities without constant adjustment.
Retuck discretely by smoothing the fabric back into place if needed during the day. We suggest doing a quick check in restrooms or private spaces to maintain that polished appearance from morning to night.
Perfect the French Tuck Technique

We’ve mastered the basic front tuck, but the French tuck offers a more sophisticated approach to styling oversized shirts. This technique creates an effortlessly chic look by tucking only a portion of the shirt’s front while leaving the sides and back flowing naturally.
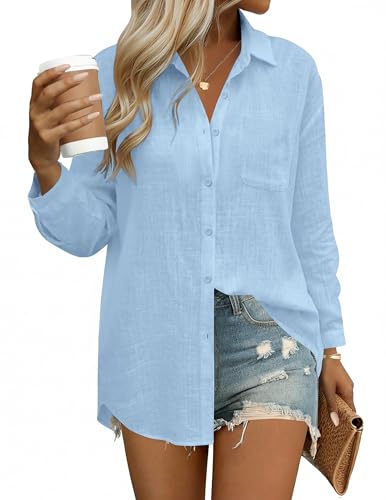
Premium Cotton Linen Button Down Womens Tops - Crafted from a soft cotton-linen blend with a natural crinkle texture, these trendy V Neck womens tops deliver lightweight, breathable comfort and durability—perfect spring summer tops for women to stay cool and chic in warm weather.

Lightweight Material:This womens button down shirt is soft,skin-Friendly,breathable,and lightweight.Comfortable to wear all day.80% Rayon +20% Nylon

Timeless and Slim-fit Design: This Long Jeans chambray shirt features a classic button-down point collar front and long sleeves, providing a timeless and versatile look. The cotton blend fabric offers a soft, comfortable feel, making it an essential piece for any woman's wardrobe.
Execute the Partial Front Tuck
Identify the optimal tucking zone by locating the center front panel of your oversized shirt. We recommend grasping approximately 2-3 inches of fabric on either side of your shirt’s front center seam or button placket. Position your hands at hip level where your waistband sits naturally.
Pinch the selected fabric section and gently twist it once to create subtle texture. This twisting motion prevents the fabric from lying too flat against your body and adds visual interest to the tuck. Avoid over-twisting as this creates unnecessary bulk.
Insert the twisted fabric section into your waistband using a gentle downward motion. We suggest tucking only 1-2 inches deep to maintain the casual, undone aesthetic that defines the French tuck. Keep the tucked portion centered and ensure equal amounts of fabric remain loose on both sides.
Adjust the loose fabric by gently pulling it outward to create soft draping around your hips. This creates the signature relaxed silhouette while maintaining a defined waistline. The untucked portions should fall naturally without appearing bunched or overly voluminous.
Balance Proportions Effectively
Create visual harmony by ensuring the tucked portion represents roughly one-third of your shirt’s total front width. We’ve found this ratio provides the most flattering proportions for most body types. Measure this visually by dividing your shirt front into three equal sections and tucking the center portion.
Maintain consistent hem lengths on the untucked sides to achieve a polished appearance. Both left and right sides should fall at approximately the same level, typically reaching your mid-hip area. Uneven hem lengths create a sloppy appearance rather than the intended casual elegance.
Adjust the tuck depth based on your torso proportions and desired silhouette. We recommend deeper tucks for longer torsos to create more defined waistlines, while shorter torsos benefit from shallower tucks that don’t overwhelm the midsection. This customization ensures the French tuck flatters your unique body shape.
Consider your shirt’s natural drape when determining the final positioning. Stiffer fabrics require less manipulation to hold their shape, while flowing materials may need slight adjustments throughout the day to maintain the desired silhouette.
Style with Different Bottom Wear
Pair French tucked oversized shirts with high-waisted jeans to emphasize your natural waistline. We suggest choosing jeans with a snug fit through the waist and hips to create contrast with the shirt’s relaxed portions. This combination elongates your legs while maintaining comfort through the midsection.
Complement the technique with customized trousers for sophisticated office-appropriate looks. Select trousers with clean lines and structured waistbands that can securely hold the tuck throughout your workday. Wide-leg styles work particularly well as they echo the shirt’s relaxed proportions.
Experiment with midi skirts to achieve feminine, romantic styling options. We recommend A-line or pencil skirts with defined waistbands that create a clear separation between the tucked and untucked portions. This pairing works especially well for transitioning from casual to dressier occasions.
Try the French tuck with shorts during warmer weather for effortless summer styling. Choose high-waisted styles that sit at your natural waistline to maximize the technique’s flattering effects. This combination creates a balanced silhouette that’s both comfortable and put-together for casual outings.
Try the Side Tuck for Asymmetrical Style

Side tucking creates an effortlessly chic asymmetrical silhouette that adds contemporary flair to your oversized shirt styling. This technique offers a fresh alternative to traditional front tucking methods while maintaining the structured look you desire.
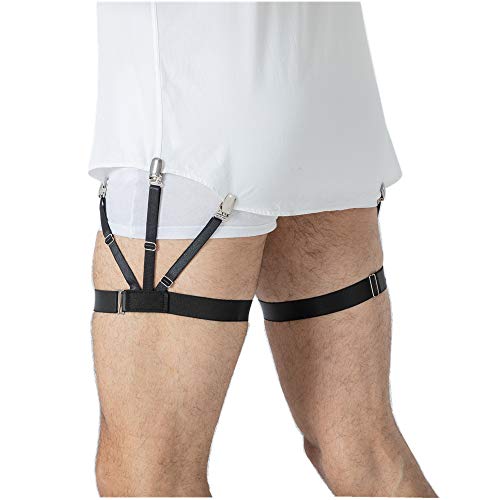
LOOK DECENT ALL DAY: No more worries of the wrinkled sloppy look, your shirt stay will keep your shirt perfectly tucked neatly and smoothly all day long, even if you move, kneel, sit or stretch, keep for a sharp, crisp, professional appearance.

Premium Fabric --- Men's short sleeve button down shirt is made of premium textured fabric,which is breathable,soft and skin-friendly,keeping you cool and comfortable in the summer

Water-Repellent Technology: Treated with eco-friendly HEIQ ECO DRY for superior protection from fluids and spills.
Position the Tuck Strategically
Choose your dominant side to determine where the tuck will look most flattering on your body shape. We recommend tucking on your right side if you’re right-handed, as this creates a natural flow that follows your body’s movement patterns.
Gather approximately 4-6 inches of fabric from the side seam area, pulling it taut to create a clean line. The fabric should extend from your natural waistline down to your hip bone for optimal proportion balance.
Tuck the gathered fabric into your waistband at a slight diagonal angle, ensuring the tuck sits about 2 inches off-center from your side seam. This positioning prevents the shirt from pulling awkwardly across your torso while maintaining the asymmetrical effect.
Smooth the remaining fabric so it flows naturally over your opposite hip, creating a relaxed drape that contrasts beautifully with the structured tucked side.
Create Visual Interest and Movement
Pull the loose fabric forward slightly to create gentle gathering that adds dimension to your silhouette. This technique prevents the untucked side from appearing flat or lifeless against your body.
Adjust the shirt’s hemline so it falls at varying lengths, with the tucked side sitting higher than the flowing side by approximately 3-4 inches. We’ve found this creates the most visually appealing asymmetrical proportions.
Layer with statement accessories like bold belts or layered necklaces to enhance the side tuck’s dramatic effect. These elements draw attention to the intentional styling while adding personal flair to your outfit.
Test the tuck’s movement by walking and sitting to ensure the fabric maintains its shape throughout daily activities. The side tuck should feel secure without restricting your range of motion.
Pair with High-Waisted Bottoms
Select high-waisted jeans or trousers that sit at your natural waistline to showcase the side tuck’s asymmetrical silhouette. The elevated waistband creates a foundation that supports the tucked fabric while elongating your legs.
Choose fitted bottom silhouettes like skinny jeans, customized pants, or pencil skirts that provide contrast to the shirt’s loose proportions. We recommend avoiding wide-leg or flowy bottoms that compete with the shirt’s volume.
Experiment with different rise heights to find your most flattering combination, typically opting for mid to high-rise styles that hit 1-2 inches above your hip bones.
Consider bottoms with structured waistbands such as belted trousers or jeans with reinforced waistlines, as these provide additional security for maintaining your side tuck throughout the day.
Experiment with the Twist and Tuck Method

The twist and tuck method adds texture and visual interest to your oversized shirt while creating a playful yet polished appearance. This technique works particularly well with flowing fabrics and provides more dimension than traditional tucking methods.

Premium Cotton Linen Button Down Womens Tops - Crafted from a soft cotton-linen blend with a natural crinkle texture, these trendy V Neck womens tops deliver lightweight, breathable comfort and durability—perfect spring summer tops for women to stay cool and chic in warm weather.

REGULAR FIT: Comfortable, easy fit through the shoulders, chest, and waist.
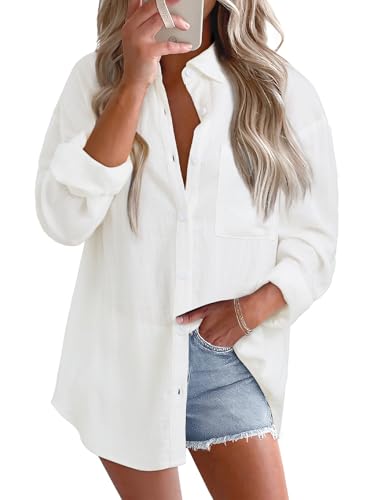
Note: Oversized white button down shirt women, please refer to size chart in product description page, not amazon size chart. There will be a little wrinkle during shipping, but don't worry, A quick wash and dry iron low or hang dry will deal with the wrinkles effectively
Gather Excess Fabric at the Waist
Pinch the shirt fabric at your natural waistline on one side, creating a small section of gathered material between your thumb and forefinger. Position your grip approximately 2-3 inches from the side seam to ensure you’re capturing enough fabric for the twist. Pull the gathered section gently away from your body while maintaining control over the surrounding fabric.
Hold the fabric at waist height and twist it clockwise 2-3 times until you feel slight tension in the material. Check the twist placement by looking down to ensure it sits at your narrowest point for the most flattering silhouette. Maintain consistent pressure on the twisted section to prevent it from unraveling before you complete the tuck.
Create a Knotted Effect
Twist the gathered fabric into a tight spiral, creating approximately 3-4 rotations for optimal hold and visual appeal. Form a small knot by looping the twisted fabric under itself and pulling the end through the loop. Position the knot at your natural waistline, ensuring it sits flat against your body without creating unwanted bulk.
Secure the knot by gently pulling both ends until you achieve the desired tightness and shape. Adjust the knot size by loosening or tightening the twist before finalizing the position. Smooth out wrinkles around the knotted area to create clean lines that enhance your overall silhouette.
Adjust Tightness for Comfort
Test the knot’s security by moving your arms above your head and bending at the waist to ensure it stays in place. Loosen the twist slightly if you experience any pulling or restriction in your movement. Tighten the knot gradually until you find the sweet spot between security and comfort.
Monitor the fabric tension throughout the day, as natural body movement may cause the knot to shift or loosen. Redistribute excess fabric around the knotted area to prevent bunching or pulling at the waistline. Practice the technique with different shirt weights and fabrics to determine your preferred tightness level for various occasions.
Use Styling Tools and Accessories

Strategic accessories and tools can elevate your oversized shirt tucking game while providing additional structure and visual appeal. These elements work alongside your tucking technique to create professional, polished looks.
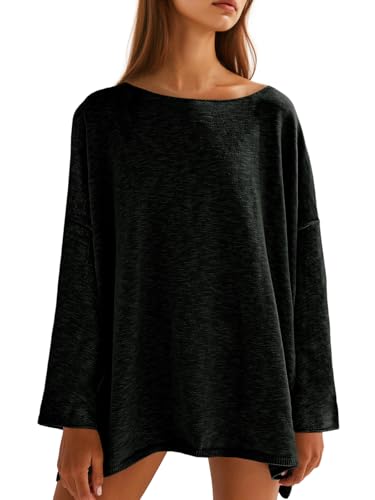
Lightweight Eco Fabric: Made from sustainable knit materials, the women oversized top is lightweight and drapes well, It works great layered, over a tank or swimsuit, and it'd be a good bikini coverup too as it hits mid thigh as a tunic should

Your not to be missed one - Are you searching for cute clothes for women? LARACE womens v neck t shirts can show your temperament well. Classic and cozy v-neck decorated with buttons, showing your slender neckline and creating a special slim visual effect. Chic sunflower shirts for women are not to be missed!

【High Quality Fabric】: 23% Cotton, 77% Polyester. hoodies for women, comfortable to wear with casual/work/workout style, size S-3XL, pick your right size
Incorporate Belts for Structure
Wide belts create the most dramatic definition when tucking oversized shirts. Position a 2-3 inch wide leather or fabric belt at your natural waistline to cinch the excess fabric and create an hourglass silhouette. We recommend choosing belts in neutral tones like black, brown, or cognac for maximum versatility across different outfits.
Statement belts add personality while maintaining structure around your midsection. Chain belts, woven designs, and belts with unique buckles transform a simple tucked shirt into a fashion-forward ensemble. These work particularly well with the French tuck technique, as they complement the relaxed sophistication of the look.
Skinny belts offer subtle waist definition without overwhelming your proportions. These 1-inch belts work best when you want minimal visual weight while still creating structure. Position them slightly above your natural waistline when wearing high-waisted bottoms to maintain proper proportional balance.
Try Shirt Clips and Tucking Aids
Magnetic shirt stays eliminate the frustration of shirts pulling loose throughout the day. These small magnetic clips attach to your shirt hem and connect to your socks or undergarments, keeping everything perfectly positioned. We find them especially helpful for formal occasions where maintaining a crisp appearance is essential.
Shirt tucking straps create professional results by anchoring your shirt to your undergarments. These adjustable elastic straps clip to your shirt hem and connect to your bra or undershirt, preventing any bunching or pulling. They’re particularly effective for customized shirts that need to maintain their structured appearance.
Fashion tape provides temporary answers for securing loose fabric edges. Double-sided tape helps keep side tucks in place and prevents shirt hems from shifting during movement. This tool works best for special events where you need guaranteed security for your tucking technique.
Add Layering Pieces for Dimension
Fitted blazers create structured silhouettes while allowing oversized shirts to peek through strategically. Leave your shirt untucked and partially buttoned, then add a customized blazer to define your waistline. This layering technique works exceptionally well with the basic front tuck, as the blazer frames the tucked section.
Cropped cardigans offer soft structure without the formality of blazers. These pieces hit at your natural waistline and create visual interest when paired with tucked oversized shirts. Choose cardigans with defined waistlines to enhance the tucking effect rather than competing with it.
Vests and waistcoats provide vintage inspired structure while highlighting your tucking technique. Button-front vests create a polished layer over tucked shirts and work particularly well with the twist and tuck method. We recommend choosing vests in contrasting colors to create visual separation between layers.
Consider Your Bottom Half Pairing

Your bottom choices determine the success of your oversized shirt tucking techniques. Strategic pairing creates the foundation for achieving balanced proportions and polished silhouettes.

REGULAR FIT: Comfortable, easy fit through the shoulders, chest, and waist.

WRINKLE FREE: Developed for less wrinkles and easy care

Material: Aoudery womens button down Oxford shirts is made from 100% Cotton, soft and comfortable. Lightweight and skin-friendly, comfortable to wear. We use American standard size. Please rest assured to purchase.
Match with High-Waisted Jeans
High-waisted jeans provide the perfect canvas for showcasing tucked oversized shirts. These elevated waistlines create natural definition points that enhance your tucking techniques while maintaining clean lines throughout your torso.
Skinny and straight leg high-waisted jeans work exceptionally well with front tuck methods. The fitted silhouette balances the oversized shirt’s volume while creating an hourglass shape that flatters most body types. We recommend choosing jeans with at least 9-inch rises for optimal tucking coverage.
Wide leg high-waisted jeans complement French tuck techniques beautifully. The flowing denim creates visual harmony with the loose shirt fabric while maintaining structured proportions at the waist. Select rigid or medium stretch denim that holds its shape to support your tuck throughout the day.
Distressed high-waisted jeans add casual appeal when paired with side tuck methods. The asymmetrical tucking complements the relaxed vibe of worn denim while maintaining intentional styling. Choose distressing below the waistband to avoid interfering with your tuck placement.
Style with Skirts and Shorts
Skirts offer versatile pairing options that showcase different tucking techniques effectively. A-line midi skirts work wonderfully with full front tucks because they create balanced proportions between your upper and lower body volumes.
Pencil skirts demand precise tucking techniques to maintain their sleek silhouette. We suggest using the French tuck method with fitted pencil skirts to avoid adding bulk around the hip area. Choose structured fabrics like ponte or wool blends that smooth over tucked shirt layers.
High-waisted shorts provide excellent foundations for showcasing oversized shirt tucks during warmer months. Customized shorts with 4-inch inseams or longer create sophisticated looks when paired with twist and tuck methods. Denim or linen shorts offer casual styling options that complement relaxed tucking approaches.
Mini skirts require careful consideration of proportions when tucking oversized shirts. We recommend partial tucking techniques like side tucks or French tucks to maintain balanced silhouettes. Choose mini skirts with structured waistbands that can support the shirt’s weight without rolling or shifting.
Choose Appropriate Rise Heights
Rise heights significantly impact how your tucked oversized shirt appears and feels throughout the day. Understanding these measurements helps you select bottoms that complement your chosen tucking technique.
Low rise bottoms (7-8 inches) work best with minimal tucking approaches. These shorter rises limit your tucking space but can create modern, relaxed looks when paired with side tuck methods. We recommend avoiding full front tucks with low rise bottoms to prevent overwhelming the proportions.
Mid rise options (8-9 inches) provide versatile tucking possibilities for most oversized shirt styles. These moderate rises accommodate French tuck and basic front tuck techniques while maintaining comfortable coverage. Choose mid rise bottoms when experimenting with different tucking methods.
High rise bottoms (10+ inches) offer maximum tucking real estate for dramatic styling effects. These extended rises support twist and tuck methods while providing smooth foundations for full front tucks. We suggest high rise bottoms for achieving the most polished, structured appearances with oversized shirts.
Ultra high rise options (11+ inches) create vintage inspired silhouettes that showcase tucked oversized shirts beautifully. These extreme rises work particularly well with loose fitting shirts because they provide ample space for fabric manipulation. Select ultra high rise bottoms when creating retro inspired outfits or maximizing waist definition.
Troubleshoot Common Tucking Problems

Even with perfect technique, oversized shirt tucking can present challenges that disrupt your polished look. We’ve identified the most frequent issues and their practical answers to keep your tucked shirts looking flawless.

Sizing Note: We recommend checking the specific measurements of each size rather than relying on your usual size.Our chart includes bust,neck,length,cuff,shoulder, bicep and hem width dimensions for accurate selection.Fit Note: lf you prefer a precise look,consider sizing down one size

Note: Oversized white button down shirt women, please refer to size chart in product description page, not amazon size chart. There will be a little wrinkle during shipping, but don't worry, A quick wash and dry iron low or hang dry will deal with the wrinkles effectively

FASHION ESSENTIAL - Cotton Short Sleeve Shirts with sleeve tabs is a fashion style and a must-have item in everyone's wardrobe.Classic shirt collar, large curved Hem and back pleats design make you look slim and refreshed.
Prevent Shirt Bunching and Pulling
Bunching occurs when excess fabric creates unwanted bulk around your waistline, disrupting the clean silhouette you’re trying to achieve. Start by smoothing the fabric against your torso before tucking, working from the center outward to eliminate air pockets. Choose shirts with appropriate fabric weight—cotton poplin and chambray drape smoothly without creating excessive volume.
Pulling happens when your tucked shirt shifts and creates tension across your body. Select fitted undergarments like seamless underwear or bodysuits to create a smooth foundation. Ensure your bottoms have the correct rise height for your chosen tucking technique, as low-rise pants with high tucks create unnecessary strain. Test your range of motion by sitting, bending, and reaching to identify potential problem areas before leaving home.
Strategic fabric distribution prevents both bunching and pulling issues. Gather fabric evenly across your waistline rather than concentrating it in one area. For particularly voluminous shirts, create small pleats along the sides before tucking to manage extra material. Position the bulk of your tuck at your natural waist where your body curves inward, allowing the fabric to follow your silhouette naturally.
Address Excess Fabric Issues
Excess fabric creates an unflattering boxy appearance that defeats the purpose of tucking your oversized shirt. Identify the optimal amount of fabric to tuck by pinching and gathering material at your waist—typically 2-3 inches on each side provides definition without bulk. Remove extra volume by creating controlled folds along the side seams before tucking.
Asymmetrical fabric distribution requires targeted adjustments to maintain visual balance. Pull equal amounts of fabric from both sides when executing front tucks, measuring with your hands to ensure consistency. For French tucks, limit the tucked portion to approximately 4-6 inches of front fabric, leaving the remaining material to drape naturally.
Hem length management prevents fabric overflow that can make your tucked shirt appear messy. Choose shirts that fall between mid-thigh and knee length for optimal tucking proportions. If your shirt is too long, consider having it hemmed or opt for knotting techniques that manage length while creating visual interest. Secure excess side fabric with fashion tape or shirt clips when traditional tucking methods don’t provide adequate control.
Maintain the Tuck Throughout the Day
Tuck maintenance begins with proper initial placement and continues with strategic reinforcement throughout your day. Position your initial tuck deeper than necessary, as natural movement will cause some fabric to shift outward. Check your tuck after sitting for extended periods, as this position commonly causes fabric displacement.
Movement patterns affect tuck stability differently depending on your chosen technique. Front tucks require periodic smoothing after bending or reaching overhead. French tucks need minimal adjustment but may require repositioning of the loose fabric to maintain asymmetrical balance. Side tucks demand the most attention, as the diagonal placement naturally shifts with body movement.
Preventive measures extend tuck longevity and reduce the need for frequent adjustments. Layer with fitted camisoles or bodysuits that anchor your shirt in place. Choose bottoms with structured waistbands that grip fabric securely without creating uncomfortable pressure. Carry a small mirror for discreet tuck checks throughout the day, and master the subtle retucking technique by loosening your waistband slightly and redistributing fabric as needed.
Adapt Techniques for Different Occasions

Different settings call for distinct tucking approaches to match the formality and style expectations of each environment.

SLIM FIT: Slim fit through the shoulders, chest, and waist.
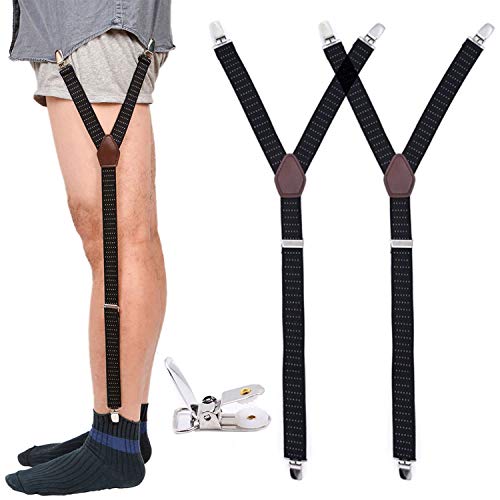
Our shirt stays keep shirts tucked in perfectly with their no-slip. The shirt garter is long lasting. Shirt stay is designed to be worn daily and withstand washing. Metal clasps with teeth firmly grip your shirts all day without damaging them.

PREMIUM FABRIC: The dress shirts for men are made of high quality fabric, featuring denim textured look, not actual denim, but a more skin-friendly, wrinkle-free, comfortable and stretchy, keeping you comfortable in your daily life
Create Casual Everyday Looks
French tucks work perfectly for relaxed weekend outings and coffee dates with friends. We recommend pairing this technique with high-waisted denim and sneakers to achieve an effortlessly chic appearance that feels comfortable yet put-together.
Side tucks elevate casual outfits by adding visual interest without appearing overdressed. Try this method with distressed jeans or casual shorts to create ever-changing silhouettes that photograph beautifully for social media moments.
Twist and tuck methods bring playful energy to everyday styling while maintaining comfort throughout busy schedules. We suggest using this technique for farmers market trips, casual brunches, or shopping excursions where movement and flexibility matter most.
Basic front tucks transform simple combinations like oversized tees with leggings into polished casual looks. Layer with denim jackets or cardigans to add dimension while keeping the focus on clean waistline definition.
Achieve Professional Office Styles
Complete front tucks create the structured appearance needed for business meetings and client presentations. We pair this technique with customized trousers and blazers to maintain professional credibility while showcasing personal style.
French tucks offer sophisticated alternatives for creative workplaces that allow more styling freedom. Choose this method with midi skirts and low heels to strike the perfect balance between professional polish and contemporary flair.
Wide belt additions enhance any tucking technique for boardroom ready looks that command attention. We recommend structured belts in neutral colors to define the waist while maintaining focus on professional competence.
Layering pieces like fitted blazers or vests over tucked oversized shirts create executive level styling. These combinations work especially well for leadership roles where authoritative presence matters alongside approachable personality.
Design Evening and Date Night Outfits
Dramatic side tucks create romantic silhouettes perfect for dinner dates and special celebrations. We style this technique with flowing midi skirts and statement jewelry to achieve elegant proportions that photograph beautifully in dim lighting.
Twist and tuck methods with statement belts transform casual oversized shirts into evening appropriate pieces. Try metallic or embellished belts to add glamour while maintaining the comfort needed for dancing or extended social events.
French tucks paired with high-waisted wide leg trousers create sophisticated evening looks suitable for theater dates or wine tastings. We recommend adding heels and delicate accessories to elevate the overall ensemble without overwhelming the relaxed shirt styling.
Complete front tucks work beautifully for cocktail events when paired with fitted pencil skirts and bold accessories. Choose silk or satin oversized shirts in jewel tones to create luxurious textures that catch light throughout evening activities.
Conclusion
We’ve covered everything you need to transform your oversized shirts from shapeless garments into stylish wardrobe essentials. With these proven tucking techniques—from the classic front tuck to the trendy French tuck and creative twist methods—you’ll never struggle with proportion again.
The key lies in choosing the right approach for your body type and the occasion. Whether you’re heading to the office or enjoying a casual weekend we’ve shown you exactly how to create flattering silhouettes that work.
Remember that confidence comes from feeling comfortable in your clothes. Practice these techniques and don’t be afraid to experiment with different styling tools and accessories to make each look uniquely yours.
Your oversized shirts are no longer a styling challenge—they’re an opportunity to showcase your fashion expertise and create effortlessly chic outfits every single day.

Size Guide: S=US 4-6, M=US 8-10,L=US 12-14,XL=US 16-18, XXL=US 20-22.

OVERSIZED FIT: Comfortable roomy fit through shoulders, chest, and waist

Long Sleeves, Chest Pocket, Button Placket
Frequently Asked Questions
What makes an oversized shirt suitable for tucking?
The ideal oversized shirt for tucking should fall between mid-thigh and knee length to avoid excessive bulk. Choose medium-weight fabrics like cotton poplin or chambray that drape smoothly without bunching. Shirts with structured shoulders provide better foundation and maintain a polished appearance when tucked.
How do I do a basic front tuck with an oversized shirt?
Position the shirt properly, then pinch the front fabric at your natural waist. Tuck the gathered fabric into your pants or skirt, ensuring even distribution to avoid bulk. Smooth the fabric and adjust for a clean waistline definition that creates visual balance.
What’s the difference between a French tuck and a regular front tuck?
A French tuck involves tucking only a portion of the shirt’s front while leaving the sides and back flowing naturally. This creates a more relaxed, sophisticated look compared to a full front tuck, which tucks the entire front section for complete waistline definition.
How do I keep my oversized shirt tuck secure all day?
Choose fitted undergarments and consider layering with a camisole or bodysuit for extra grip. Test your tuck by moving in various positions before leaving home. For stubborn tucks, use fashion tape or shirt clips to keep everything in place throughout the day.
Which bottoms work best with tucked oversized shirts?
High-waisted jeans are ideal for most tucking techniques, especially skinny and straight-leg styles for front tucks. Wide-leg jeans pair well with French tucks. A-line midi skirts work great with full front tucks, while fitted pencil skirts complement French tucks perfectly.
What accessories can enhance my oversized shirt tucking style?
Wide belts create dramatic waist definition, while skinny belts offer subtle emphasis. Statement belts add personality to your look. Consider using shirt clips or tucking aids for security, and layer with fitted blazers or cropped cardigans to add structure and dimension.
How do I prevent bunching and pulling when tucking oversized shirts?
Smooth the fabric completely before tucking and ensure even distribution around your waistline. Choose fitted undergarments that don’t add bulk. Monitor fabric tension throughout the day and make small adjustments as needed to maintain a clean, polished silhouette.
Can I wear tucked oversized shirts to professional settings?
Yes, complete front tucks paired with tailored trousers and blazers create a structured, professional appearance. French tucks offer a sophisticated alternative that’s still office-appropriate. Stick to neutral colors and structured fabrics for the most polished business look.
What’s the twist and tuck method for oversized shirts?
The twist and tuck method involves gathering fabric at your waist, twisting it to create a knotted effect, then tucking the twisted portion. This technique adds texture and visual interest while ensuring the knot sits flat against your body for a polished appearance.
How do I choose the right tucking technique for my body type?
Apple shapes benefit from French tucks that don’t emphasize the midsection. Pear shapes should try full front tucks to balance proportions. Rectangle shapes can use side tucks for curves, while hourglass figures can showcase their waist with complete front tucks and belts.