Transform your plain t-shirts into stunning wearable art with creative painting techniques that’ll make you stand out from the crowd. Whether you’re looking to refresh your wardrobe on a budget or express your unique personality through fashion, t-shirt painting offers endless possibilities for customization and self-expression.
We’ve discovered that painted t-shirts aren’t just a fun weekend project – they’re a powerful way to showcase your creativity while building a one-of-a-kind wardrobe. From simple abstract designs to intricate patterns and meaningful quotes, the right painting technique can turn any basic tee into a conversation starter.
The best part? You don’t need expensive materials or professional art skills to create amazing results. With just a few basic supplies and our proven techniques, you’ll be designing custom shirts that rival expensive boutique pieces. Let’s explore the most effective t-shirt painting methods that guarantee impressive results every time.
Get Started With Basic Geometric T Shirt Painting Ideas
Geometric shapes offer the perfect starting point for your t shirt painting journey. We’ll guide you through fundamental techniques that create stunning visual impact with minimal complexity.

18 VIBRANT COLORS WITH STENCILS : Shuttle Art fabric paint set contains 18 colors soft fabric paint in bottles (60 ml/2 oz), 3 brushes, 1 palette and 18 patterns sticker stencils, perfect for various textile paintings and art crafts

Large 33.8oz VOLUME with Pump– Designed for big projects. No more constant refills. This large 1000ml bottle is perfect for bulk users—classrooms, workshops, group projects, or fabric artists who paint often. The built-in pump saves time and prevents spills. Dispense exactly what you need, paint without mess

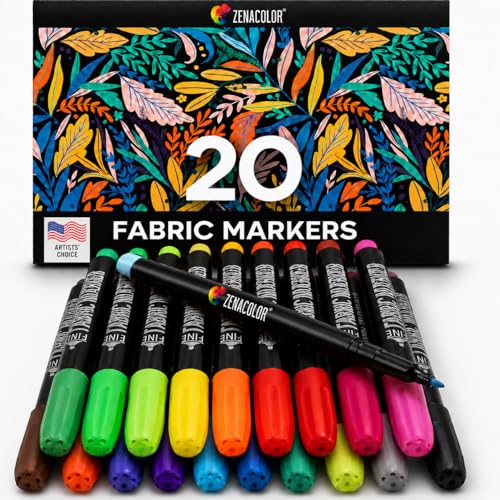
Dual-Tip: These fabric markers offer both a 1mm fine tip for precise details and a flexible brush tip for creating broader strokes, shading, and filling in larger areas. These fabric markers permanent for clothes are perfect for all types of fabric artwork, from fine lines to expressive strokes.
Choose Simple Shapes and Patterns
Circles provide the easiest entry point into geometric t shirt painting because they require only basic brush movements. Start with dots in varying sizes across your shirt’s front panel to create a polka dot effect. Triangles work exceptionally well for modern designs and can be painted using three straight brush strokes. Position triangles in clusters or create arrow patterns pointing upward for ever-changing visual appeal.
Squares and rectangles deliver clean geometric looks that complement most clothing styles. Paint small squares in grid patterns or create larger rectangular blocks for color blocking effects. Diamond shapes add sophisticated angles to your design by combining four triangular strokes. These shapes work particularly well when painted in metallic colors for evening wear transformations.
Master Essential Brush Techniques
Flat brush strokes create clean geometric lines essential for painting squares and rectangles on fabric surfaces. Hold your brush at a 45 degree angle and apply steady pressure while moving across the shirt material. Stippling techniques produce textured circular shapes by gently dabbing the brush tip against the fabric. This method works perfectly for creating constellation patterns or abstract geometric clusters.
Edge painting ensures sharp geometric boundaries by loading paint only on the brush’s edge. Practice this technique on scrap fabric before applying it to your finished shirt design. Blending motions smooth color transitions between adjacent geometric shapes and prevent harsh paint lines. Rotate your brush slightly while maintaining contact with the fabric surface.
Select Beginner-Friendly Paint Colors
Black and white combinations create striking geometric contrasts that work on any shirt color background. These neutral tones allow your shapes to stand out prominently without overwhelming the overall design aesthetic. Primary colors like red blue and yellow offer vibrant options that maintain visual clarity in geometric patterns. Single color schemes using different shades of the same hue provide sophisticated monochromatic geometric designs.
Metallic paint options including gold silver and copper add luxury appeal to basic geometric shapes. These specialized paints require slightly thicker application but create stunning focal points on dark colored shirts. Pastel color palettes work excellently for subtle geometric designs that complement casual daywear. Light pink mint green and lavender create soft geometric patterns perfect for spring and summer clothing.
Create Nature-Inspired T Shirt Painting Ideas

Nature offers endless inspiration for creating stunning painted t-shirts that capture the beauty of the outdoors. We can transform organic shapes and natural color palettes into wearable art that connects us to the environment around us.

Versatile Stencils: This set includes 4 pieces of 12 x 12 inch reusable stencils with geometric patterns, perfect for decorating walls, floors, tiles, furniture, and more.

Package includes: 8 pieces of different geometric stencils in large size (12 x 12 inches) creative template for craft, painting and home decor; Larger tiles are suitable for the stenciled floors, and also will look nice on a wall too

36 Unique Geometric Stencil Designs: this set includes 36 different geometric stencil patterns that help create a variety of decorative designs; The diverse patterns allow you to easily add creative details to DIY art projects
Paint Botanical Elements and Leaves
Fern patterns create delicate, repeating designs that work beautifully across t-shirt fronts or as accent pieces on sleeves. We start by painting the main stem with thin brush strokes, then add individual fronds using gentle curved motions. Small detail brushes help us capture the intricate leaf segments that make fern designs so recognizable.
Monstera leaves offer bold, tropical statements with their distinctive split patterns and large scale. We begin with the basic leaf outline, then carefully paint the natural holes and slits that give monstera plants their unique appearance. Dark green base colors combined with lighter green highlights create depth and dimension.
Eucalyptus branches provide graceful, flowing designs perfect for wraparound sleeve applications or diagonal placements. We paint the woody stems first, then add the oval shaped leaves in alternating patterns. Muted blue green tones mixed with sage colors capture the natural eucalyptus palette effectively.
Flower silhouettes work exceptionally well for minimalist botanical approaches that emphasize clean shapes over detailed textures. We focus on recognizable flower forms like daisies, sunflowers, or roses using solid color fills. Black silhouettes against white shirts create striking contrast, while white flowers on dark fabrics offer elegant reverse effects.
Design Mountain and Industry Scenes
Mountain ranges translate beautifully into layered geometric shapes that create depth through overlapping triangular forms. We paint the background mountains in lighter colors, then gradually darken each foreground layer. Blues, purples, and grays work together to simulate atmospheric perspective naturally found in distant peaks.
Sunrise scenes behind mountain silhouettes add warmth and drama through gradient color techniques. We start with yellow paint at the horizon line, then blend upward through orange and pink tones. The mountain shapes remain dark against the colorful sky, creating powerful silhouette effects.
Forest treelines provide textural variety through different painting techniques that represent various tree types. We use vertical brush strokes for pine trees, rounded shapes for deciduous varieties, and irregular forms for natural forest edges. Dark green and brown combinations establish the foundational forest colors.
Desert landscapes offer opportunities to explore warm earth tones and unique plant forms like cacti and succulents. We paint sandy backgrounds in beige and tan shades, then add distinctive desert plants using small detail work. Sunset colors in the background enhance the southwestern aesthetic appeal.
Add Ocean Wave and Beach Themes
Wave patterns capture ocean movement through curved brush strokes that simulate water flow and foam effects. We start with blue base colors, then add white highlights to represent wave crests and bubbling foam. Layering different blue tones creates the illusion of water depth and movement.
Seashell collections work perfectly for scattered design approaches across t-shirt surfaces or concentrated in corner placements. We paint various shell types including conch, scallop, and spiral varieties using natural cream, pink, and brown colors. Small detail brushes help us add the ridges and textures that make shells recognizable.
Beach sunset silhouettes combine multiple natural elements into cohesive scenes that tell complete stories. We paint the sunset background first, then add palm tree silhouettes, distant islands, or seabird shapes. The contrast between dark silhouettes and bright sunset colors creates dramatic visual impact.
Coral reef designs offer opportunities to explore vibrant underwater color palettes and organic shapes. We use bright oranges, pinks, and purples to represent different coral types, then add small fish or sea creature details. Flowing, irregular shapes mimic the natural growth patterns of ocean coral formations.
Try Abstract T Shirt Painting Ideas for Modern Looks

Abstract designs bring contemporary flair to your t-shirt painting projects. These techniques create eye-catching patterns that stand out from traditional artistic approaches.

The “Goldilocks” Paint Brush Set - Professional-quality performance without luxury pricing. This paint brush set outperforms cheap sets while avoiding the cost and complexity of premium tools. A versatile painting set suitable for beginners and professionals.
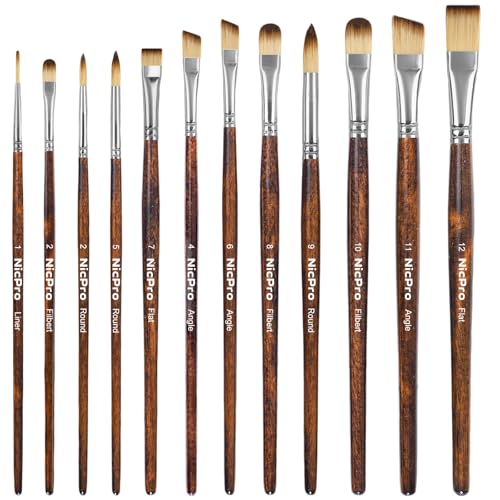
12 Sizes Paint Brush Set - This versatile paint brush set includes 12 brushes in flat (7,12), round (2,5,9), filbert (2,8,10), angle (4,6,11), and liner (1). This set handles all your painting styles—from fine detailing to bold coverage—across acrylic, oil, watercolor, gouache, tempera, and more
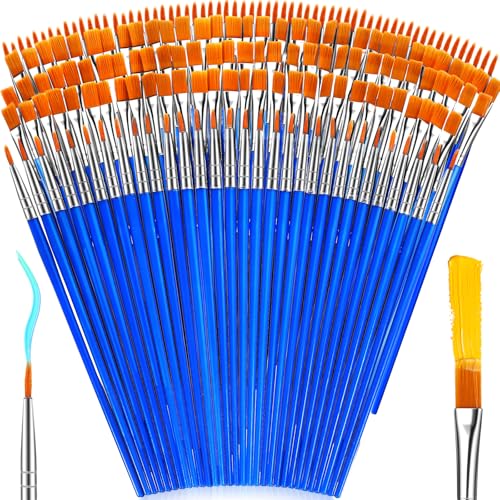
【162-Piece Bulk Set | Dual Brush System】Maximize versatility with 81 flat brushes (0.59 inch edge for bold strokes) and 81 round brushes (0.39 inch tips for details) – 3X more tools than standard kits! Pre-sorted in labeled compartments for instant access during painting sessions. Ideal for art classrooms, mural projects, and multi-artist households.
Experiment With Color Blending Techniques
Wet-on-wet blending creates smooth color transitions that flow naturally across your t-shirt fabric. Apply one color to the fabric while it’s still damp, then add a second color nearby and watch them merge seamlessly. Dry brush blending works by layering semi-dry paint colors over each other, creating textured gradients with visible brush strokes.
Sponge blending produces soft, cloudy effects perfect for abstract backgrounds. Dab a damp makeup sponge into two or three complementary colors like purple and blue, then press gently onto the fabric in overlapping motions. Spray bottle techniques involve misting the fabric lightly before applying paint, causing colors to spread and bloom organically.
Color wheel combinations guide your blending choices for maximum visual impact. Try analogous colors (neighbors on the color wheel) like orange, red, and pink for harmonious blends. Experiment with complementary pairs such as blue and orange or purple and yellow for bold contrast effects.
Create Splatter and Drip Effects
Controlled splattering using an old toothbrush produces fine, even droplets across your design area. Load the brush with diluted fabric paint, then run your thumb across the bristles while pointing toward the shirt. Paint brush flicking creates larger, more dramatic splashes by loading a flat brush and snapping your wrist quickly.
Gravity drip techniques involve applying thick paint at the top of your design and letting it naturally flow downward. Tilt the shirt at different angles to control the drip direction and speed. Squeeze bottle methods give you precise control over paint placement and flow patterns.
Layered splatter effects add depth to your abstract design. Start with light colors as your base layer, then add progressively darker splatters on top. Metallic gold or silver accents over colorful splatters create premium looking finishes that catch light beautifully.
Design Minimalist Line Art Patterns
Single brush stroke patterns focus on confident, unbroken lines that create movement across the shirt. Use a liner brush loaded with paint to draw continuous curves, spirals, or geometric shapes in one fluid motion. Intersecting line designs involve crossing straight or curved lines at various angles to form abstract compositions.
Negative space utilization makes your line art more impactful by leaving intentional blank areas. Draw your lines to frame or highlight the natural shape of the t-shirt, creating balance between painted and unpainted sections. Varying line weights adds visual interest by using thick and thin strokes within the same design.
Repetitive pattern elements like dots, dashes, or short lines can be arranged in organic or structured ways. Create rhythmic patterns that flow with the shirt’s natural drape and movement. Monochromatic line work using different shades of the same color family creates sophisticated, gallery worthy abstract art on your t-shirt.
Explore Character-Based T Shirt Painting Ideas

Character designs bring personality and storytelling to your t-shirt painting projects. These recognizable figures create instant connections with viewers and showcase your artistic interpretation skills.

14 VIBRANT COLORS PLUS EXTRA WHITE: The Shuttle Art fabric paint set includes 14 vibrant soft fabric paints (12 ml/0.4 oz) in tubes, plus an additional white for extra versatility, along with 3 brushes. Perfect for various textile painting projects and art crafts

30 VIBRANT COLORS WITH STENCILS : Shuttle Art fabric paint set contains 30 colors soft fabric paint in bottles (60 ml/2 oz), 6 brushes, 1 palette and 18 patterns sticker stencils, perfect for various textile paintings and art crafts

Professional Fabric Medium – Flexible & Durable Results. This high-performance fabric medium is specially formulated to mix with acrylic paint, instantly turning it into flexible fabric paint. It improves paint flow, adhesion, and flexibility, helping prevent cracking, peeling, or flaking on textiles while preserving the original vibrancy of acrylic colors
Paint Cartoon and Anime Characters
Cartoon characters offer vibrant colors and bold outlines that translate beautifully onto fabric surfaces. Start with simple characters like Mickey Mouse or Hello Kitty to practice basic shapes and proportions. Anime characters require attention to facial features, particularly the expressive eyes that define this art style.
Essential techniques for cartoon painting include:
- Outlining with black fabric paint for definition
- Filling solid color areas with flat brush strokes
- Adding highlights with white paint for dimension
- Creating clean edges using painter’s tape
Popular character choices feature:
- Classic Disney characters like Minnie Mouse and Donald Duck
- Anime favorites including Pikachu and Sailor Moon
- Modern cartoon icons such as Adventure Time and Steven Universe characters
Use reference images to maintain character accuracy while adding your personal artistic flair. Practice facial expressions on paper before transferring designs to your t-shirt canvas.
Create Animal Portrait Designs
Animal portraits combine realistic rendering with stylized interpretation for stunning wearable art. Focus on capturing the essence of your chosen animal through distinctive features like a lion’s mane or an owl’s piercing eyes. Domestic pets make excellent subjects because of their emotional connection to viewers.
Key painting approaches include:
- Starting with basic shapes to establish proportions
- Building fur texture through stippling and dry brush techniques
- Emphasizing eyes as focal points with detailed shading
- Using earth tones and natural color palettes
Trending animal portrait ideas feature:
- Majestic wildlife like wolves, eagles, and tigers
- Beloved pets including cats, dogs, and rabbits
- Exotic creatures such as pandas, koalas, and flamingos
Layer your paints from light to dark values to create depth and dimension. Consider the animal’s natural habitat colors when selecting your background elements or accent colors.
Design Superhero and Pop Culture Icons
Superhero designs tap into universal themes of heroism and adventure while showcasing bold graphic elements. These characters feature distinctive symbols, ever-changing poses, and iconic color schemes that make powerful visual statements. Pop culture icons from movies, TV shows, and music create instant recognition and personal connections.
Effective design strategies include:
- Emphasizing iconic symbols like Batman’s logo or Superman’s “S”
- Using high contrast colors for maximum visual impact
- Creating ever-changing poses that suggest movement and action
- Incorporating signature accessories or costume elements
Popular icon categories cover:
- Classic superheroes including Wonder Woman, Spider-Man, and Captain America
- Movie characters like Star Wars figures and Marvel heroes
- Music legends such as David Bowie and Prince silhouettes
Consider simplifying complex character designs into recognizable silhouettes or focusing on their most distinctive features. This approach ensures your painted design remains clear and impactful on the t-shirt canvas.
Master Seasonal T Shirt Painting Ideas

Seasonal t-shirt painting projects let us capture the essence of each time of year through creative designs. We can transform plain shirts into festive masterpieces that celebrate holidays, summer adventures, and cozy autumn and winter moments.

Suitable for brushing - airbrushing or screen-printing

20 VIBRANT COLORS - This set includes 20 different colors of Tulip Puff Fabric Paint, giving you a wide range of options to create unique designs on your fabric projects.

FABRIC PENS, INTENSE COLORS - Our set contains 40 different textile permanent markers with fabric paint offering you an amazing burst of shades, allowing you to unleash your creativity and add your personal touch
Design Holiday-Themed Shirts
Christmas t-shirt designs offer endless creative possibilities with traditional symbols and modern interpretations. We recommend painting classic evergreen trees using deep forest green fabric paint, adding white highlights for snow-covered branches. Candy cane stripes work beautifully as border elements, requiring only red and white paint applied with steady brush strokes.
Halloween painting projects excel when we embrace bold, spooky imagery. Pumpkin silhouettes painted in vibrant orange create instant seasonal appeal, while black bats scattered across the shirt add dramatic flair. Spider webs painted with silver metallic paint catch light beautifully, creating an eye-catching effect.
Valentine’s Day shirts shine with romantic motifs painted in soft pinks and passionate reds. Heart patterns work perfectly for beginners, ranging from simple solid hearts to intricate mandala-style designs. Cupid arrows painted diagonally across the chest create ever-changing visual movement.
Easter designs celebrate renewal with pastel color palettes and spring imagery. Painted Easter eggs in soft yellows, lavenders, and mint greens create cheerful displays. Bunny silhouettes work wonderfully as central focal points, especially when painted in white against colored backgrounds.
Create Summer and Beach Vibes
Ocean wave patterns capture summer’s essence through fluid brushwork and coastal colors. We achieve realistic wave effects by layering different shades of blue, starting with navy as the base and adding lighter blues and white foam. Curved brush strokes mimic natural wave movement perfectly.
Tropical fruit designs bring vibrant energy to summer shirts through bold, juicy colors. Pineapples painted in golden yellows with green leafy tops create instant tropical flair. Watermelon slices work beautifully as repeating patterns, requiring only pink, green, and black for seeds.
Sun and palm tree motifs evoke vacation vibes through classic beach imagery. Sunset gradients painted with warm oranges, pinks, and purples create stunning backgrounds. Palm tree silhouettes painted in black over these colorful sunsets produce professional-looking results.
Beach quote lettering adds personality to summer shirts through inspiring messages. Phrases like “Beach Please” or “Salty Hair Don’t Care” work perfectly when painted in flowing script fonts. Nautical rope borders painted around text create cohesive coastal themes.
Paint Fall and Winter Motifs
Autumn leaf designs celebrate fall’s beauty through warm, earthy color combinations. Maple leaves painted in deep reds, burnt oranges, and golden yellows create stunning seasonal displays. Layering different leaf shapes adds depth and visual interest to compositions.
Snowflake patterns transform winter shirts into crystalline masterpieces through delicate white designs. Each snowflake painted with thin brushes creates unique geometric patterns. Silver metallic accents on white snowflakes add sparkle and dimension.
Winter wildlife scenes bring cozy woodland charm to cold-weather shirts. Painted cardinals in bright red stand out beautifully against snowy backgrounds. Deer silhouettes work perfectly when painted in brown against winter industry backdrops.
Cozy sweater patterns recreate winter fashion through painted textile designs. Cable knit patterns painted in cream or gray create the illusion of actual sweater textures. Fair Isle designs with repeating geometric shapes in traditional Nordic colors bring authentic winter style to t-shirts.
Develop Typography T Shirt Painting Ideas

Typography painting transforms words into powerful visual statements that speak directly to viewers. We’ll explore three distinctive approaches to lettering that turn plain shirts into meaningful conversation pieces.

Essential Fabric Medium - Turns acrylic paint to fabric paint. This high-quality fabric medium is specially designed to improve flow, flexibility, and adhesion when mixed with acrylic paint. It prevents cracking and flaking on textiles, allowing your art paint to move naturally with the fabric while preserving the original vibrancy of your acrylic colors

VIBRANT COLORS: Perfect for textile projects, arts & crafts or for rejuvenating your clothes.

PROFESSIONAL FABRIC MEDIUM : Shuttle Art 4 oz (118 ml) fabric medium is specially formulated to turn any acrylic paint into high-quality fabric paint, while also boosting the performance of existing fabric paints. It improves fluidity for smoother application and enhances color retention, ensuring your artwork stays vibrant and flexible on textiles without cracking or peeling.
Hand-Letter Inspirational Quotes
Choose meaningful quotes that resonate with your personal values or current life goals. We recommend selecting phrases between 3-7 words for optimal visual impact and readability across the shirt’s surface.
Practice your lettering style on paper before painting directly onto fabric to develop consistency in letter spacing and height. Script fonts work beautifully for motivational phrases like “Dream Big” or “Stay Strong” while block letters suit bold statements such as “Be Fearless.”
Plan your layout by sketching the quote’s positioning with chalk or washable markers first. Center short quotes across the chest area or create diagonal arrangements for ever-changing visual flow that draws the eye naturally.
Layer different brush sizes to add depth and emphasis to exact words within your inspirational message. Use a 1-inch flat brush for main words and a fine detail brush for accent letters or decorative flourishes.
Select colors that match the quote’s emotional tone, using warm colors like gold and orange for uplifting messages or cool blues and purples for calming affirmations.
Create Custom Name Designs
Transform names into artistic focal points using varied lettering styles that reflect personality traits or interests. We suggest experimenting with bubble letters, cursive script, or geometric block styles to match the wearer’s character.
Incorporate decorative elements around the name to enhance visual appeal without overwhelming the lettering. Stars, hearts, flowers, or abstract shapes work as effective accent pieces that frame the text beautifully.
Scale the name appropriately based on letter count and shirt size, ensuring readability from a conversational distance. Short names like “Amy” or “Jack” can span the full chest width while longer names may require smaller sizing or creative stacking.
Add shadow effects by painting a darker version of your base color slightly offset behind each letter. This technique creates depth and makes the name appear to pop off the shirt’s surface dramatically.
Experiment with color gradients within individual letters to create sophisticated visual effects that catch light differently throughout the day.
Paint Artistic Word Art Layouts
Design overlapping text compositions that combine multiple related words or phrases into cohesive artistic statements. Layer words like “Create,” “Inspire,” and “Dream” at different angles to build ever-changing visual complexity.
Use varying font weights within the same design to establish visual hierarchy and guide the viewer’s reading pattern across the shirt. Bold primary words paired with lighter secondary text create professional looking results.
Create geometric word arrangements by organizing text into shapes like circles, triangles, or diamond patterns that transform typography into abstract art pieces.
Incorporate negative space strategically to let certain words breathe while others cluster together for emphasis. This balance prevents overcrowded designs that become difficult to read from a distance.
Apply mixed media techniques by combining painted letters with stenciled elements or fabric markers to achieve varied textures and finishes within the same word art composition.
Use Stencils for Precise T Shirt Painting Ideas

Stencils transform complex t shirt painting ideas into achievable masterpieces that look professionally crafted. These versatile tools eliminate guesswork and ensure consistent results every time we paint.

【Inspirational Word Stencils Set】This word stencils set includes 16 pieces of different inspirational word templates. And each motivational template measures 20 x 20 cm/ 7.87 x 7.87 inches. Multiple style can meet a variety of your DIY craft needs.

Package Includes:16pcs different texture stencils for painting.Perfect for adding an artistic background to your projects.Every reusable geometric stencil for painting is 6x6inch.
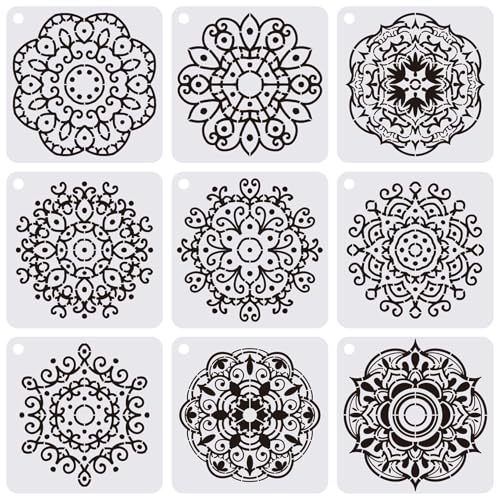
Professional Home Decor Tool: This set of 9 distinct geometric mandala templates is designed for high-end DIY home improvement. Perfect for adding artistic accents to wooden furniture, floors, wall borders, cabinets, and tiles
Create Professional-Looking Logos
Brand stencils deliver crisp, recognizable logos that rival commercial printing quality. Cut custom stencils from cardstock or purchase pre-made logo templates for popular brands and symbols. Position the stencil firmly against your shirt fabric and secure with painter’s tape around all edges.
Multi-layer logos require separate stencils for each color element. Paint the base layer first and allow it to dry completely before positioning the second stencil. We recommend using registration marks or small dots to align complex logo components perfectly.
Corporate branding becomes accessible when we use professional vinyl stencils that create sharp edges and prevent paint bleeding. Apply fabric paint with a foam roller or stippling brush for even coverage without brush marks.
Design Consistent Pattern Repeats
Repeating motifs across your entire shirt surface require careful stencil placement and spacing measurements. Mark guide points with removable fabric chalk before beginning your pattern sequence. Space identical elements using a ruler or measuring tape to maintain uniform distances.
Geometric patterns benefit from grid-based stencil systems that ensure perfect alignment. Create a temporary grid on your shirt using washable markers as placement guides. We suggest starting from the center point and working outward to maintain symmetry.
Border designs around sleeves, necklines, or hem areas look polished when stenciled with consistent spacing. Measure and mark equal intervals before applying your first stencil impression. Use the same pressure and paint amount for each application to achieve uniform color density.
Make Sharp Geometric Shapes
Clean angles emerge when we secure stencils completely flat against the fabric surface. Press down all edges firmly and use low-tack painter’s tape to eliminate gaps where paint might seep underneath. Remove the stencil immediately after painting while the paint remains wet for the sharpest edges.
Complex polygons like hexagons, octagons, and star shapes become simple with precision-cut stencils. Layer different geometric stencils to create intricate mandala-style designs or tessellated patterns. We achieve the best results using fabric paint with a thick consistency that won’t run under stencil edges.
Three-dimensional effects appear when we use multiple stencils to create shadowing and depth illusions. Paint the main shape first in a light color, then position a slightly offset stencil to add darker shadow elements. This technique works exceptionally well for creating floating geometric elements on your shirt design.
Apply Advanced T Shirt Painting Ideas and Techniques

We’re ready to elevate our t-shirt painting projects with sophisticated techniques that create professional-quality results. Advanced methods combine multiple painting principles to produce complex, visually stunning designs that showcase true artistic mastery.

Various sizes - 12 different sizes provide different functions, cover all your needs, round: (1, 4, 8 ) flat:(6, 11) filbert: (2, 7, 9) angel: (3, 5, 10) rigger: 0

The Angelus Micro Detail Paint Brush Set is a must-have for any artist or hobbyist looking for high-quality brushes built for precision painting and detailed craftsmanship. They perform exceptionally well when paired with Angelus Acrylic Paints

High Quality Brushes: The large 1-inch flat brush head is handmade by experienced craftsmen, made with high quality nylon bristles during the production process, each brush is carefully inspected, with excellent water retention, the pigment can flow and persistently adsorbed on the soft and flexible bristles, excellent quality, the brush head is tightly and firmly bonded with the brush for long-lasting durability
Master Layering and Texture Methods
Build dimensional depth through strategic paint layering that creates rich, multi-level designs. Start with your base color and allow it to dry completely before adding subsequent layers, ensuring each application bonds properly with the fabric. Apply thin coats rather than thick ones to prevent cracking and maintain fabric flexibility.
Create raised textures using thick fabric paint applications combined with various tools for unique surface effects. Drag a fork through wet paint to simulate wood grain patterns, or press bubble wrap into the paint for honeycomb textures. Use palette knives to create peaks and valleys that catch light differently, adding visual interest to your design.
Incorporate mixed media elements by combining fabric paint with other materials like fabric markers, glitter, or small beads. Press rice or sand into wet paint for natural textures, or use salt on damp paint to create crystalline effects. These combinations produce tactile surfaces that engage both sight and touch.
Experiment with negative space layering by using removable stencils between paint applications. Apply your first color, place stencils over exact areas, then add your second layer to create intricate patterns where colors intersect. Remove stencils while paint is slightly damp to achieve clean edges without bleeding.
Create Gradient and Ombre Effects
Master color transitions using wet blending techniques that create smooth gradients across your t-shirt surface. Work quickly while paint remains workable, using a damp brush to blend colors where they meet. Start with lighter colors and gradually introduce darker shades for natural-looking progressions.
Achieve vertical ombre effects by diluting fabric paint with water or fabric medium to create varying color intensities. Apply your darkest shade at the bottom of your design area, then progressively add water to lighten the paint as you work upward. Blend each section into the next while both areas remain wet.
Use spray bottle techniques for soft, atmospheric gradients that mimic watercolor effects on fabric. Mist your t-shirt lightly with water, then apply diluted fabric paint that spreads and blends naturally. Control the intensity by adjusting paint concentration and water application timing.
Create radial gradients that emanate from a central point using circular blending motions. Start with your focal color in the center and work outward with progressively lighter or darker shades. Use a sea sponge for natural-looking transitions that avoid harsh brush marks.
Design Complex Multi-Color Compositions
Plan your color palette using color theory principles to ensure harmonious multi-color designs that complement rather than compete. Select a primary color as your anchor, then choose analogous colors for harmony or complementary colors for contrast. Limit your palette to 3-5 colors to maintain visual coherence.
Execute color blocking techniques that divide your design into distinct sections with bold color boundaries. Use painter’s tape to create clean lines between color sections, ensuring each area dries completely before removing tape. Apply colors in order from lightest to darkest to prevent muddy mixing.
Incorporate pattern overlays by painting your base composition first, then adding contrasting patterns on top using stencils or freehand techniques. Allow each layer to dry thoroughly before adding the next to prevent color bleeding. Use transparent fabric medium to create translucent overlays that reveal underlying colors.
Balance visual weight across your composition by distributing colors and patterns strategically throughout the design area. Place darker or more intense colors sparingly to create focal points without overwhelming the overall design. Use lighter colors to provide visual rest areas that let the eye process complex compositions.
Conclusion
We’ve covered everything from basic geometric patterns to advanced layering techniques that’ll help you create stunning painted t-shirts. Whether you’re drawn to nature-inspired designs or bold character art there’s a technique that matches your skill level and creative vision.
The beauty of t-shirt painting lies in its accessibility and endless possibilities. With just a few supplies and the techniques we’ve shared you can transform any plain shirt into a unique piece of wearable art that reflects your personality.
Don’t be afraid to experiment and combine different methods from this guide. Mix stencils with freehand painting or blend seasonal themes with typography to create truly one-of-a-kind designs. Your creative journey starts with that first brushstroke so grab your supplies and let your imagination run wild.

Flower book with flowers to colour with textile pens DIY. Colouring in playfully and creatively: with this DIY design, colourable designs and the joy of painting yourself come together. A perfect match for coloring page lovers.

VERSATILE: Acrylic orange fabric paint works as orange cloth paint for cotton, denim and canvas, ideal as orange shirt paint, fabric paint orange for shoes, tote bags, furniture upholstery and creative clothing projects.

24 VIBRANT COLORS WITH STENCILS : Shuttle Art fabric paint set contains 24 colors soft fabric paint in bottles (60 ml/2 oz), 6 brushes, 1 palette and 18 patterns sticker stencils, perfect for various textile paintings and art crafts
Frequently Asked Questions

【Premium Acrylic Paints for Fabric】Colorful fabric paint set offers 12 rich colors of artist quality acrylic fabric medium. The creamy consistency and high pigments with designed rheology ensure easy blending and smooth application, covering large areas and fine details with great power. Quick-drying and vivid after curing, additional coats can be applied shortly for desired effects.
FABRIC PENS, INTENSE COLORS - Our fine precise tip pens offer you an amazing burst of shades, allowing you to unleash your creativity and add your personal touch.

VIVID COLORS. Nicpro 8 Colors Permanent Fabric Paint is in vibrant and intense color, allowing artists and creators to add bold and eye-catching designs to their fabric projects. These paints often come in a wide range of shades, from rich primaries to intricate blends, providing ample options for artistic expression. With a color wheel to help organize colors, making selection and combination easier
What supplies do I need to start t-shirt painting?
You don’t need expensive materials to begin t-shirt painting. Basic fabric paints, brushes of various sizes, plain cotton t-shirts, and cardboard to place inside the shirt are essential. Optional supplies include stencils, sponges for blending, and mixing palettes. Start with primary colors (red, blue, yellow), black, and white, as these can be mixed to create any color you need.
How do I prepare my t-shirt before painting?
Wash and dry your t-shirt without fabric softener to remove any residues that might prevent paint adhesion. Place cardboard inside the shirt to prevent paint from bleeding through to the back. Lay the shirt flat on your work surface and smooth out any wrinkles. This preparation ensures your paint will apply evenly and your design will look professional.
What are the easiest t-shirt painting designs for beginners?
Geometric patterns using simple shapes like circles, triangles, and squares are perfect for beginners. These designs require basic brush techniques and create visually appealing results. Other easy options include nature-inspired silhouettes like ferns or mountains, simple typography with inspirational quotes, and minimalist line art. These designs build confidence while teaching fundamental painting skills.
How long does fabric paint take to dry on t-shirts?
Fabric paint typically takes 2-4 hours to dry to the touch, but requires 24-48 hours to fully cure. Drying time depends on paint thickness, humidity, and temperature. Thick applications or layered designs may take longer. Avoid wearing or washing the shirt until completely dry. Heat-setting with an iron after 24 hours helps ensure the paint stays vibrant through multiple washes.
Can I wash t-shirts after painting them?
Yes, but wait at least 72 hours after painting and heat-set the design first. Turn the shirt inside out and wash in cold water on a gentle cycle. Use mild detergent and avoid bleach or fabric softener. Air dry or use low heat in the dryer. Proper curing and heat-setting ensure your painted design remains vibrant and doesn’t crack or peel through multiple washes.
What’s the best way to create smooth color gradients on t-shirts?
Use the wet-on-wet blending technique for smooth gradients. Apply your lighter color first, then add the darker shade while the paint is still wet. Use a clean, damp brush or sponge to blend the colors together with gentle circular motions. Work quickly before the paint begins to dry. Practice on scrap fabric first to perfect your technique before applying it to your t-shirt.
How do I fix mistakes while painting my t-shirt?
Act quickly while paint is still wet – use a damp cloth or cotton swab to gently remove unwanted paint. For dried mistakes, carefully scrape off excess paint with a craft knife, then paint over with the background color once dry. Small imperfections can often be incorporated into the design creatively. Always keep extra paint mixed for touch-ups and corrections.
What’s the difference between fabric paint and acrylic paint for t-shirts?
Fabric paint is specifically formulated to remain flexible after drying, preventing cracking when the shirt stretches. It also has better wash durability and softer hand feel. Regular acrylic paint becomes stiff and may crack or peel over time. While you can use acrylic paint with fabric medium, dedicated fabric paints provide superior results for wearable art projects and maintain comfort when wearing.